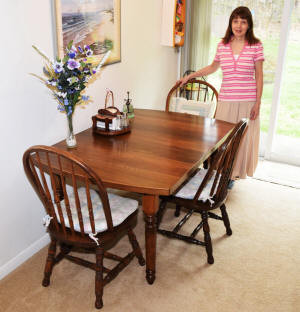
Melanie with her redesigned table (I will post a good pic of the table
finish soon)
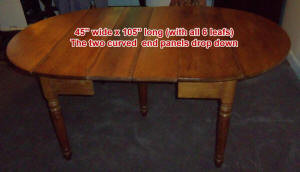
Original table

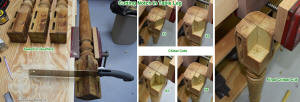
James Pleukharp marking
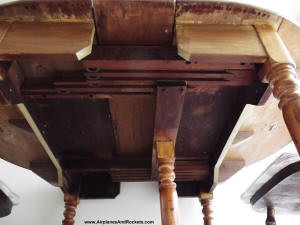
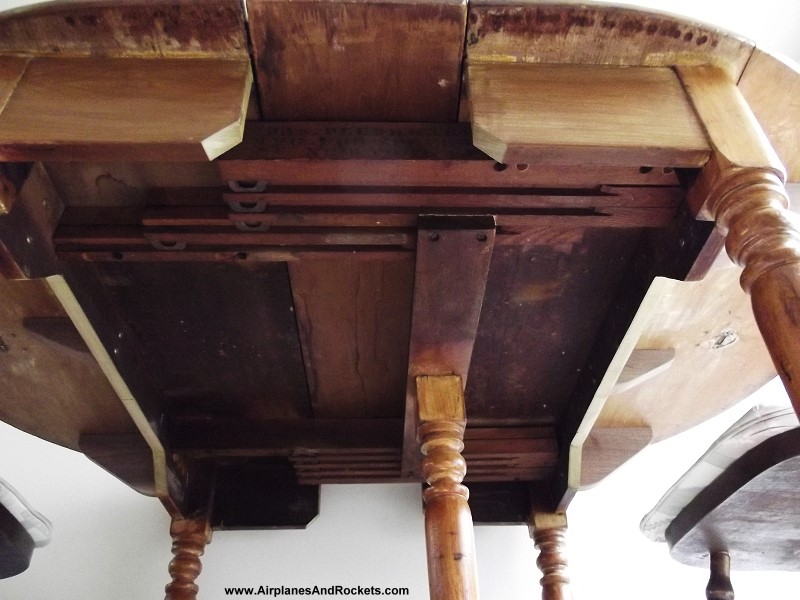
Underside of original table

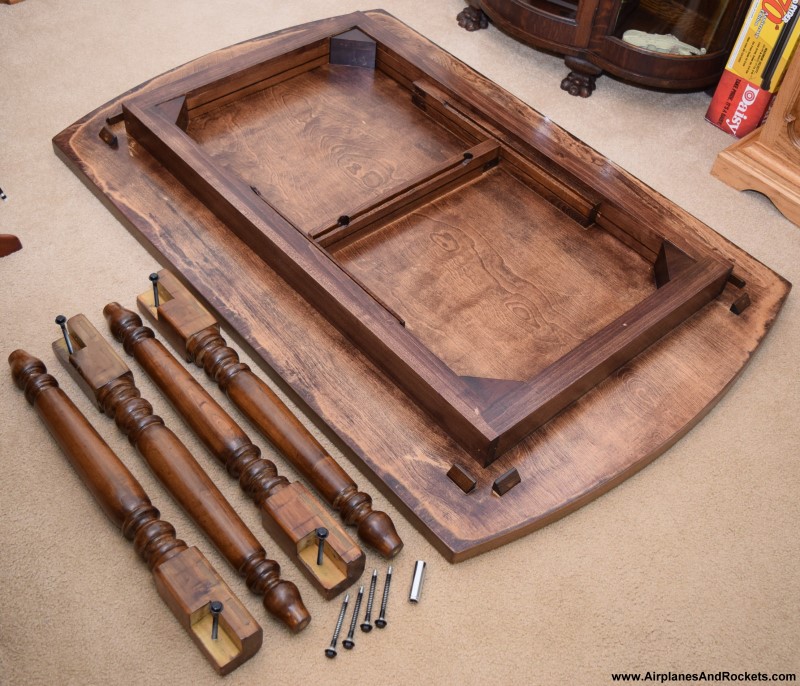
Underside of redesigned table
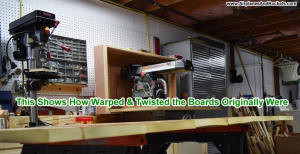
Warps in original table leaf pieces apparent
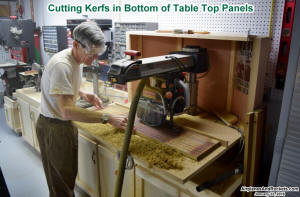
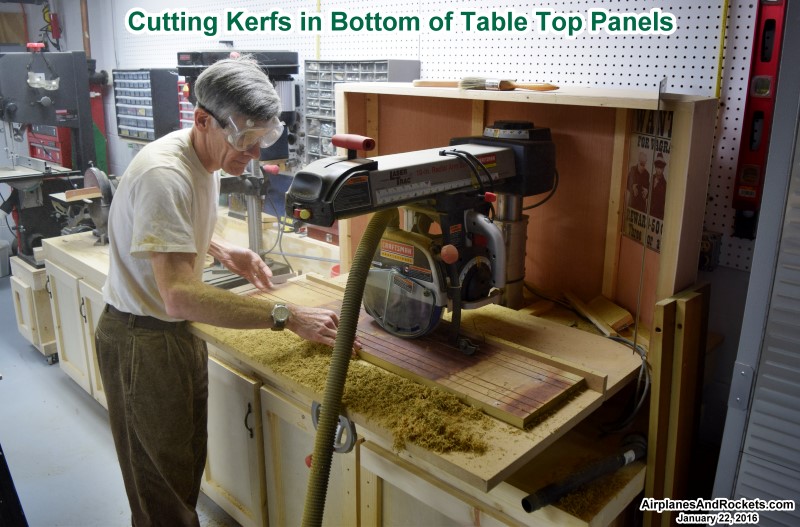
Cutting kerfs in leaf bottoms
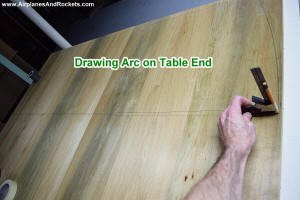
Marking arc for ends of tabletop
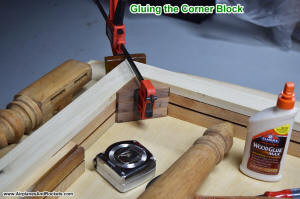
Clamping corner block into frame

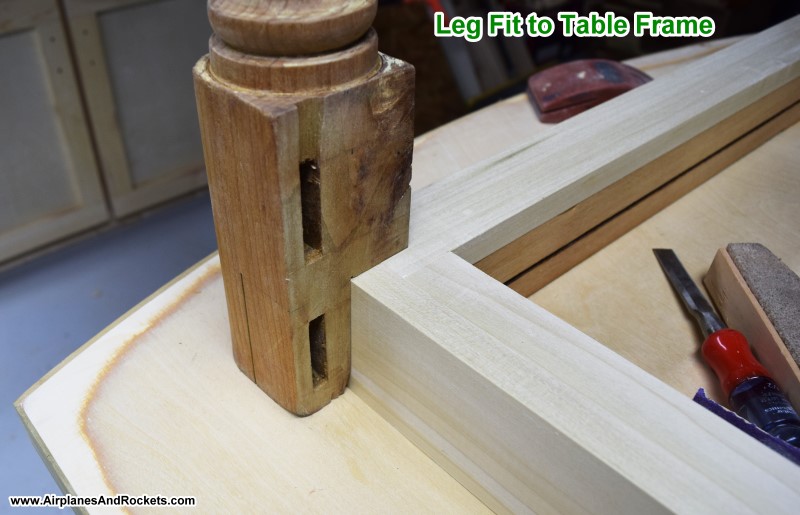
Checking leg fit to frame corner

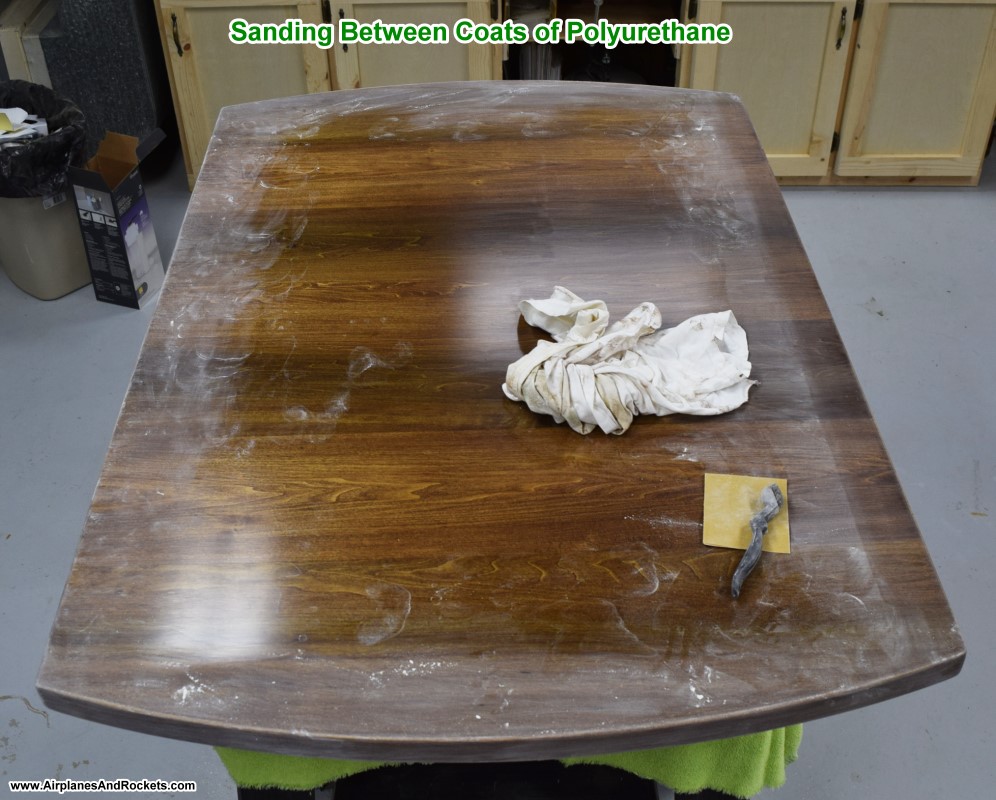
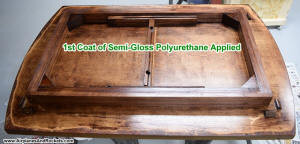
Minwax Special Walnut stain applied

Sanding between all five coats of Minwax semi-gloss fast-drying polyurethane

Leg attachment
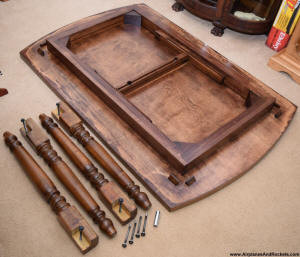
Everything ready for final assembly
When Melanie's mother needed to be moved into an extensive care facility, we inherited the family's antique dining room
table. According to marking burned into the frameworks, it was manufactured by the
James Pleukharp company,
located in Ohio. Similar models were made sometime in the late 19th and early 20th centuries. The rounded end panels drop
down and the center section expands to hold up to six leaf panels to a total of 105". With no leaves the table is nearly
round with a 45" diameter. A very greenish poplar comprises the solid 3/4" tabletop and turned legs, with oak used for the
sliding expansion mechanism. Surprisingly, a thick walnut plank ran across the frame to support the center leg.
Perhaps due to the average person being much shorter than we are today, the top of the table was only about 26" from
the floor, even with the tiny wheels inserted into the leg bottoms. The six original chairs went to other relatives, so
chairs made for modern tables were much too high. We sat the table legs on wooden blocks for a while, with plans to eventually
extend them properly. However, the more the table was used, the more apparent it became that there were some unavoidable
irritants that merely extending the legs would not correct. The first was that the very old wood had become very weak so
that the top pieces would flex under normal use. Also, the expander frame components were very worn and sloppy fitting,
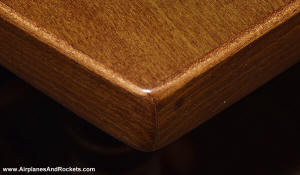
which caused the table to wobble. Finally, the vertical panels of the frame were located very close to the edge of the tabletop
so our knees were constantly banging into them. As can be seen in the photo of the original table configuration, the individual
leaf panels did not include vertical frame pieces underneath, so a crude looking opening was left in view.
We decided that the annoyances were more than we were willing to endure, and that the table would need to either be replaced
or re-worked. These Pleukharp tables have virtually no intrinsic value on the antique market, and we really did not want
to dispose of the family heirloom, so the decision was made to rebuild it to conform to our needs. Our very small house
(920 sq.ft.) does not have room for a large dining room table, so a size of about the now-standard 42 " x 60" was chosen,
and it would be fixed without any leaf panels. In planning the new table, I made use of as much of the original material
as possible.
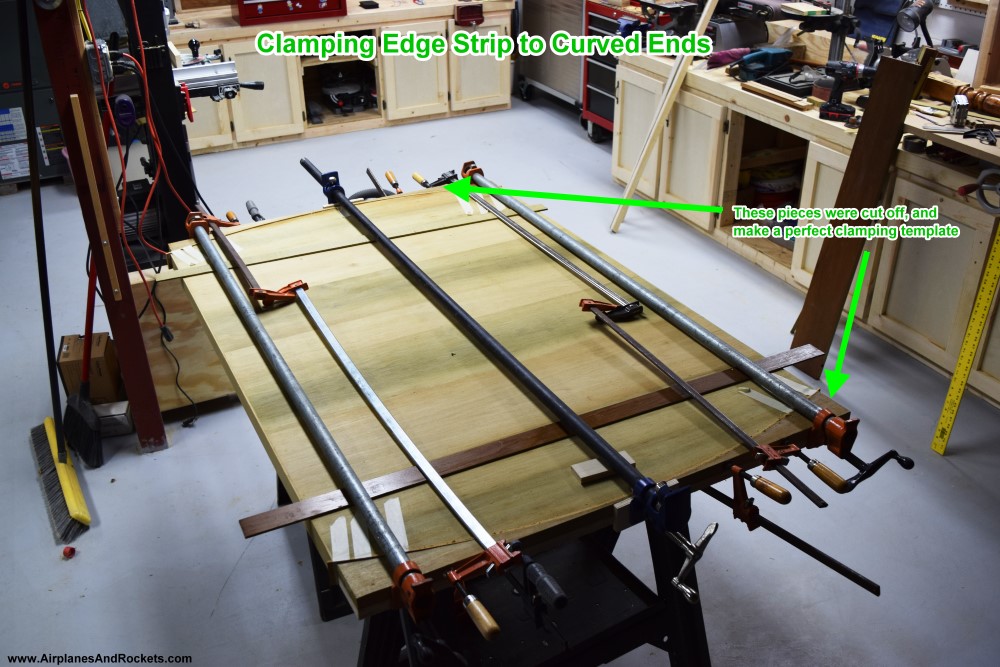
Because all the top poplar wood panels were very curved and twisted, I needed to glue them to a stiff plywood substrate
both to force them into as flat a shape as possible and to provide additional strength to the weakened-by-age poplar. Doing so required cutting saw kerfs along the lengths on the undersides
to permit the boards to be reshaped without splitting. Plenty of Elmer's carpenter glue was used along with heavy clamping,
but even so the top surface was very uneven both due to some remaining curvature and uneven thicknesses of the panels. A
lot of elbow grease was used in first planing down the high spots and then belt sanding until reasonable flat. The extreme
softness of the wood made the job a lot easier than it would have been with something like oak or maple. The 3/4", 7-layer
plywood used for the substrate was unbelievably heavy and accounts for almost half the weight of the completed table! 1/4"
thick strips of poplar were glued along the edges to hide the saw kerfs and to cover end grain. The photos below show the
entire process.
The frame was built from the original oak sliding expander mechanism. The pieces were glued and screwed directly to the
bottom of the table. I did not want the oak visible against the poplar tabletop and legs, so a facade was glued along the
outside and bottom edges of the frame. There was not enough original wood for that, so I bought some poplar strips at Lowes
that were an almost perfect match. The frame sits about 6" back from table edge so it does not interfere with people knees
and legs.
Four of the five legs were reworked to bolt securely onto the outside corners of the frame. Fortunately, because of the
thickness of the new tabletop and the way the frame was made, the legs were just tall enough to result in a table height
of 28-1/4", which is plenty high since modern tables are typically in the 28" to 30" range. I wanted the legs to be removable
and also be very sturdy, so they have a 90° notch cut to mesh firmly with the frame, and then two 5/16" lag bolts run
through them and into the oak frame. The table turns out to be extremely sturdy. Since my chisel skills are not as refined
as I would like them to be, rather than attempting to chisel out the notches I cut a pair of thin slits through the tops
of the legs using a band saw and then used the chisel to crack out one quadrant. Thin strips of poplar were cut and glued
into the slits of the other three quadrants and are nearly invisible in the finished work. I also needed to cut and glue
large rectangular plugs into each leg where mortises used to accept tenons from the original frame. They are not as invisible,
but it doesn't bother me because you will never see them unless you get under the table to look.
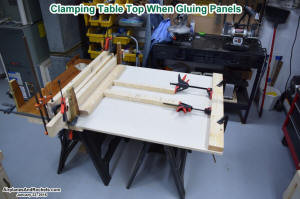
Gluing & clamping leaf pieces to plywood substrate

Clamping edge strips to curved ends of tabletop using the pieces cut off for keeping even pressure along
the arc.
Steps for cutting 90° notches into tops of legs. Thin strips of poplar were glued into the saw slits,
and rectangular poplar blocks were glued into the mortise holes.
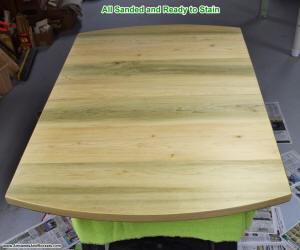
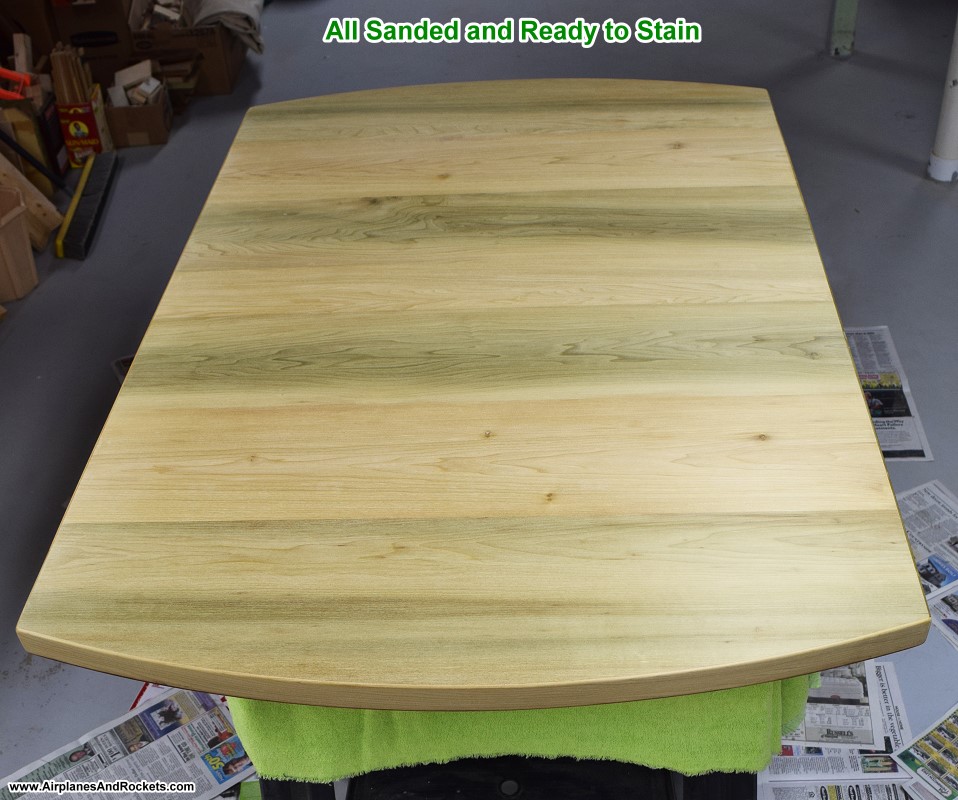
Tabletop ready for stain
Bottom framework
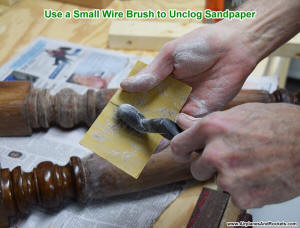
Use a wire brush to unclog sandpaper and make it last much longer
Edge trim strip
Other Woodworking Tips & Projects:
Posted April 5, 2016
|