|
A natural extension of my model building activities has been many woodworking projects
- both building and refinishing. Without going into a lot of detail, here are some of
the projects for which I happen to have photographic documentation.
My workshop currently consists of a 10" radial arm saw, a 12" drill press, 9" dia.
/ 6"x48" disc/belt sander, 14" band saw, and a router table - all Craftsman. A pretty
good assortment of hand-held sanders, drills, and routers tops off the for power tools
list. A pretty respectable assortment of clamps, hand tools, wood vise and metal vise,
and good size wooden work benches help get the job done.
I'll post a few photos at some point ... just in case you might care ;-)
 Early in 1982, fresh out of the USAF as
an Air Traffic Control Radar Repairman, I was fortunate to land a job as an
electronics technician at the Oceanic Division of Westinghouse in Annapolis, MD.
It turned out being more of a high level electronics assembly job building
printed circuit boards, chassis, wire harnesses, sonar transducers, and
integrated systems, mostly for the U.S. Navy. A fairly extensive collection of
high quality hand tools were required in order to get results which would pass
rigorous Navy inspection standards. Snap-On was the supplier of choice because
at the time they made extremely high quality (and expensive) small pliers, wire
cutters, screwdrivers, wrenches, nuts drivers, etc. I don't know whether there
are still roaming Snap-On tool trucks visiting businesses anymore, but at the
time we got a weekly visit. Onboard was a tool refiguring workbench for
sharpening cutters, repairing screwdriver tips, and other things. Restored
components of the
c1976
Craftsman 7−Drawer Machinist's Tool Chest. Craftsman 7−Drawer Machinist's
Toolbox - top open. Cleaned and groomed felt surfaces... Early in 1982, fresh out of the USAF as
an Air Traffic Control Radar Repairman, I was fortunate to land a job as an
electronics technician at the Oceanic Division of Westinghouse in Annapolis, MD.
It turned out being more of a high level electronics assembly job building
printed circuit boards, chassis, wire harnesses, sonar transducers, and
integrated systems, mostly for the U.S. Navy. A fairly extensive collection of
high quality hand tools were required in order to get results which would pass
rigorous Navy inspection standards. Snap-On was the supplier of choice because
at the time they made extremely high quality (and expensive) small pliers, wire
cutters, screwdrivers, wrenches, nuts drivers, etc. I don't know whether there
are still roaming Snap-On tool trucks visiting businesses anymore, but at the
time we got a weekly visit. Onboard was a tool refiguring workbench for
sharpening cutters, repairing screwdriver tips, and other things. Restored
components of the
c1976
Craftsman 7−Drawer Machinist's Tool Chest. Craftsman 7−Drawer Machinist's
Toolbox - top open. Cleaned and groomed felt surfaces...
 While visiting our daughter in North Carolina,
we ran across someone who had a vintage
6-player croquet set for sale for just a few dollars. As the photos below show,
it has been completely restored. All components (except the balls) were stripped
down to bare wood or metal, sanded, primed, and then painted with four coats of
enamel spray paint for color areas and three coats of polyurethane clear on the
natural finish portions. The balls would have been too difficult to get to bare
wood, so I sanded down to the point where the paint was stable and strongly adhered
to the underlying wood. The two end pegs were fabricated from new wood because there
was only one original and I wanted them to look alike ... While visiting our daughter in North Carolina,
we ran across someone who had a vintage
6-player croquet set for sale for just a few dollars. As the photos below show,
it has been completely restored. All components (except the balls) were stripped
down to bare wood or metal, sanded, primed, and then painted with four coats of
enamel spray paint for color areas and three coats of polyurethane clear on the
natural finish portions. The balls would have been too difficult to get to bare
wood, so I sanded down to the point where the paint was stable and strongly adhered
to the underlying wood. The two end pegs were fabricated from new wood because there
was only one original and I wanted them to look alike ...
 After just 33 years, this crewel picture that Melanie
stitched is complete and has a custom
frame. If memory serves correctly, we bought the crewel kit at a Ben Franklin store
in Severna Park, Maryland, in 1985 while living in Arnold, Maryland. She started it shortly
after getting it, and then it was put away until last year, 2017, when she decided to
complete the project. Most, if not all, of the needlework pictures Melanie has done over
the years have been placed in custom frames made by me. I've used pine, oak, teak, hickory,
mahogany, and now maple for this frame. The maple wood ... After just 33 years, this crewel picture that Melanie
stitched is complete and has a custom
frame. If memory serves correctly, we bought the crewel kit at a Ben Franklin store
in Severna Park, Maryland, in 1985 while living in Arnold, Maryland. She started it shortly
after getting it, and then it was put away until last year, 2017, when she decided to
complete the project. Most, if not all, of the needlework pictures Melanie has done over
the years have been placed in custom frames made by me. I've used pine, oak, teak, hickory,
mahogany, and now maple for this frame. The maple wood ...
 Sometime around the year 2000, while we were living
in Fairfield, Ohio, our daughter, Sally, made a diorama of a Tae Kwon Do martial arts
dojo that was inspired by the school she was attending at the time. Unbeknownst to Sally,
Melanie and I had kept the diorama in a cardboard box for lo these many years. We decided
to make a nice wood and Plexiglas display case for it and present it to her for her birthday.
The case is made from some scrap walnut given to me by a friend. Korean, Chinese, and
Japanese versions of "Greensboro
Martial Arts Academy" and a few decorative flourishes were
... Sometime around the year 2000, while we were living
in Fairfield, Ohio, our daughter, Sally, made a diorama of a Tae Kwon Do martial arts
dojo that was inspired by the school she was attending at the time. Unbeknownst to Sally,
Melanie and I had kept the diorama in a cardboard box for lo these many years. We decided
to make a nice wood and Plexiglas display case for it and present it to her for her birthday.
The case is made from some scrap walnut given to me by a friend. Korean, Chinese, and
Japanese versions of "Greensboro
Martial Arts Academy" and a few decorative flourishes were
...
 We have had one of those ubiquitous 'farm tables' since sometime
in the late 1980s, back when they were made of wood that is about 50% thicker than today's
variety. Over the decades, it has been used variably as a school desk for our kids, as
a sewing table, as a computer desk, and as a surface for building model airplanes. It
has endured no fewer than ten household moves in that time (don't
ask). After all that, it was understandably due for being repaired and refinished
... We have had one of those ubiquitous 'farm tables' since sometime
in the late 1980s, back when they were made of wood that is about 50% thicker than today's
variety. Over the decades, it has been used variably as a school desk for our kids, as
a sewing table, as a computer desk, and as a surface for building model airplanes. It
has endured no fewer than ten household moves in that time (don't
ask). After all that, it was understandably due for being repaired and refinished
...
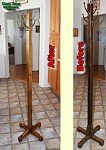 For as long as both Melanie and I can remember
this old coat tree has been standing in her parent's house - first in Hagerstown, Maryland,
then in two locations in West Virginia, and finally back in Hagerstown, Maryland. After
her mother moved into a senior care home, we 'inherited' it, which was great for me because,
being obviously old, I really liked it. As you can see from the 'before' picture, it
was in pretty rough shape and having been heavily used for who knows how many decades?
Any glue that might have been used had long since disintegrated, and the finish was heavily
worn. A few small nails held everything together in a very wobbly manner. It probably
started out life in York, Pennsylvania. from whence her parents both harkened ... For as long as both Melanie and I can remember
this old coat tree has been standing in her parent's house - first in Hagerstown, Maryland,
then in two locations in West Virginia, and finally back in Hagerstown, Maryland. After
her mother moved into a senior care home, we 'inherited' it, which was great for me because,
being obviously old, I really liked it. As you can see from the 'before' picture, it
was in pretty rough shape and having been heavily used for who knows how many decades?
Any glue that might have been used had long since disintegrated, and the finish was heavily
worn. A few small nails held everything together in a very wobbly manner. It probably
started out life in York, Pennsylvania. from whence her parents both harkened ...
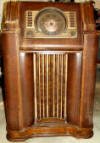 After searching occasionally for many years for
another
Crosley 03CB radio in a location close enough to drive to, I finally saw one on Craigslist
in Harrisburg, PA, about 300 miles from my home in Erie, PA. Melanie and I picked it
up yesterday. It needs - and will receive - a total restoration for both the cabinet
and the electronics, but it appears to be in better condition that my first pre-restored
Crosley 03CB. This radio is Chassis #95. As of this writing (July 2013) all the parts
have been disassembled and the woodwork on the cabinet is underway. Some joints needed
gluing and the lamination had separated in a few areas. The metal faceplate components
are ready to paint, and the mounting hardware has been re-plated with copper per the
original. There is still a lot left to be accomplished, including a complete disassembly
... After searching occasionally for many years for
another
Crosley 03CB radio in a location close enough to drive to, I finally saw one on Craigslist
in Harrisburg, PA, about 300 miles from my home in Erie, PA. Melanie and I picked it
up yesterday. It needs - and will receive - a total restoration for both the cabinet
and the electronics, but it appears to be in better condition that my first pre-restored
Crosley 03CB. This radio is Chassis #95. As of this writing (July 2013) all the parts
have been disassembled and the woodwork on the cabinet is underway. Some joints needed
gluing and the lamination had separated in a few areas. The metal faceplate components
are ready to paint, and the mounting hardware has been re-plated with copper per the
original. There is still a lot left to be accomplished, including a complete disassembly
...
 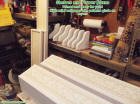   During our frequent walks around the neighborhood
here in Erie, PA, Melanie and I would see houses that had flower boxes installed beneath
the windows and vowed that some days we would do the same for our house. Finally, as
a present to Melanie for her birthday, I made measurements and drew up some plans for
a set to put on the front of our house. After doing a search on the Internet for ideas,
I decided on a fairly unique configuration where the boxes themselves sit on a shelf
that is mounted to the house. That allows the boxes to be easily removed for servicing
... During our frequent walks around the neighborhood
here in Erie, PA, Melanie and I would see houses that had flower boxes installed beneath
the windows and vowed that some days we would do the same for our house. Finally, as
a present to Melanie for her birthday, I made measurements and drew up some plans for
a set to put on the front of our house. After doing a search on the Internet for ideas,
I decided on a fairly unique configuration where the boxes themselves sit on a shelf
that is mounted to the house. That allows the boxes to be easily removed for servicing
...
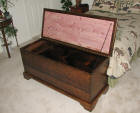  Another of Melanie's family's relics is this
pine clothes chest. After more than 100 years of use and abuse, this chest was in dire
need of restoration. Construction is very low density pine, with dovetailed corners.
Finish was a clear varnish with no stain. The bottom, back, and inside had no finish
at all. Restoration consisted of knocking apart and re-gluing most joints, sanding, and
filling in the multiple dings and scratches where they were really deep. Minor imperfections
were kept for the sake of character. Minwax dark walnut stain was used inside and out,
and allowed to dry for a week. Then, two coats of Deft satin clear were brushed on with
... Another of Melanie's family's relics is this
pine clothes chest. After more than 100 years of use and abuse, this chest was in dire
need of restoration. Construction is very low density pine, with dovetailed corners.
Finish was a clear varnish with no stain. The bottom, back, and inside had no finish
at all. Restoration consisted of knocking apart and re-gluing most joints, sanding, and
filling in the multiple dings and scratches where they were really deep. Minor imperfections
were kept for the sake of character. Minwax dark walnut stain was used inside and out,
and allowed to dry for a week. Then, two coats of Deft satin clear were brushed on with
...
  This cobbler's
bench has been in Melanie's family for a couple generations. It was in pretty rough shape.
I chose to sand the finish off rather than use chemical stripper because it was fairly
brittle and came off easily. A leg had been broken and some drawer joints needed re-gluing.
All of the square strips on the work surface were removed for sanding. The wood is very
soft pine. Final finish was Minwax stain and Minwax Polyurethane. Although polyurethane
is hard to work with because if runs so easily ... This cobbler's
bench has been in Melanie's family for a couple generations. It was in pretty rough shape.
I chose to sand the finish off rather than use chemical stripper because it was fairly
brittle and came off easily. A leg had been broken and some drawer joints needed re-gluing.
All of the square strips on the work surface were removed for sanding. The wood is very
soft pine. Final finish was Minwax stain and Minwax Polyurethane. Although polyurethane
is hard to work with because if runs so easily ...
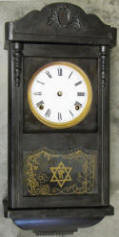 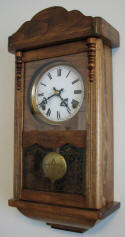   This regulator
wall clock was purchased on eBay for around $50 in early 2007. The mechanical pendulum-regulated,
spring-driven escapement movement took a bit of cleaning, oiling and adjusting to get
working; it can be seen in action online on
YouTube. The finish as received was in really awful shape. It took
a lot of chemical stripper to remove the finish. I removed as many parts as possible
for sanding and the reinstalling. The design on the top plate was made of copper and
was in very poor shape, with parts of it corroded away, I just disposed of it. The brass
dial ring, hinges, and pendulum were wire-wheeled and lacquered. The glass is silkscreened
on the back surface. Interestingly, the clock was made in China (circa 1899), and has
what looks like a Star of David pattern on in the middle. My standard Minwax stain with
Deft lacquer clear coat was applied. Summer 2007. This regulator
wall clock was purchased on eBay for around $50 in early 2007. The mechanical pendulum-regulated,
spring-driven escapement movement took a bit of cleaning, oiling and adjusting to get
working; it can be seen in action online on
YouTube. The finish as received was in really awful shape. It took
a lot of chemical stripper to remove the finish. I removed as many parts as possible
for sanding and the reinstalling. The design on the top plate was made of copper and
was in very poor shape, with parts of it corroded away, I just disposed of it. The brass
dial ring, hinges, and pendulum were wire-wheeled and lacquered. The glass is silkscreened
on the back surface. Interestingly, the clock was made in China (circa 1899), and has
what looks like a Star of David pattern on in the middle. My standard Minwax stain with
Deft lacquer clear coat was applied. Summer 2007.
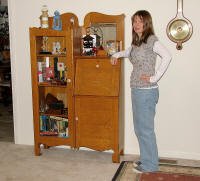 Here is an antique secretary cabinet that was
given to us by Melanie's parents shortly after we were married. As received, it was in
fairly good shape, but the finish was very tired and stained, and most of the joints
were loose. There was no glass in the door, and the beveled mirror panel was missing
most of its silver backing. We used it for many years after just buying a piece of glass
for the door. Here is an antique secretary cabinet that was
given to us by Melanie's parents shortly after we were married. As received, it was in
fairly good shape, but the finish was very tired and stained, and most of the joints
were loose. There was no glass in the door, and the beveled mirror panel was missing
most of its silver backing. We used it for many years after just buying a piece of glass
for the door.
Sometime around 1998 I decided to refinish it. At that point the decision was made
to totally disassemble the entire secretary because all of the joints were so loose.
It came apart like a puzzle with just a few whacks of a mallet. All the pieces were stacked
in a neat, flat pile and ended up being moved twice until finally in Loveland, Colorado,
in 2001, I got up the nerve to tackle the job of assembling and finishing it. After much
chemical stripping and sanding ...
 This is my second-favorite picture that Melanie
has made. It is made using a form of embroidery called
crewel. This
is a fairly large picture that is mounted in an 18" x 22" oak frame. I did not make the
frame. This is my second-favorite picture that Melanie
has made. It is made using a form of embroidery called
crewel. This
is a fairly large picture that is mounted in an 18" x 22" oak frame. I did not make the
frame.
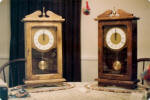 These two regulator clocks were built from
plans by Klockit. The wood was from scrap that Melanie's father had torn off their old
house in West Virginia. The pendulum movements are electronic. We gave one to my sister,
Gayle and her husband, and the other to Melanie's sister, Melissa and her husband for
Christmas 1983. <more>
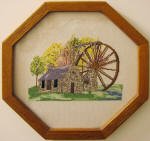 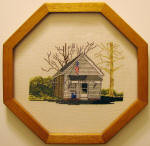 These two counted cross stitch pictures were
done by Melanie sometime in the mid 1980s, when we lived in Arnold, Maryland. I made
the octagonal frames out of mahogany sticks that we bought at
Hechinger (a home store similar to Lowes and The Home
Depot) that were being sold as stakes for tomato plants. The glass was cut
from some old window panes that had been left in the basement of our house when we bought
it. The frames are about 9½ inches from side to side. These two counted cross stitch pictures were
done by Melanie sometime in the mid 1980s, when we lived in Arnold, Maryland. I made
the octagonal frames out of mahogany sticks that we bought at
Hechinger (a home store similar to Lowes and The Home
Depot) that were being sold as stakes for tomato plants. The glass was cut
from some old window panes that had been left in the basement of our house when we bought
it. The frames are about 9½ inches from side to side.
Two other pictures in the country building series were complete in later years.
The rectangular oak frames for those two were purchased.
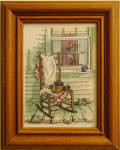 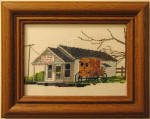
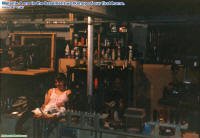 Wow, talk about waxing nostalgic over a recently
discovered photo! This was taken in the basement of our first home in Arnold, Maryland
(just outside of Annapolis), sometime in 1985. Melanie
is in maternity clothes, working on a cross-stitch picture, whilst awaiting the birth
of our son, Philip. You can see my head to the left with the radial arm saw. The basement
was damp and dank; I put a lot of effort into trying to keep it dry enough to not rust
the tools. In that workshop I built the weather station and a lot of the picture frames
shown on this page. Wow, talk about waxing nostalgic over a recently
discovered photo! This was taken in the basement of our first home in Arnold, Maryland
(just outside of Annapolis), sometime in 1985. Melanie
is in maternity clothes, working on a cross-stitch picture, whilst awaiting the birth
of our son, Philip. You can see my head to the left with the radial arm saw. The basement
was damp and dank; I put a lot of effort into trying to keep it dry enough to not rust
the tools. In that workshop I built the weather station and a lot of the picture frames
shown on this page.
 There are
many videos on YouTube showing some pretty ingenious dust collectors for radial arm saws.
Most use a fairly small enclosure located just behind the fence, with a shop vac attachment
for forcefully inhaling the sawdust. They appear to work extremely well for cuts that
are at 90° to the fence and to the table surface. Maybe my interpretation of the dust
collectors is wrong and they adapt to any angle. Since I only have a small shop vac and
do not like to have to turn it on every time I make a cut, my
... There are
many videos on YouTube showing some pretty ingenious dust collectors for radial arm saws.
Most use a fairly small enclosure located just behind the fence, with a shop vac attachment
for forcefully inhaling the sawdust. They appear to work extremely well for cuts that
are at 90° to the fence and to the table surface. Maybe my interpretation of the dust
collectors is wrong and they adapt to any angle. Since I only have a small shop vac and
do not like to have to turn it on every time I make a cut, my
...
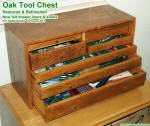 For decades, I have had my hobby workbench set
up with collectible coffee mugs sitting around to hold all of my hand tools - pliers,
picks, files, scissors, rulers, screwdrivers, etc. Over time the number of coffee mugs
has grown considerably, so it seemed like the time had arrived to finally get a tool
box to put everything in so as to have a tidier and more efficient work space. A search
for a nice
oak toolbox showed that anything worth getting would cost many hundreds of dollars
if purchased new. There are a few el cheapo wood toolboxes out there, but the customer
reviews are overwhelmingly bad. Lousy joints, easily scratched finish, and sticking drawers
are a few of the most common complaints
... For decades, I have had my hobby workbench set
up with collectible coffee mugs sitting around to hold all of my hand tools - pliers,
picks, files, scissors, rulers, screwdrivers, etc. Over time the number of coffee mugs
has grown considerably, so it seemed like the time had arrived to finally get a tool
box to put everything in so as to have a tidier and more efficient work space. A search
for a nice
oak toolbox showed that anything worth getting would cost many hundreds of dollars
if purchased new. There are a few el cheapo wood toolboxes out there, but the customer
reviews are overwhelmingly bad. Lousy joints, easily scratched finish, and sticking drawers
are a few of the most common complaints
...
 We found a nice antique Queen Anne style chair
at the Erie City Mission. It had been reupholstered
at some point based on a tag still attached. It was in excellent condition except the
two front leg glue joints had broken away from the frame. Screws had been used, but the
wood in the frame was chewed up and splintered from many prior attempts. I clamped the
inside and outside edges, then saturated the wood with cyanoacrylate glue (Super Glue).
In some place I drilled 1/16" holes in the wood to allow
... We found a nice antique Queen Anne style chair
at the Erie City Mission. It had been reupholstered
at some point based on a tag still attached. It was in excellent condition except the
two front leg glue joints had broken away from the frame. Screws had been used, but the
wood in the frame was chewed up and splintered from many prior attempts. I clamped the
inside and outside edges, then saturated the wood with cyanoacrylate glue (Super Glue).
In some place I drilled 1/16" holes in the wood to allow
...
 In the picture to the right, I was trimming a short
section of oak floor molding. The cut came out very nicely. You can see that I did not
put the tape as far to the left as I should have in order to protect the cut edge, but
it was nice and clean anyway, with no splintering. Maybe that was because 1) the blade
was sharp, and 2) the oak piece had recently been finished with a couple coats of polyurethane,
so the wood grain was thoroughly filled and the finish had not turned brittle. In the picture to the right, I was trimming a short
section of oak floor molding. The cut came out very nicely. You can see that I did not
put the tape as far to the left as I should have in order to protect the cut edge, but
it was nice and clean anyway, with no splintering. Maybe that was because 1) the blade
was sharp, and 2) the oak piece had recently been finished with a couple coats of polyurethane,
so the wood grain was thoroughly filled and the finish had not turned brittle.
 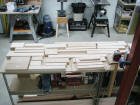 Update: My
Lorraine Grandmother
Clock is now (as of August 2013) 100% complete! Update: My
Lorraine Grandmother
Clock is now (as of August 2013) 100% complete!
I am built the grandmother clock from plans and mechanics purchased from Klockit.
For as long as I can remember, I have wanted to build a floor model clock, and this one
will fit well in our 1,500 sq.ft. house. The wood chosen is hickory both because it has
beautiful grain and color variation, and because then I can say that I have built a "Hickory
Dickory Clock!" The hickory was bought from
Summit Hardwoods, just a few miles south
of ...
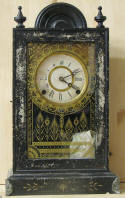 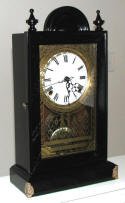 This
mantel clock
is a multi-generational heirloom. It was not expensive, but had emotional value. Melanie's
family hearkens from the York, Pennsylvania, region and this clock, I discovered, was
manufactured by the Ansonia company and sold by Will K. Rebert, Watchmaker and Jeweler,
in York. Her parents gave it to me for Christmas of 2006, and I decided to refinish it
and return it to them the next Christmas. Unfortunately, Melanie's father passed away
from cancer last summer, but we were able to present it to her mother. I used chemical
stripper to avoid sanding to preserve the intricate and shallow engravings. As it turned
out there was a milk paint coating underneath the black paint that was hard as a rock.
The case insides and back cover
... This
mantel clock
is a multi-generational heirloom. It was not expensive, but had emotional value. Melanie's
family hearkens from the York, Pennsylvania, region and this clock, I discovered, was
manufactured by the Ansonia company and sold by Will K. Rebert, Watchmaker and Jeweler,
in York. Her parents gave it to me for Christmas of 2006, and I decided to refinish it
and return it to them the next Christmas. Unfortunately, Melanie's father passed away
from cancer last summer, but we were able to present it to her mother. I used chemical
stripper to avoid sanding to preserve the intricate and shallow engravings. As it turned
out there was a milk paint coating underneath the black paint that was hard as a rock.
The case insides and back cover
...
 This banjo style weather station is an original
design that I designed and built waaaaay back around 1984, shortly after Melanie and
I were married. The wood is laminated from three layers of wood that came from the side
of an old farm house that Melanie's father tore down in West Virginia. The basic pattern
was cut with a handheld saber saw, and the the final shape was formed with files and
sandpaper - a lot of work. A router was used along the top edge for decoration. The hygrometer
(top), thermometer (middle), and barometer (bottom), along with the finial at the very
top, were ordered from Klockit (they've been around for
a long time - like me). All the instruments are of very high quality. 1984ish. This banjo style weather station is an original
design that I designed and built waaaaay back around 1984, shortly after Melanie and
I were married. The wood is laminated from three layers of wood that came from the side
of an old farm house that Melanie's father tore down in West Virginia. The basic pattern
was cut with a handheld saber saw, and the the final shape was formed with files and
sandpaper - a lot of work. A router was used along the top edge for decoration. The hygrometer
(top), thermometer (middle), and barometer (bottom), along with the finial at the very
top, were ordered from Klockit (they've been around for
a long time - like me). All the instruments are of very high quality. 1984ish.
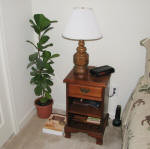 This antique nightstand
was given to us by my Aunt Bernice, who lived in Mayo, Maryland. Like most of our other
furniture, this was used as provided for a long time before undertaking a refinishing
project. It was a pretty straightforward job. Chemical stripper followed by sandpaper
followed by stain followed by a Deft lacquer top coat. I don't recall why I chose to
use lacquer rather than polyurethane here. The drawer handle was sprayed hunter green,
which looks good against the reddish stain. This antique nightstand
was given to us by my Aunt Bernice, who lived in Mayo, Maryland. Like most of our other
furniture, this was used as provided for a long time before undertaking a refinishing
project. It was a pretty straightforward job. Chemical stripper followed by sandpaper
followed by stain followed by a Deft lacquer top coat. I don't recall why I chose to
use lacquer rather than polyurethane here. The drawer handle was sprayed hunter green,
which looks good against the reddish stain.
 Back when Melanie had more time
(around 1984), she made a lot of counted cross stitch pictures.
This one remains her most ambitious project ever - a large nautical map of the ancient
world, fashioned after the works of famed cartographer Gerard Mercator and titled with
"Orbis Terrae Compendiosa
Descriptio," which is, loosely translated, Latin for "A Comprehensive Description
of the World." Melanie's work was done on 22-count fabric, and measures approximately
13" by 8" (not including white border). Such a fine effort needed a special frame, so
I set about making a custom 23" by 17" frame out of teak wood bought at World of Hardwoods
in Baltimore. The fancy fluting was done on my Craftsman radial arm saw with the molding
head. It was a scary operation with the sharp teeth flying while feeding that teak through
it. Teak, as you might know, is used extensively on boats because it weathers well. It
is an oily type wood that starts out life with a <more> Back when Melanie had more time
(around 1984), she made a lot of counted cross stitch pictures.
This one remains her most ambitious project ever - a large nautical map of the ancient
world, fashioned after the works of famed cartographer Gerard Mercator and titled with
"Orbis Terrae Compendiosa
Descriptio," which is, loosely translated, Latin for "A Comprehensive Description
of the World." Melanie's work was done on 22-count fabric, and measures approximately
13" by 8" (not including white border). Such a fine effort needed a special frame, so
I set about making a custom 23" by 17" frame out of teak wood bought at World of Hardwoods
in Baltimore. The fancy fluting was done on my Craftsman radial arm saw with the molding
head. It was a scary operation with the sharp teeth flying while feeding that teak through
it. Teak, as you might know, is used extensively on boats because it weathers well. It
is an oily type wood that starts out life with a <more>
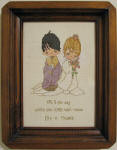 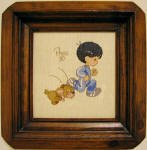 Melanie made the picture on the top for me before
we were married. Before life robbed me of my time and willingness to do such things,
I used to run a couple miles every day. I never had a dog, but the picture was a standard
one from the Precious Moments collection. She did change the hair color from the original
sandy brown to black, to match mine. Melanie made the picture on the top for me before
we were married. Before life robbed me of my time and willingness to do such things,
I used to run a couple miles every day. I never had a dog, but the picture was a standard
one from the Precious Moments collection. She did change the hair color from the original
sandy brown to black, to match mine.
The picture at the bottom was made by Melanie after were were married (May 22, 1983).
Both are counted cross stitch on 22-count fabric. I made the frames using my Craftsman
table saw with a shape cutter head. If I recall correctly, the wood was standard framing
2x4 pine.
 This counted cross stitch picture with a Christmas
theme was also done by Melanie sometime in the mid 1980s. It sports the same type of
custom built mahogany frame. This counted cross stitch picture with a Christmas
theme was also done by Melanie sometime in the mid 1980s. It sports the same type of
custom built mahogany frame.
 Melanie loves the seashore and sailboats, as
you might have inferred from her selection of topics for pictures and from her having
had a radio controlled Victoria sailboat
at one time. This was her first cross-stitch project in over a decade. It is in a 16"
x 20" oak frame (purchased). Melanie loves the seashore and sailboats, as
you might have inferred from her selection of topics for pictures and from her having
had a radio controlled Victoria sailboat
at one time. This was her first cross-stitch project in over a decade. It is in a 16"
x 20" oak frame (purchased).
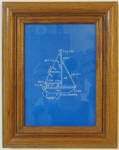 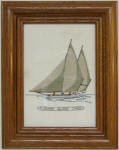 These sailboats are approximately 5" by 8". These sailboats are approximately 5" by 8".
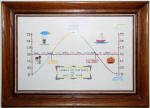 Here is a custom design that I came up with that
plots the day of the year versus the length of the day (daylight), for the latitude of
Annapolis, Maryland. Numbers were derived from table in the Old farmer's Almanac. Here is a custom design that I came up with that
plots the day of the year versus the length of the day (daylight), for the latitude of
Annapolis, Maryland. Numbers were derived from table in the Old farmer's Almanac.
 Melanie made this picture for her grandmother
(mother's mother), who actually sat in a rocking chair and did needlework and sewing.
It is also one of the Precious Moments series. The frame is made in the same manner as
the other pine models cut on my Craftsman table was. Melanie made this picture for her grandmother
(mother's mother), who actually sat in a rocking chair and did needlework and sewing.
It is also one of the Precious Moments series. The frame is made in the same manner as
the other pine models cut on my Craftsman table was.
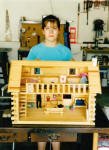 Sometime
around 1999, we gave Sally a log cabin doll house kit for Christmas. It was a bit of
a challenge to put together properly, but it came out very nicely. The simulated stone
on the chimney was the most difficult part of the job. Sometime
around 1999, we gave Sally a log cabin doll house kit for Christmas. It was a bit of
a challenge to put together properly, but it came out very nicely. The simulated stone
on the chimney was the most difficult part of the job.
Much more to come...
Other Woodworking Tips & Projects:
|


