|
For decades, I have had my hobby workbench set up with collectible coffee mugs sitting around to hold all of my
hand tools - pliers, picks, files, scissors, rulers, screwdrivers, etc. Over time the number of coffee mugs has grown
considerably, so it seemed like the time had arrived to finally get a tool box to put everything in so as to have
a tidier and more efficient work space. A search for a nice oak toolbox showed that anything worth getting would cost
many hundreds of dollars if purchased new. There are a few el cheapo wood toolboxes out there, but the customer reviews
are overwhelmingly bad. Lousy joints, easily scratched finish, and sticking drawers are a few of the most common complaints.
Conversely, customer reviews on the well-made oak chests overwhelmingly rave over how nice they are. Well, I'm not
so poor that I'm eating the dog for dinner, but then I'm not eating caviar either, so the logical middle ground seemed
to be to find a used oak tool chest for sale and repair and restore as required.

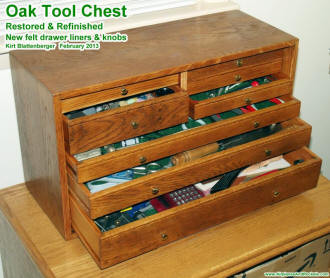
Completed oak too chest restoration
Fortunately, a hand-made, 8-drawer oak tool chest went up for auction on eBay shortly after my search began. It
was exactly what I wanted since my desire was for all drawers an no openable lid, because I want to be able to site
a plastic parts drawer cabinet on top of it. I won the auction for $61 + shipping costs. I knew form the good pictures
the seller posted that it would require a little repair and a re-finishing job. I was very anxious to receive it and
get the project underway, even though it mean putting off work on the
Lorraine Grandmother Clock building effort for a couple weeks
in the process. Upon inspection I could tell that the entire tool chest was very nicely built, with quality joinery.

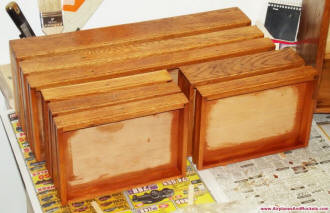
Drawers with polyurethane applied. Repairs have all been done.
To make a not-so-long story even shorter, a few of the drawers needs to be re-glued and the large bottom drawer
was missing part of the side slide slot, so that took a little work. The felt liner in some of the drawers pulled
out quite easily and then a little acetone cleaned off the adhesive residue. Although not really necessary, I removed
all of the drawer slide rails and repositioned them so everything was level and even. All of the original finish was
scraped and sanded off. Wood putty filled all the hardware holes since I will not be re-installing the brass bottom
corner pieces and the drawer puller were not aligned in a neat row. Prior to finishing, the entire frame and all drawers
were vacuumed and wiped with a tack cloth. A coat of 1-step polyurethane Pecan was applied to restore the golden oak
tone, then a coat of semi-gloss clear polyurethane was brushed on. Prior to brushing on the second and final clear
coat, everything was rubbed with 000 steel wool to knock off the high points (dust particles and contaminants in the
polyurethane can). The result is a nearly glass-smooth semi-gloss finish. Self-adhesive felt cloth drawer liners (from
Home Depot) were installed in all the drawers and on the bottom of the case. A new set of brass drawer pulls (also
from HD) were installed in nice, straight alignment.

Enclosure with polyurethane applied. Drawer slides have ben re-positioned for evenness.

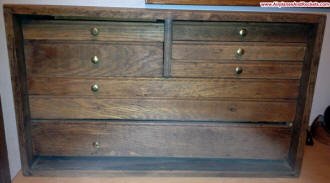
Oak Tool Chest - Original (3 drawer knobs missing) (note uneven drawer spacing)

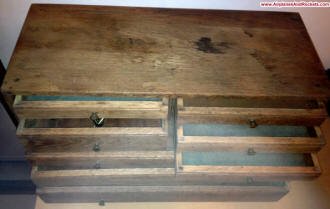
Good Quality Joinery (felt liners poor condition)

Drawer details
Other Woodworking Tips & Projects:
Posted February 10, 2013
|


