|
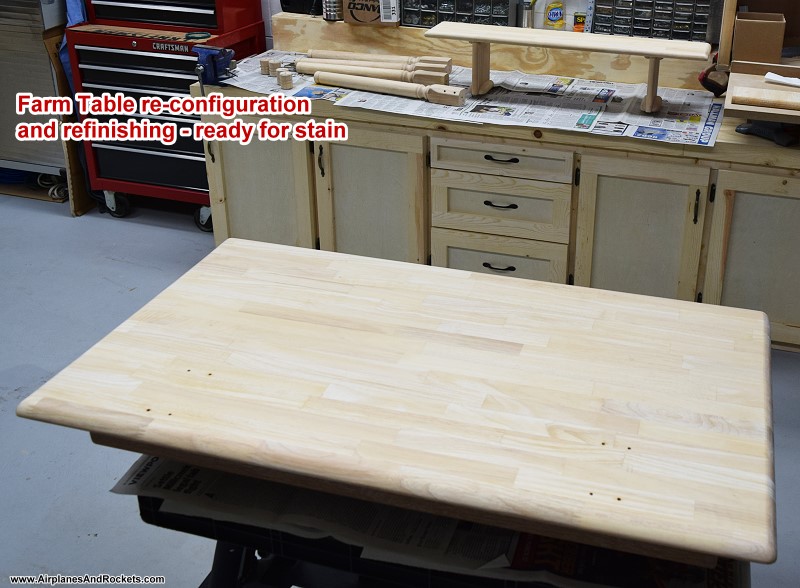
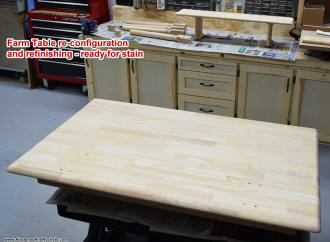
 We have had one of those ubiquitous 'farm tables'
since sometime in the late 1980s, back when they were made of wood that is about 50%
thicker than today's variety. Over the decades, it has been used variably as a school
desk for our kids, as a sewing table, as a computer desk, and as a surface for building
model airplanes. It has endured no fewer than ten household moves in that time (don't ask). After all that, it was understandably due for being
repaired and refinished. We have had one of those ubiquitous 'farm tables'
since sometime in the late 1980s, back when they were made of wood that is about 50%
thicker than today's variety. Over the decades, it has been used variably as a school
desk for our kids, as a sewing table, as a computer desk, and as a surface for building
model airplanes. It has endured no fewer than ten household moves in that time (don't ask). After all that, it was understandably due for being
repaired and refinished.
The original size was something like 56" long and 36" wide - a pretty big farm table.
Since the space available in our house is very limited (only 920 sq. ft.), I figured
reducing it in length and width would be a good idea. The left-over pieces would be good
material for turning into a shelf at the rear of the table. Also, the table legs and
bottom support structure were painted white, but we decided to remove the paint and stain
them the same as the top.
The first order of business was to scrape and sand all the old finish off all the
surfaces - top and bottom. Using chemical strippers is a last resort because of the mess,
and fortunately the paint came off the legs quite easily with a scraper. It is amazing
what you can do very quickly with a super-sharp scraper. A belt sander got the tabletop
and support frame nice and even, and was also used to form the two cut edges of the tabletop
and new shelf to match the curve of the original. All cuts were made either on my 10"
Craftsman radial arm saw or on my Craftsman 14" bandsaw.
 Legs on the original configuration formed the
corners of the bottom support of the tabletop, with the flat frame pieces butting against
them. It was not a very strong structure, although none of the joints ever failed. Instead,
I joined the flat frame pieces with dowels and glue to make a rectangle, then glued and
screwed it to the bottom of the tabletop. The legs now sit inside of and are screwed
to the frame (for easy removal). Also, when the farm table was used as a computer desk,
I needed to cut 2" off the bottom of the legs to comfortably fit the chair. Those cut-off
sections were later just screwed back on. For this go-around, I drilled a counter bore
in the bottoms of the 2" sections and screwed them to the bottoms of the legs with long
cabinet screws. Shaping and finish sanding was done with them screwed in place so they
would do look like add-ons when attached. Half-round grooves were filed and sanded into
the wood at the joints to make them less noticeable when installed, and to provide a
decorative bottom to the legs when the extensions are removed. Legs on the original configuration formed the
corners of the bottom support of the tabletop, with the flat frame pieces butting against
them. It was not a very strong structure, although none of the joints ever failed. Instead,
I joined the flat frame pieces with dowels and glue to make a rectangle, then glued and
screwed it to the bottom of the tabletop. The legs now sit inside of and are screwed
to the frame (for easy removal). Also, when the farm table was used as a computer desk,
I needed to cut 2" off the bottom of the legs to comfortably fit the chair. Those cut-off
sections were later just screwed back on. For this go-around, I drilled a counter bore
in the bottoms of the 2" sections and screwed them to the bottoms of the legs with long
cabinet screws. Shaping and finish sanding was done with them screwed in place so they
would do look like add-ons when attached. Half-round grooves were filed and sanded into
the wood at the joints to make them less noticeable when installed, and to provide a
decorative bottom to the legs when the extensions are removed.
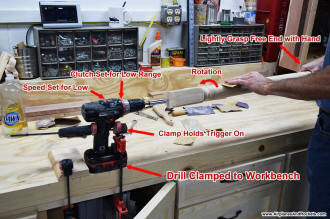
 I sold my lathe long ago during a household move
so in order to make sanding the table legs easier, I ran a hex head lag screw into the
ends and chucked them in a cordless drill that was clamped it to the workbench. I have
used this method for sanding round workpeices on past projects. The clutch torque was
put on the lowest setting for safety's sake in case something went awry (no problems
encountered), and the speed was locked on low. My right hand served as the rotation point
for the free end of the table leg. Heat was not a problem since the rotation speed was
so low. As the photo shows, my left hand held the sandpaper while the table leg rotated
away from me. It worked out very well. I sold my lathe long ago during a household move
so in order to make sanding the table legs easier, I ran a hex head lag screw into the
ends and chucked them in a cordless drill that was clamped it to the workbench. I have
used this method for sanding round workpeices on past projects. The clutch torque was
put on the lowest setting for safety's sake in case something went awry (no problems
encountered), and the speed was locked on low. My right hand served as the rotation point
for the free end of the table leg. Heat was not a problem since the rotation speed was
so low. As the photo shows, my left hand held the sandpaper while the table leg rotated
away from me. It worked out very well.
After final shaping and sanding of the table components, everything was assembled
in its completed state just to be sure there would be no unpleasant surprises after the
stain and polyurethane had been applied. Screws were used for the table legs and the
shelf so that they could be easily removed for moving or storage.
320 grit sandpaper was used for one last light sanding, then all components were vacuumed
and wiped with a tack cloth. A single coat of Minwax wood stain was applied to everything
and allowed to dry overnight. After wiping with a tack cloth again, three full coats
of Minwax satin polyurethane were the applied, with careful sanding, vacuuming, and tack
clothing done between coats. Do not omit the vacuum and tack cloth steps. Also, although
it is a bit of a pain, be sure to pour the polyurethane through a paint strainer or clean
cloth into a spare container to remove crud from it, and be sure to clean and wipe your
brush well before each coat. Failing to do any of these things will make getting a smooth,
gunk-free surface nearly impossible. It is worth the small extra effort to avoid disappointment.
Brush cleaning tip: Between coats, clean the brush as usual in paint thinner, and
then suspend it with a piece of wire across the lip of the jar/can so that the tip does
not touch the bottom, with a clearance of 1/4" or so. That ensures the bristles will
remain straight and supple, and the brush will not end up sitting in crud that settles
to the bottom. When removing the brush for use, lift it out without swishing it in the
cleaner, then tamp it dry with a clean paper towel. Be sure to dip the brush in the polyurethane
and let it sit for a few seconds to absorb it into the bristles so you don't end up with
a little bit of polyurethane and a lot of brush cleaner in the first couple strokes.
Polyurethane is notorious for running on vertical surfaces and puddling underneath
horizontal edges, so it is important to keep the first coat as thin as possible while
ensuring full coverage. My experience is that the first coat against bare wood is the
worst for that. Subsequent coats do not tend to run as readily, but you still need to
be very careful to check for and brush out flaws; be sure to look at the undersides near
the edges. Contrary to what a lot of the advice articles say, I have never had a problem
with brushing in both directions (back and forth) as long as the brush is kept moving
quickly and a wet edge maintained, and it is usually OK to go back over a sag/run to
brush it out as long as more than a few minutes have not passed since it was applied.
The main caveat I offer is to never shake at all or stir the polyurethane vigorously
in order to avoid introducing bubbles into it. Oh, and foam brushes are major air bubble
makers in polyurethane. Stick with a nice quality, soft bristle brush.
A final polyurethane tip: If you are finishing a critical project (like my hand-made
Lorraine Grandmother Clock or refinished
vintage
Crosley Console Radio) and cannot manage to avoid runs/sags because
of the intricate features, use a spray can of polyurethane for the final coat. A light
application is all that is needed to retain a uniform surface, and as long as you are
careful, it will not run. Using spray for all the coats is expensive and messy because
of the overspray, and it will be nearly impossible to get sufficient, even coverage in
those intricate areas.
Posted February 25, 2017
Other Woodworking Tips & Projects:
|