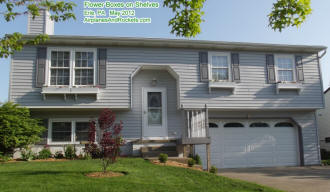
Shelves and Flower Boxes Installed
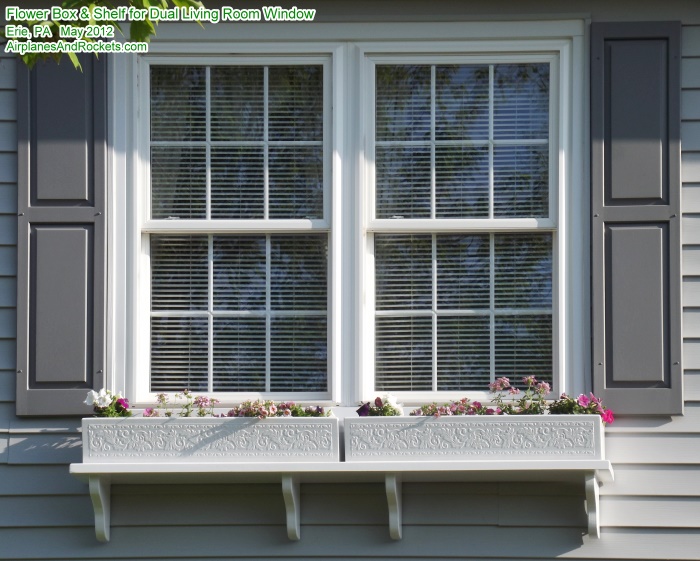
Double-wide flower boxes and shelf
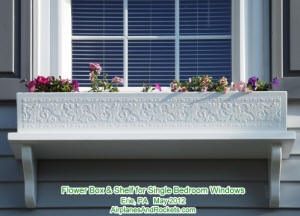
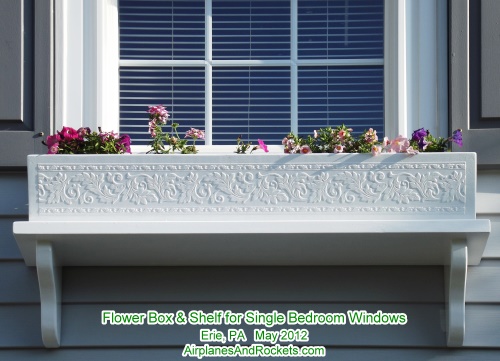
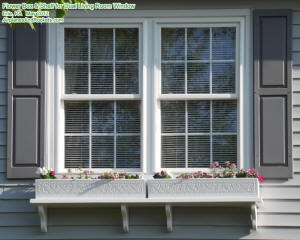
Single-wide flower boxes and shelves (decorative pattern
is high-relief wallpaper glued in place before painting)
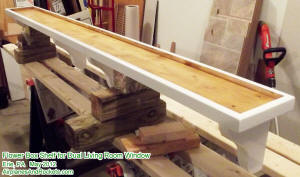
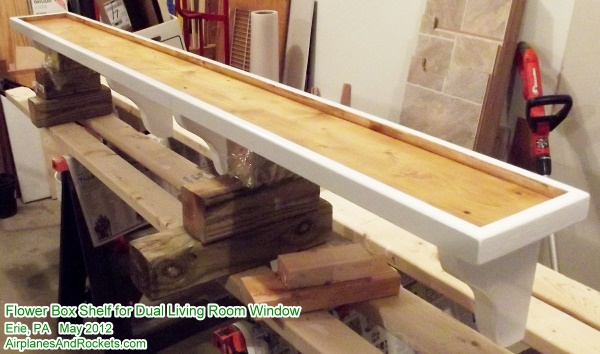
Double-wide shelf
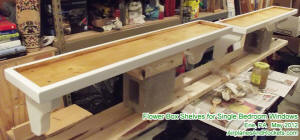
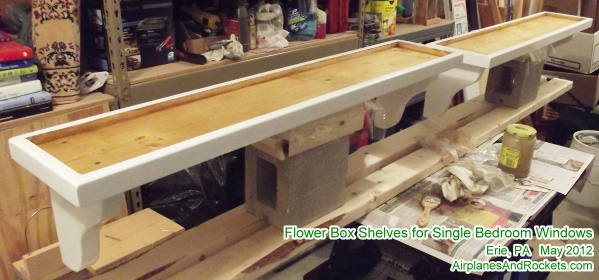
Single-wide shelves
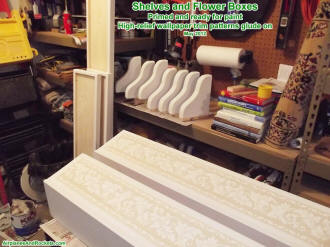
Flower boxes, shelves, and hangers
primed and ready for paint.
During our frequent walks around the neighborhood here in Erie, Pennsylvania,
Melanie and I would see houses that had flower boxes installed beneath the windows
and vowed that some days we would do the same for our house. Finally, as a present
to Melanie for her birthday, I made measurements and drew up some plans for a set
to put on the front of our house. After doing a search on the Internet for ideas,
I decided on a fairly unique configuration where the boxes themselves sit on a shelf
that is mounted to the house. That allows the boxes to be easily removed for servicing,
and per one website, to be replaced in the fall and winter with an arrangement of
gourds, small evergreens, and various other seasonal decorations.
Four separate flower boxes were built of pine wood. Separate shelves and mounts
were built and installed under the two single-width bedroom windows and one long
shelf was built and mounted for the double-width living room window. My goal was
to build and finish those flower boxes and shelves once and have them last for 10
to 20 years. Achieving that goal would mean assembling them sturdily and applying
a very durable finish.
The outsides received two coats of Kilz primer and three coats of outdoor Valspar
white paint. The insides of the flower boxes and the tray surfaces got a concoction
of a blend of turpentine, tar pitch, linseed oil, and spar varnish - a mixture described
on a USDA website that said it should yield at least 10 years. 3/8" drainage holes
were drilled in the bottoms of the flower boxes (before finishing them) and pieces
of 1/8" thick Plexiglas were placed on the trays as spacers so that the flower boxes
would drain properly and would allow air to circulate under the boxes.
I do not have plans for the flower boxes and trays, but the boxes are about 42"
long and 7-1/2" high. 3/4" x 8" pine boards were used throughout. The curvy brackets
are laminated from two 3/4" pieces and were cut on a bandsaw, then sanded smooth
on a belt sander.
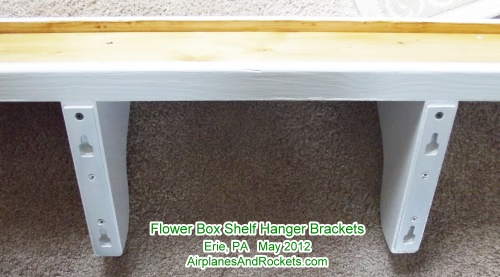
Since the units were going to be heavy, I wanted a very robust mounting system
that would not result in the brackets pressing against the side of the house. Not
only would that cause wear and tear on the siding (vinyl), but it would distort
the siding obviously. I decided to fabricate "keyhole" type brackets from 1/8" thick
aluminum bar stock, and use 5/16" lag screws in the wall's 2x4 studs. Mechanically,
a torque is applied that tends to rotate about the bottoms of the brackets, so that
means an outward, pulling force on the top lag screws and an inward, pushing force
on the bottom lag screws. A washer was screwed into the key hole slot in the bracket
under where the lag screw head contacts it; that provides a hard surface that will
resist compression and wear over time. That's what my theory says, anyway. Check
back in a few years to see if it proves valid!
Enough writing for now. Here are the photos.
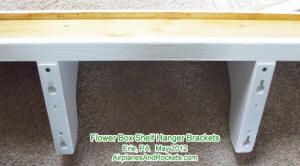
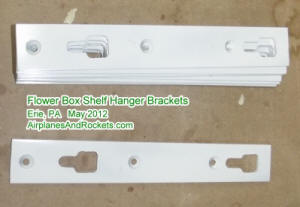
1/8" Aluminum flower box shelf hangers. (custom hangers cut,
drilled, and filed to shape)
Other Woodworking Tips & Projects:
Posted May 28, 2012
|