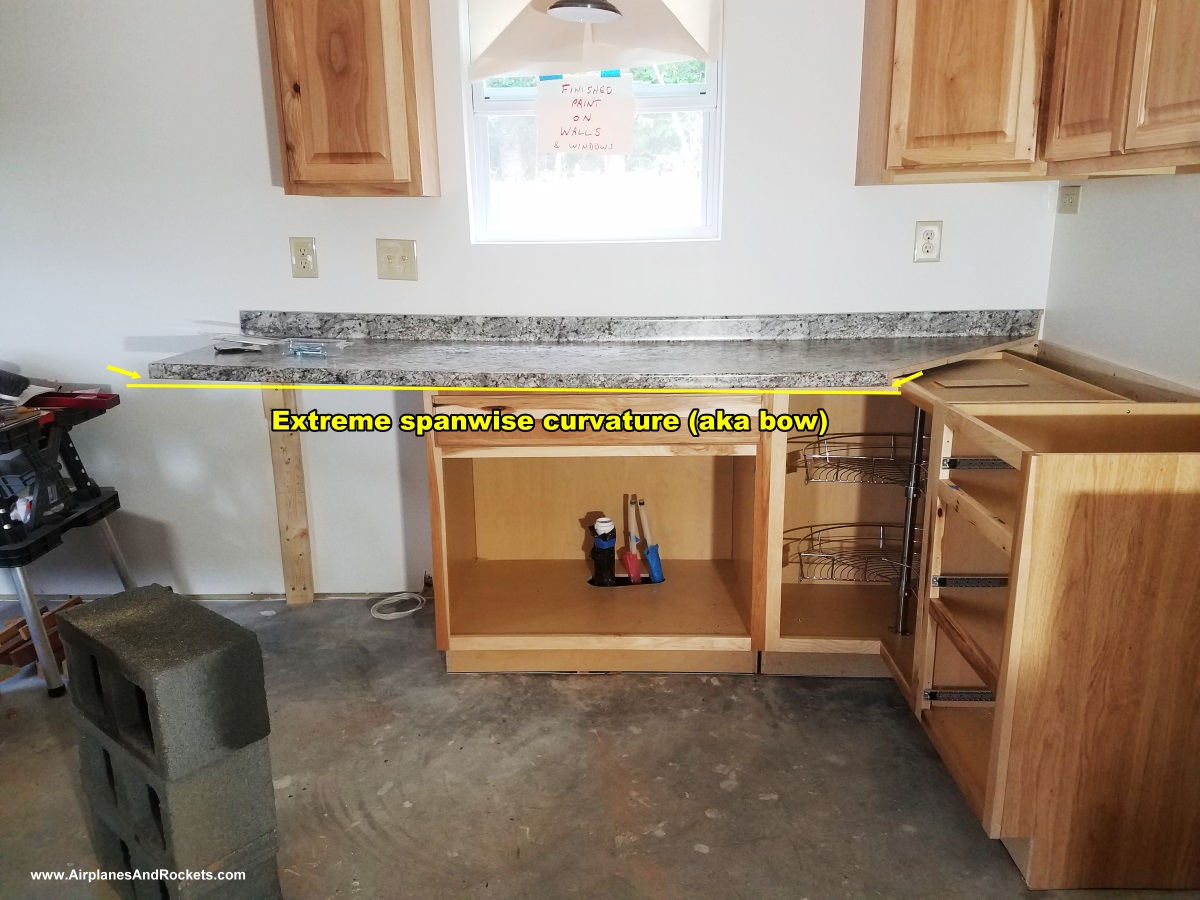
Laminated countertop with extreme cupping and bowing.
After seeing the horrendous quality of workmanship performed by "professional"
block layers, framers, door installers, trim-work carpenters, and other highly paid
tradesmen here in Greensboro, North Carolina, I decided that in spite of the extreme
pain being endured from my bifurcated spinal cord, the thought of paying this
inept bunch to do the finish work was untenable.
Hence, in addition to having to inspect, sand, fill, and re-sand literally every
square inch of drywall prior to painting the walls and ceilings ourselves, I installed
all the cabinets and countertops (kitchen and bathroom), flooring, fixtures, appliances,
and wood trim myself. It is not that we were not willing to pay for quality work, it is
that quality work was nowhere to be found.
My general contractor, Mike Curl*, while he is a nice guy and very capable of
performing his tasks such as site survey and earth moving, he was very poor at seeing
that his subcontractors did a good job. He always dismissed my pointing out the
low quality work of others that we were paying in some cases as much as $100 per
hour** per employee (many were undoubtedly illegal aliens). I only mentioned the egregious
items that I believed would affect the integrity of the structure. Although we always
paid the bills of contractors and his company (Curl Enterprises) immediately, it
was a 9-month-long battle to get a no-frills 1,150 square foot, single story home,
built on a concrete slab, and a detached 1-car garage built. I'm embarrassed to
say what it cost us. Someday I will post photos of the truly atrocious work ... but
I digress.
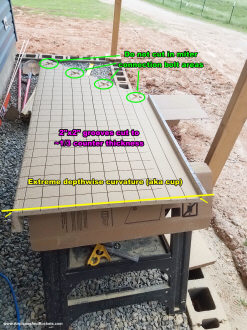
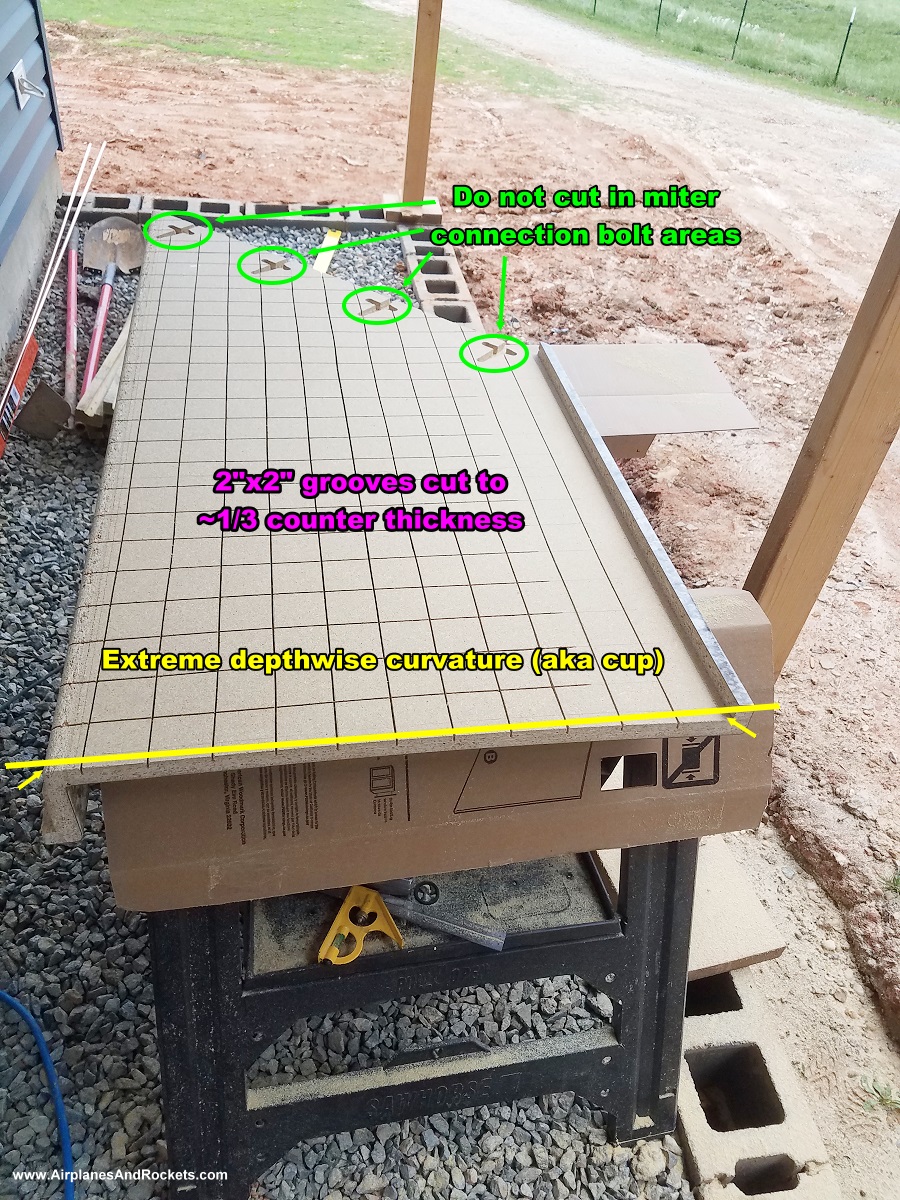
2" square grid of slots cut in bottom surface of laminated countertop.
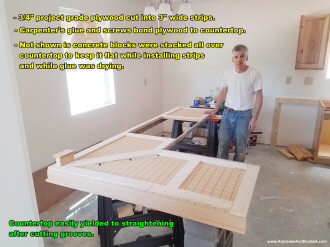
3"-wide strips of 3/4" plywood glued and screwed to underside
of laminated countertop to keep it straight, and to act as spacers on the tops of
base cabinets.

Underside view of installed laminated countertop showing attachment
to base cabinet.
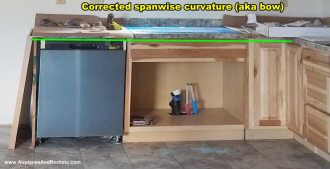
The final result of all the effort - nearly perfectly straight
laminated countertops.
The real purpose of this write-up is to show the method I came up with to straighten
what were initially very bowed (lengthwise) and cupped (depth-wise) laminate countertops.
An Internet search on recommended ways to correct it turned up nothing that
could be applied to such extreme misshapenness. Many suggested that
with as severely curved as mine were, the best thing to do is to discard them and
buy new countertops. That was not an option for two reasons. First, during the COVID scamdemic
when the house was built the cost was double what it had been just two years prior. Second, the
scamdemic, in early 2022, was still causing a major shortage of building materials,
so finding a suitable selection was nearly impossible. It required driving to three
separate Lowes locations to get the sections needed.
Having been a woodworker for many decades, there have been a few times I needed
to remove warps, twists, or bows from wood surfaces. Cutting a crosshatch pattern
on the underside for stress relief and then flattening and bracing the surface always
did the trick. Attempting to flatten the countertop by weighing down the edges and
screwing the top to the base cabinets would not work because the tension in the
curve would likely have caused the laminate on the top to split. Cutting slots in
the bottom surface made the less-thick wood easily bend back into a flat surface.
Using a circular saw, the slots were cut about a third of the way through from the bottom, and were
spaced 2 inches apart. Those dimensions were really just a guess based on past experience,
but they worked perfectly, as can be seen in the photos. I wish I had taken more
pictures of the process, but was not planning on documenting it at the time.
Since the countertop needs to be set up about 3/4-inch above the tops of the
base cabinets to provide clearance for the drawers, I cut 3-inch wide strips of
3/4-inch project plywood (more plies of wood and better glue than construction plywood)
and then glued and screwed it around the perimeter of the countertop and in the
areas between cabinets. Doing so resulted in the countertop retaining its flatness
while also providing ample surface for driving screws from the base cabinets into
the plywood without requiring the use of special attachment brackets. I dare say
these countertops are as secure and flat as any I've ever seen - and I've seen many.
Two "L" sections were prepared in the same manner - one to the left of the stove
and the other to the right. By the way, epoxy was used along with the special hardware
to joint the mitered laminated countertop sections. Doing so assures water will
never seep into the joint and cause the wood to swell - a common problem.
By the way, the walls were very bowed in places due to the framers not taking
care to select straight 2x4's for the cabinet area. That made both the base cabinets
and the wall cabinets difficult to install properly, but I took care to assure the
intersections of every cabinet matched perfectly, and ample screws were used to
keep frames in alignment and the cabinets firmly attached to the walls. Before the
drywall was installed, I put 2x4's horizontally across the walls behind where the
cabinets hang to avoid needing to hunt for studs for attachment. Every cabinet has
a least two screws top and bottom, neatly and equally spaced, and sunk firmly into
either a vertical or horizontal 2x4.
Hopefully if you landed on this page because you find yourself facing the same sort
of laminated countertop dilemma, these tips will provide some needed relief. It looks like
a lot of work, but compared to the annoyance of trying to force the countertop into
place and hope to hold it down with screws, this well worth the effort.
* Curl Enterprises, Greensboro, NC - building contractor, HVAC
installation and service.
** A crew of 3 block layers
spent 3½ hours on the foundation of my 24x24-foot garage and charged $1,000
labor. That works out to about $100 per hour per man. I supplied all the
material (block and mortar).
Other Woodworking Tips & Projects:
Posted May 17, 2023
|