|
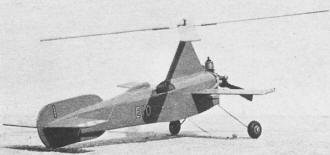
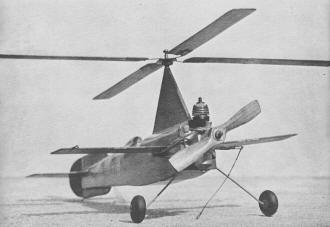
Here is an unusual project
for the control line enthusiast. Bob Tennenbaum's Jumpin' Giro is an
autogyro craft that due
to its potential for slow, helicopter-like flight, can be flown in a small area.
That makes Jumpin' Giro a good subject for old-timers who don't suffer spinning
in circles well anymore. It is designed for an .020 glow fuel engine, but a
small electric setup can be easily substituted. The rotor span is only about
14-15 inches, and as designed there is no form of control; it simply flies in
circles on its own. There is probably not enough centrifugal force on the tether
line to provide positive control, but use of an R/C controlled electric motor
would add to the fun. My guess is it should only be flown in no wind or very
light wind conditions. That leaves out most days in my Erie, Pennsylvania locale. Mr. Igor
Bensen had recently (1955) introduced his
Bensen Gyrocopter when
this article appeared in the 1958 Annual edition of Air Trails magazine, which
was featured in all the hobbyist and do-it-yourself magazines, so that could
have been the motivation for Jumpin' Giro.
Round-the-Pole Circle Whirly - The Jumpin' Giro
 By Bob Tennebaum By Bob Tennebaum
Jumpin' Giro is an ideal model for schoolyards, small parks and gyms. Any
place where an 8 to 14-foot tether line can be accommodated is room enough to
fly this RTP model. It is almost indestructible and it cannot stall. Four-bladed
rotors provide over three-quarters of the lift, small stub wings are for lateral
stability and model can be flown without these. The pylon around which the model
flies should be from 30 to 36 inches high with a good strong base.
 The new Pee Wee or old Infant .020 takes
this model up nicely; no larger engine should be used as the speed would be
too great. Our Infant was shock rubber band mounted, which helps when you have
to put in some more side or down thrust. The small stub wings plug in so you
can experiment with different flight trims. A 5x3 wooden prop provided the thrust.
This model is ideal for air pick-up tricks or other similar stunts. I would
suggest a large tank to provide longer time in the air. The new Pee Wee or old Infant .020 takes
this model up nicely; no larger engine should be used as the speed would be
too great. Our Infant was shock rubber band mounted, which helps when you have
to put in some more side or down thrust. The small stub wings plug in so you
can experiment with different flight trims. A 5x3 wooden prop provided the thrust.
This model is ideal for air pick-up tricks or other similar stunts. I would
suggest a large tank to provide longer time in the air.
Construction is very simple. Entire model is of medium grain 1/16 inch sheet
balsa. Build the crutch, then cement two sides to it. Add formers B2, C, D,
E, F. Cement in dowel and box for wings. Install lead out wire and landing gear.
Build pylon as 1/6, 1/32, 1/16 inch sheet balsa sandwich with the 1/16 SWG wire
shaft in between. Cement to fuselage. Sheet top and bottom. Cement stab and
rudder with offset in place, install tail skid. Build stub wings for tight fit
in the box. Give four coats of clear dope and two of fuel-proof color dope.
 Blades are 1/16 inch sheet hard balsa.
Straightened paper clips or 1/16 inch SWG wire is cemented to each blade leading
edge, then soldered to a tin disc which is the rotor hub. This hub can be made
from a V-127 film spool disc (sand off black enamel). The bearings are 1/16
inch ID copper tube about 1/4 inch long soldered to disc. Make sure it is truly
vertical. Blades should have about 2 to 3° negative incidence, and add a
slight bit of dihedral. The rotor spins counter-clockwise. Blades are 1/16 inch sheet hard balsa.
Straightened paper clips or 1/16 inch SWG wire is cemented to each blade leading
edge, then soldered to a tin disc which is the rotor hub. This hub can be made
from a V-127 film spool disc (sand off black enamel). The bearings are 1/16
inch ID copper tube about 1/4 inch long soldered to disc. Make sure it is truly
vertical. Blades should have about 2 to 3° negative incidence, and add a
slight bit of dihedral. The rotor spins counter-clockwise.
Model should balance 1/2 inch back from engine mount, but no farther, and
should be nose heavy to increase stability in flight. Let it taxi into wind.
This is important as wind will start the blades rotating sooner, and let model
ROG sooner. It should take off in about 4 to 5 feet from point of release.
Nylon fishing line can serve as a tether.

Round-the-Pole Circle Whirly: The Jumpin' Giro Plans
Posted January 16, 2021
|


