 With 3 sizes
to choose from, there's a Cub kit to suit any modeler's tastes and budget. But they all share
the benefits of Great Planes' advanced engineering, resulting in models that are amazingly
easy to build and fly. And with scale outlines taken from original Piper 3-view drawings,
these kits boast a very realistic Cub profile, with incredible attention to detail. All 3
Great Planes Cub kits feature computer-designed and drawn plans, interlocking die-cut wood
parts and straight, strong structures. Building is further simplified by pre-shaped leading
edges, pushrod routing holes and virtually all-balsa exteriors. The 40- and 60-size Cubs feature
barn door ailerons; the 20-size has strip ailerons.
Here is some info on my Herr Engineering
J-3 / NE-1 Cub.
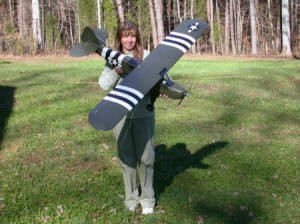
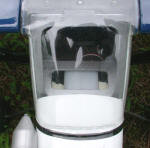
My latest Great Planes Cub 20 was modified to produce an L-4 Grasshopper in D-Day invasion
colors. It has scale barn-door ailerons (vs. the strip ailerons provided) and observation
Plexiglas in the rear.
 A micro servo was installed to trigger a small digital
camera on the left wing struts. The stock version was covered in red, white, and blue with
a non-scale scheme. A micro servo was installed to trigger a small digital
camera on the left wing struts. The stock version was covered in red, white, and blue with
a non-scale scheme.
 Close
to a decade ago, I built a stock GP Cub 20 in classic yellow, flew it a dozen time or so,
then sold it. Close
to a decade ago, I built a stock GP Cub 20 in classic yellow, flew it a dozen time or so,
then sold it.
More recently, I built and test-flew a GWS electric J-3 for a friend of mine. It uses a
Hitec 3-channel radio.
Believe it or not, I'm putting the finishing touches on another GP Cub 20 that sports a
red, white, and blue Monokote job. On this version, I mounted the engine upright because I
am tired of the fickleness of an inverted engine. Sure, it's not as scale-looking, but then
neither is turning the thing upside-down to start the engine.
 Dave Guzman,
a friend and professional comrade (electrical engineer, owner of
RfTek) of mine from the Raleigh, North Carolina
area, built and flew model airplanes as a boy in Columbia. A picture of his Fokker DR-1
triplane,
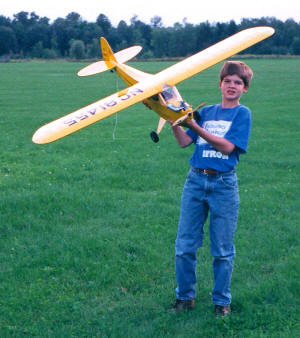
one he build many moons ago, is shown to the left. The J-3 Cub to the right is one he asked
me to build and test-fly for him since it had been so long since he had flown anything. I
gladly took on the task. Dave Guzman,
a friend and professional comrade (electrical engineer, owner of
RfTek) of mine from the Raleigh, North Carolina
area, built and flew model airplanes as a boy in Columbia. A picture of his Fokker DR-1
triplane,
one he build many moons ago, is shown to the left. The J-3 Cub to the right is one he asked
me to build and test-fly for him since it had been so long since he had flown anything. I
gladly took on the task.
He bought a Hi-Tec 3-channel radio for it. As with the GWS Tiger Moth that I had bought for myself, the GWS J-3 Cub needed some
structural improvements to make it more durable. I cannot recall exactly what changes I made,
but one was definitely to NOT use the crappy glue that is provided in the kit. Reinforcing
of the wing strut attachment points was needed, and learning from the GWS Tiger Moth, about
5 degrees of down thrust was built into the motor mount. The Tiger Moth had a severe tendency
to climb in a when the power was advanced past about half throttle. It turned out being a
good decision, because even with the much down thrust, the GWS J-3 Cub still liked to climb
at high throttle settings.
 I took the J-3 Cub along to a small party that
Dave and his wife threw at their house, and after eating, we all walked across the street
to for the maiden flight. The radio was range checked, a quick preflight on the structure,
and it was tossed into the air. Thankfully, the crowd was treated to a perfectly trimmed and
flying airplane. After a few trips around the field I put it into a dive and pulled up into
a really bad loop, but everyone was happy to see it. It flew around doing low passes until
the battery ran out of power and made a nice landing in the grass. It was getting really dark
by then, but we stuck in the other battery and heaved it into the air again. Dave flew it
for a short time, but it was difficult to maintain visual orientation with the low light,
so he handed the transmitter back to be and I flew until the battery crapped out. I took the J-3 Cub along to a small party that
Dave and his wife threw at their house, and after eating, we all walked across the street
to for the maiden flight. The radio was range checked, a quick preflight on the structure,
and it was tossed into the air. Thankfully, the crowd was treated to a perfectly trimmed and
flying airplane. After a few trips around the field I put it into a dive and pulled up into
a really bad loop, but everyone was happy to see it. It flew around doing low passes until
the battery ran out of power and made a nice landing in the grass. It was getting really dark
by then, but we stuck in the other battery and heaved it into the air again. Dave flew it
for a short time, but it was difficult to maintain visual orientation with the low light,
so he handed the transmitter back to be and I flew until the battery crapped out.
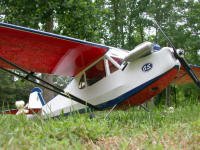
Great Planes J-3 Cub 20 w/O.S. 25 LA
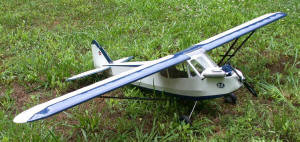 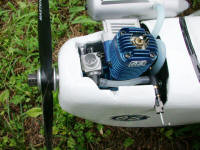
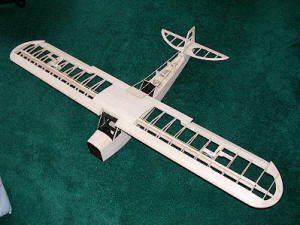
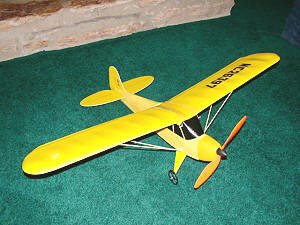
Here is my non-scale covering of the Great Planes J-3 Cub 20. It was originally covered in
an L-4 Grasshopper scheme, but my lousy eyesight made it hard to tell what was happening due
to the lack of color contrast, so I re-covered it as shown. While at it, I turned the O.S.
25 LA engine upright to eliminate the need to turn the darn thing over to start it (flooded
otherwise). I also fixed the ailerons in place to make it a 3-channel setup - the ailerons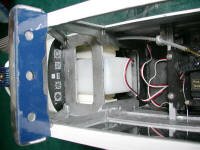 were
not very effective, so I figured why bother. were
not very effective, so I figured why bother.
 Mounting the engine far enough
out on the mount to reach front resulted in a lot of springiness, so I moved the engine back
close to the firewall and added a prop shaft extender from Fox. Mounting the engine far enough
out on the mount to reach front resulted in a lot of springiness, so I moved the engine back
close to the firewall and added a prop shaft extender from Fox.
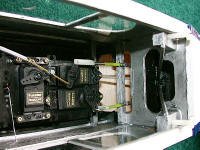
The current setup is for a Futaba radio with three S3004 standard servos. There is plenty
of room for any radio. A 6-oz. fuel tank is installed and pressurized by the muffler. I'm
going to convert it to electric power.


|


