|
Du−Bro
was the first American company to produce a radio control helicopter kit - the
Whirlybird 505. That was
sometime around 1972 It was modeled after the way free flight helicopters were built
an the engine and propeller sitting on top of the main rotor, using a free-wheeling
rotor that turned in response to the counter torque of the engine. Fixed pitch rotor
blades were controlled via a flybar assembly as was the case prior to the advent
of flybarless rotor heads. Du-Bro's next helicopter was a much-improved and very
popular Hughes 300, using a driven rotor with the engine mounted in the fuselage.
It also used a flybar for rotor control. Building off that success, they next introduced
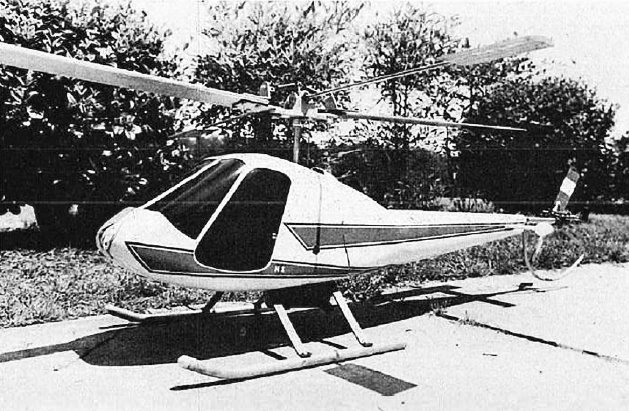
this TriStar R/C helicopter. It was smaller than the Hughes 300 and modeled
after the RotorWay Scorpion homebuilt helicopter that was
all the rage in the 1970s and 80s. Du−Bro also offered scale Hughes 500 and Enstrom fuselages for it.
See also my personal Du−Bro Tri−Star helicopter
photos. RCM published a product review of the
du−Bro Tri−Star
helicopter in the May 1975 issue.
Du-Bro
Tri-Star R/C Helicopter
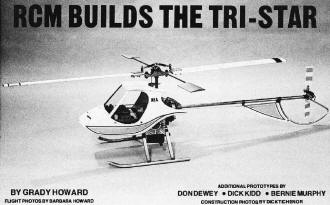 When Du-Bro introduced the Tri-Star, it
entered a market ready for a lower priced helicopter. When I received my Tri-Star
kit, I was very enthused with the simplicity of the construction. Everything was
bolted together with 6-32 x 3/8" and 6-32 x 1/4" socket head bolts and lock washers.
The Tri-Star went together in a minimum of time even when I did not have any instructions
to go by. When Du-Bro introduced the Tri-Star, it
entered a market ready for a lower priced helicopter. When I received my Tri-Star
kit, I was very enthused with the simplicity of the construction. Everything was
bolted together with 6-32 x 3/8" and 6-32 x 1/4" socket head bolts and lock washers.
The Tri-Star went together in a minimum of time even when I did not have any instructions
to go by.
Let me explain here that I am an experienced helicopter builder and flyer. I
also had been to the Du-Bro factory and previewed the original Tri-Star. While at
the factory I had the opportunity to fly the Tri-Star and to disassemble and re-assemble
it. I received one of the prototypes before the kit was released to the public.
This is the reason for my kit not having any instructions with it.

Tri-Star Enstrom fuselage.

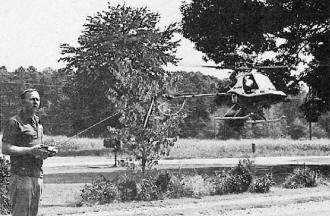
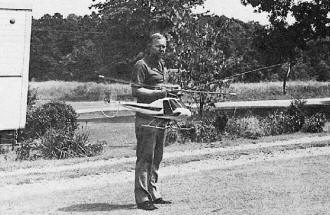
Grady Howard flies the Tri-Star without any fuselage - the best
way to learn to fly. Note flag on transmitter -windy and gusty.
The Scorpion version.
The Enstrom configuration requires 2 oz. additional weight in
the nose. All flying photos taken within 30 minutes from the first bare Tri-Star
shot.
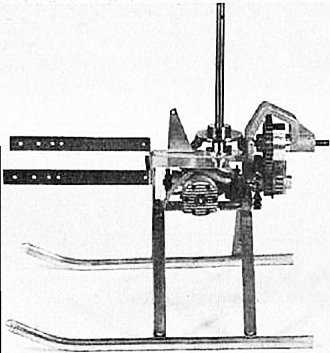
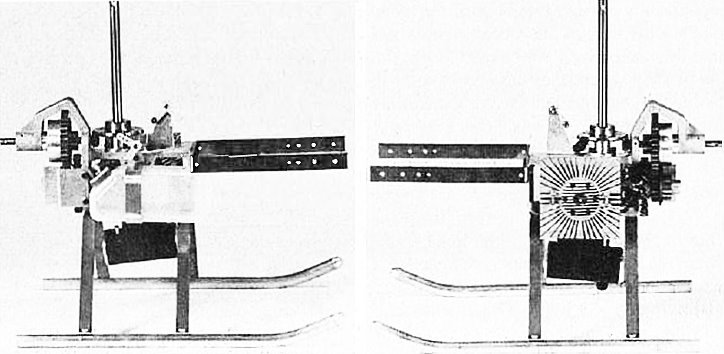
The basic Tri-Star crutch with skid braces, skids, K & B-Lee
.40 with Perry pump and carburetor; main gears, radio frame, and main rotor shaft
installed.
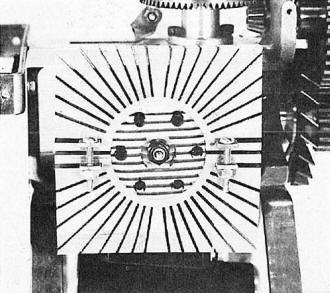
Close-up view of cylinder head side with heat shield in place.
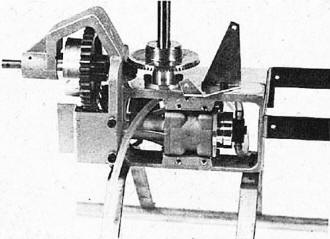
Opposite side of frame prior to tank installation.
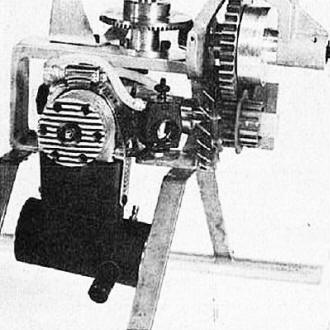
Semco super expansion muffler installed.

Fuel tank in place (left). Heat sink is now installed (right).
Close-up of method of installing heat sink.
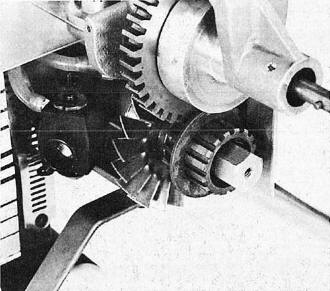
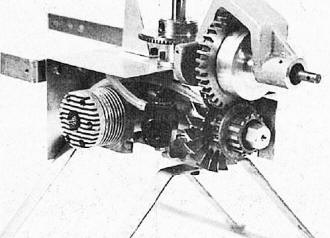
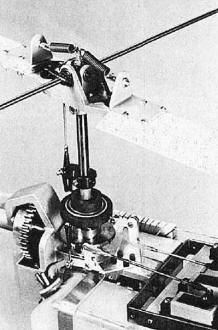
Close-up view of gear mesh. Note conventional aircraft spinner
extension added to small gear to allow direct application of electric starter if
desired. A small spinner could also be added, if desired.

Tail boom and completed drive shaft. Boom must be cut to correct
length.
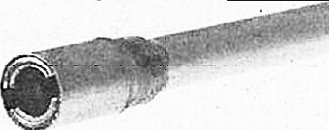
Close-up of end of drive shaft.
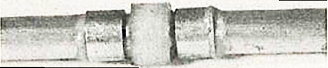
Nylon bearing installation. Stabil-It Express used to secure
tubing.
Completed tail rotor mechanism.
An aluminum strap is added from the base of the front skid to
the front of the steel brace for added support.

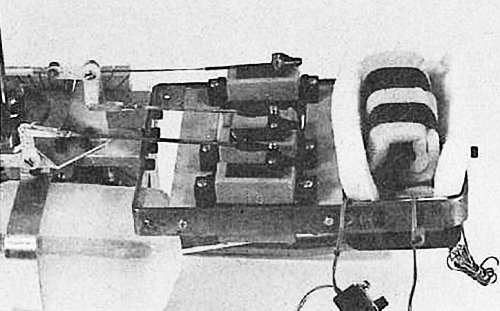
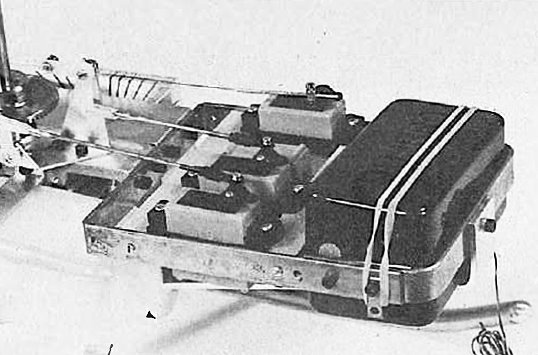
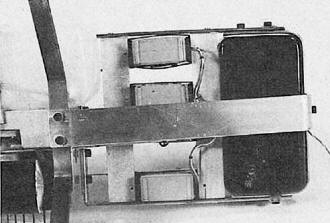
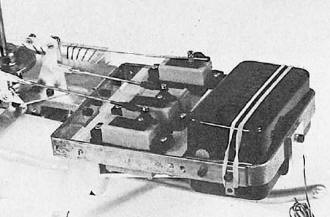
The radio equipment installed. Receiver and battery pack wrapped
in foam in plastic radio box .
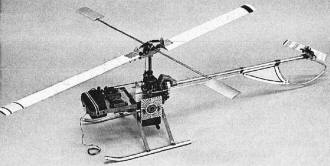
The completed Tri-Star. You can learn to fly it in this mode
or you can add the Scorpion fuselage. Enstrom and Hughes 500 bodies also available.
After a couple of phone calls to Dave Gray at the Du-Bro factory, I had the Tri-Star
ready to fly. There were only a few minor things that needed to be cleared up before
I could finish the 'copter. My first impression on that first flight was that there
was something extremely wrong with my set-up because the tail was extremely sensitive
to tail rotor control.
After talking to Dave Gray again, I found out that this was to be expected as
I was accustomed to flying a Shark that is heavier and slower to respond.
Back to the backyard again and, this time, I tried to be a little slower on the
sticks. This helped to calm the little machine down some. However, to keep the Tri-Star
from being really hard to fly, it is very important to get it trimmed out as quickly
as possible for a "hands-off" condition. Let me inject here and now, this helicopter
is going to be a handful for the rank novice and beginner helicopter flyer! The
more experienced flyer can handle the machine and really have a ball with the fast
maneuverability and quick response of the Tri-Star.
The toughness of the Tri-Star is really something! I had a flame out at approximately
200 ft. and in one hour I was back in the air flying. l did not have to replace
anything at all. I only had to straighten out the bent metal and re-set the rotor
head and blades. My machine weighed 7 lbs. ready to fly and the OS Max .40 provided
plenty of power.
After the Tri-Star was released I asked for, and subsequently received, a set
of the instructions and the exploded views that accompanied the booklet. After reading
the booklet and examining the views, I could see the problems that I had heard about
from other owners of the Tri-Star. The exploded views are very artistic but leave
a lot to be desired in building information. There were some parts views that were
backwards and some that were omitted. After talking to Dewey Broberg of Du-Bro about
this problem with the plans, it was established that there would be an addition
to the original plans using photos to help in the building. This should be of great
help to those building the Tri-Star for their first helicopter.
There were several problems and weak points that began to show up after several
hours of flying time on the Tri-Star. The most noticeable problem was that the fan
would come loose from the arbor to which it was staked (or pinged). I tried correcting
this by using silver solder but this did not hold longer than 3 flights. I then
drilled two 1/16" holes 180° apart through the fan and the arbor that it was
on. The next step was to put two pieces of 1/16" music wire, cut to length, through
the holes and brad the ends over. This has worked well with the fan pinned to the
arbor.
The next, and more serious problem, was the small gear on the engine would wear
out and break off teeth. I went through three gears before I found that I was not
getting a good gear mesh and alignment. It seems that the gears had a slight burr
on the teeth and, when setting them up with a slight amount of back lash, as specified
in the instructions, then after running, the burr would be gone and the gears then
had too much back lash. This allowed the small gear to slam into the larger clutch
gear on each stroke of the engine, thus causing breaking of teeth and total destruction
of the gear. Again, this problem bas been discussed with the Du-Bro factory and
they have now started to harden the gears, and this seems to take care of this problem.
The servo mounting frame that is hanging out front is very susceptible to bending
down on hard landings. I have added a piece of 1/2" x 1/8" aluminum strip from the
front of the frame back to the main frame where the landing gear struts are fastened.
I then fastened the strap under one of the landing gear 6-32 bolts. This, then,
holds the frame rigid and there is less vibration on the fuselage. I don't know
if this is going to be incorporated into the future kits, ·but it is a big help
in giving the machine a stronger frame. The tail rotor drive shaft has two bushings
on it that must be oiled or they will bind on the aluminum and cause excessive drag
and a terrifically loud noise.
I have now flown the Tri-Star in all kinds of wind conditions and even inside.
I still have some trouble with the sensitivity of the tail rotor when coming in
from altitude to a landing. This, I believe, is due entirely to the fact that the
Tri-Star is a little helicopter and most small helicopters respond in this fashion.
This is the same with little airplanes compared to big airplanes; the big ones usually
handle better and are generally easier to fly.
For those who are shopping for price and have lots of time to practice, then
you will like the Tri-Star. If you want a machine that will be easier to fly and
more stable even in wind, then go to a larger, heavier helicopter and leave the
Tri-Star to those who really want a challenge.
I personally enjoy the size and quickness of the Tri-Star and can really impress
the crowd with fast low level figure 8 is with 90° banked turns. I have also looped
the Tri-Star without the body on it. You must get it very high (300 ft. or more)
and dive for about 150 ft. before easing back on the stick. As the helicopter gets
in the vertical position, then you must pull full back and then watch it fall a
long way. If you have had sufficient altitude then the chopper will come out the
bottom. If not, then you must start repairing.
With the optional fuselages that are available, the Tri-Star can be a different
helicopter each day for more fun and enjoyment. The Enstrom fuselage that I have
in addition to the Scorpion fuselage, seems to slow down the speed of the tail somewhat
and the forward flight speed doesn't seem to be affected. With the Enstrom fuselage
on the Tri-Star, I can keep my orientation better because of the mass that the body
affords. For flying the Scorpion body only, a 1/32" plywood fin in front of the
tail skid helps the tail to "weathervane."
After the learning phase. is over (is it ever?) then I would suggest one of the
larger fuselages, if for nothing more than the visibility factor.
Overall I feel the Du-Bro Tri-Star is a fine small helicopter for the more experienced
helicopter flyer, but I feel that it is definitely not a beginner's helicopter.
The top of the radio box is secured with a rubber band. Plastic
box painted with K & B Superpoxy.
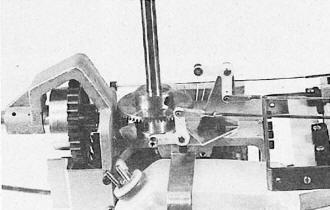
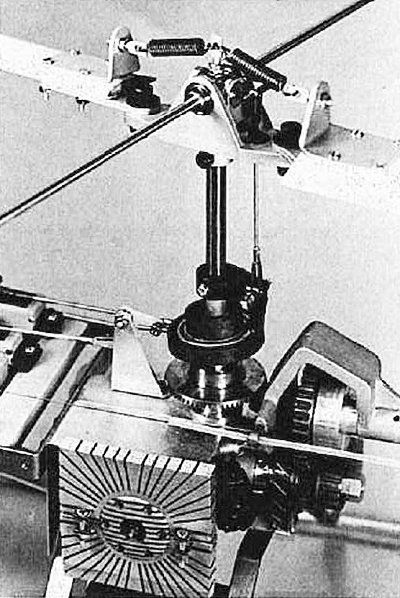
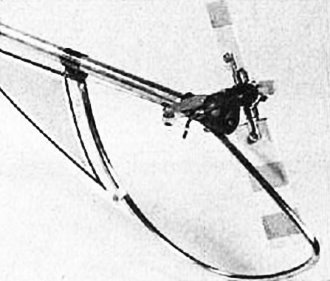
Note linkage attachment from servos to cyclic bellcranks. One
was shown reversed on our plans.
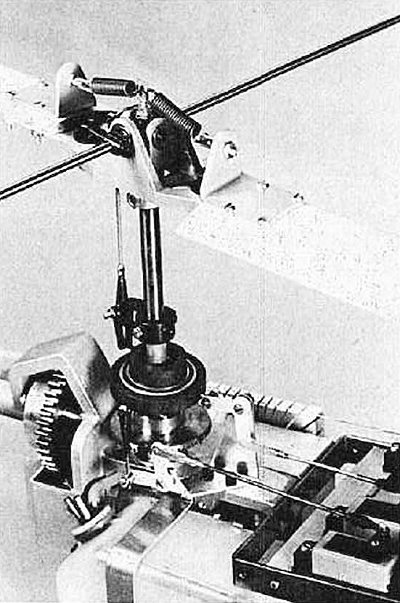
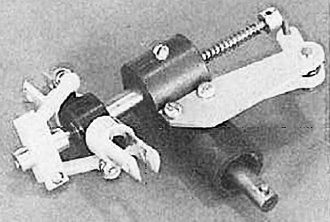
The swashplate and scissors installed. Make sure there is no
binding in latter.
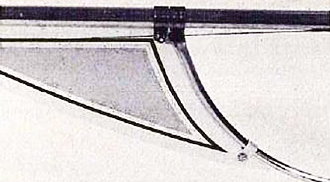
1/32" ply tail fin added to aid in weathervaning.
Tail rotor gear box and blades installed.
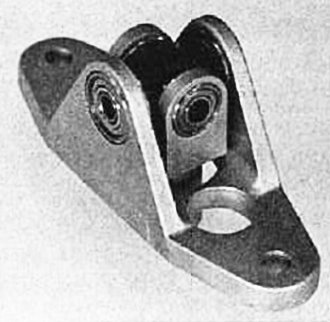
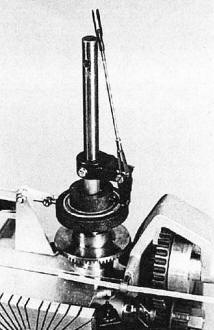
Basic head assembly with all bearings in place.
Photos above and below show both sides of the completed swash
plate and main rotor assembly.

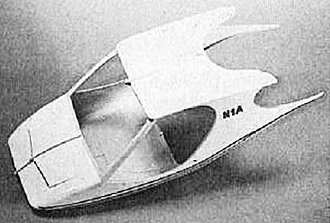
The Scorpion body shell halves joined together with Zap. Note
reinforcing piece on Inside bottom. DJ's wide trim sheets and. tape used for co/or
trim.
Posted June 1, 2019
|