If you do a Google search on Silkspan and
dope covering methods, a lot of good written instructions can be found. In fact,
I suggest you read one or two of them if you have never done a Silkspan and dope
covering job before, or if it has been a while and you want a refresher course,
or if you have tried and never been able to get an acceptable result. There is no
special skill required to obtain a really nice looking Silkspan and dope finish,
there are a couple "gotcha" scenarios that can ruin an otherwise simple process.
I believe the two worst mistakes you can make are painting dope in air that is too
humid, and using a thinner that is not entirely compatible with the dope (nitrate
or butyrate).
I decided it might be a good idea to make a video of how I have been successfully
achieving decent Silkspan and dope finishes for lo these 40 or more years. My finishes
have never won any prizes, but the tissue (Silkspan) has always been nice and taught
and the brushed dope has gone on evenly, with nice, sharp trim lines.
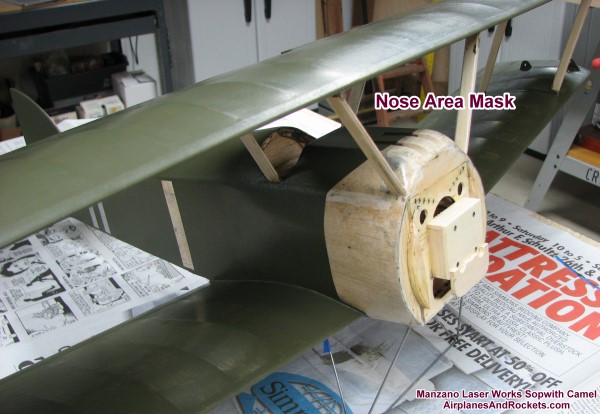
The subject of this tutorial / demonstration is a
Sopwith Camel biplane
from a Manzano Laser Works kit. My Camel first flew as a 3-channel radio controlled
model, and was covered with Monokote. It experienced an unplanned encounter with
terra firma and broke off half of the top left wing. Since I had originally planned
to build it for control line, I decided to take the opportunity to strip off the
Monokote (olive drab - the dark colored stains on the balsa
are residual adhesive tint) and re-cover with Silkspan and dope. I never
liked the idea of using plastic covering on a WWI biplane, so this time it will
look a little more authentic. Snoopy will still be the pilot, though.
Prior to recording these videos, the Camel had been completely finish sanded
and a coat of 50/50 nitrate dope had been brushed onto the balsa framework to facilitate
the Silkspan attachment later.
Because YouTube limits video durations to 10 minutes, it is necessary to break
the tutorial into multiple parts.
Part 1 is mostly an introduction to the concept of tissue covered
models and the two types of dope - nitrate and butyrate. It also covers tools needed
(sharp razor blade, paint brushes, tack cloth, etc.), and the topic of covering
compound curves.
Silkspan Covering - Part 1
Part 2 is A discussion about the logistics of partitioning the
covering pieces to best accommodate the airframe is given, along with preferred
grain orientation. It covers where to apply the base coat of dope to the wood framework,
and where not to apply it. A demonstration is given of how to seal the loose edges
of the newly applied and dried Silkspan
Silkspan Covering - Part 2
Part 3 introduces safety concepts, and discusses the compatibility
issues of nitrate and butyrate dopes, along with demonstrating how to identify the
Silkspan's grain and shiny vs. non-shiny side, if applicable. Wetting and applying
the Silkspan to one of the wingtips is also shown.
Silkspan Covering - Part 3
Part 4 shows how to trim the overhang from the newly applied
Silkspan. A demonstration is then given on how to properly cover the wingtip's compound
curves. Supermodel Melanie, who has been graciously operating the camera, makes
a cameo appearance. In case you were wondering (you probably
weren't), I kept looking down toward the end of the movie because our cat wandered
into the room and began rubbing against the camera tripod, and I was making sure
she couldn't tip it over.
Thanks for watching.
Silkspan Covering - Part 4
Update(5/1/2010):
While preparing for Part 5, I came across a couple items that
should be included in this tutorial.
The first is a method for trimming pieces of Silkspan that are too small to grasp
with your fingers while cutting with the X-acto blade. Being wet makes it even more
challenging. I use a pair of tweezers that has flat tips about 1/4" wide to grab
the Silkspan. Those same tweezers work great when applying the wet Silkspan and
a small section folds over onto itself and is difficult to unstick. They are also
good for grabbing an edge of wet tissue to pull it tight across an open span like
across wing ribs.
(click for a larger image)
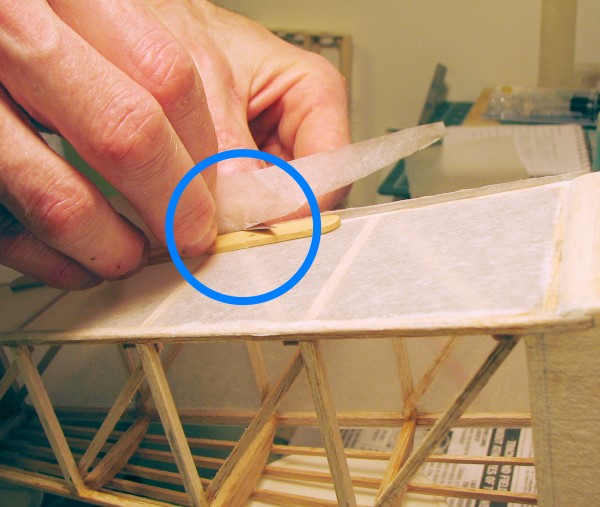
The second is a method for achieving a constant width trimmed edge for creating
an overlap area. I use a popsicle stick, which is about about 3/32" thick, to sit
on the edge of the framework, and then run the X-acto blade along the top of it.
Keep shifting the popsicle stick as needed until you have trimmed the entire edge.
If you need a larger overlap, use tape two together or use a piece of hard balsa.
just earned an honored spot in my great hobby shops list. Back in April, I placed
an order for a bunch of Brodak dope for use on my
Sopwith Camel. They were
chose because of having the best price I could find. After finally getting around
to using the dope, I notice the Cessna White was missing, so I wrote asking them
to see if it was ever shipped. Their records confirmed it had not been included
in the order, so they are sending it now. That is the kind of honesty that deserves
recognition!
I finally completed the wing repair and totally refinished the entire Camel.
About a pint of acetone and lots of paper towels were used to wipe the color coat
of dope off the entire airframe. Then, a couple coats of clear were applied, and
a couple coats of white base color. Sanding was done every other coat. Even with
the white base, it took five coats of yellow to get a good opaque color. Just two
coats of olive drab green were needed, and three coats of Insignia red. Prior to
painting, two additional coats of white were applied in all the areas where white
would be needed in order to avoid having to brush many coats of white over color.
When the weather warms up, I plan to spray a light coat of clear over everything.
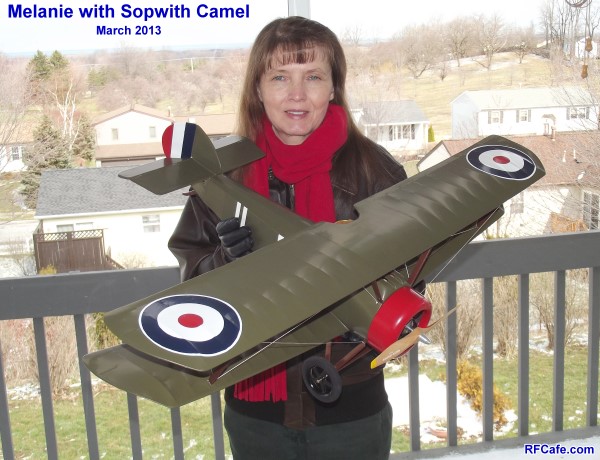
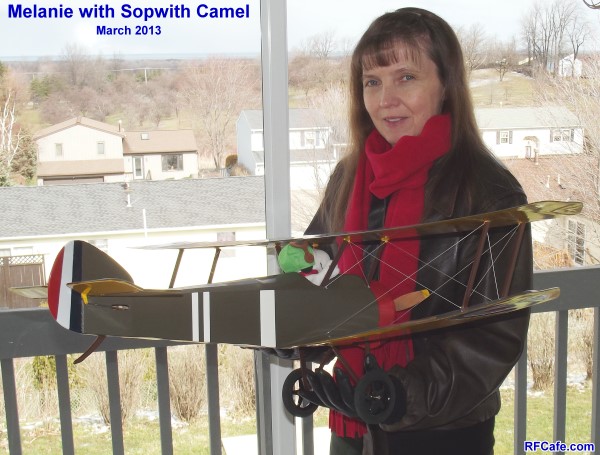
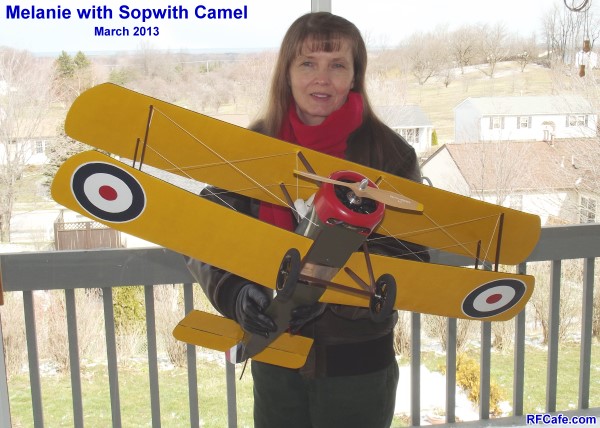
Melanie with the Manzano Laser Works Sopwith Camel set up
for electric-powered control line.
About Airplanes & Rockets
Kirt Blattenberger
Carpe Diem! (Seize the Day!)
Even during the busiest times of my life I have endeavored to maintain some form
of model building activity. This site has been created to help me chronicle my journey
through a lifelong involvement in model aviation, which
all began in Mayo, MD
...
Copyright 1996 - 2026 All trademarks, copyrights, patents, and other rights of ownership to images
and text used on the Airplanes and Rockets website are hereby acknowledged.