|
Website visitor Merle S. wrote to
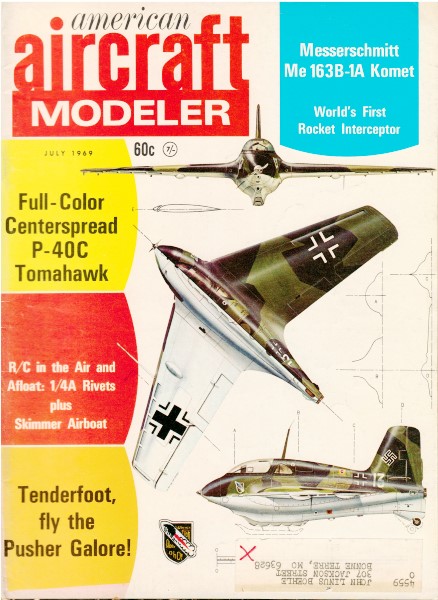
ask for a scan of Owen Kampen's .02 "Rivets." It appeared in the July 1969 American Aircraft
Modeler on page 19. In 1969, a 26" wingspan, .02-powered model with rudder-only R/C was
doing well to weigh only 10 oz. With today's micro systems, a "full house" system could
be installed with the same weight. I scanned my purchased copy of the magazine and ran
the page through an OCR program to extract the text. Images were edited to make them
legible.
Owen Kampen
designed many models, and had a few of his designs kitted by Ace R/C.
.020 "Rivets"
By Owen Kampen
Tiny rudder-only version of great Formula-1 pylon racing plane is fast, groovy, and
responsive.
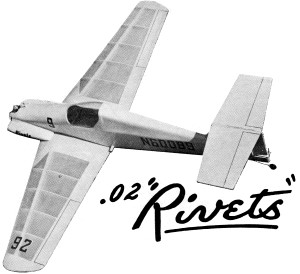
Sweeping by in a high-G pylon turn, the Rivets heads for the straight.
Perhaps it is not really going 100 mph, but it sure looks like it!
THINK small! Until recently the size of an R/C model was dictated by the size and
weight of its electronic payload. Now with the availability of systems in the 3-ounce
or less range, many small models are possible. Rivets is one. True to its prototype,
it is small in size but not in performance. It's a mover, fast and responsive, not for
slow reflexes and definitely not for the novice.
In this day of big displacement engines, the tiny Cox T.D. 02 powerhouse tends to
be regarded as a cute novelty. Don't be misled for this engine-airframe combination can
create plenty of excitement on rudder only. While fast, it is also honest, a groover
in the turns, with a flat power-off glide when properly trimmed and balanced.
When designing small planes I have tended to avoid a low-wing configuration for rudder-only
use as the need for excessive dihedral tends to destroy scale-like appearance. Being
aware of the fact that a sharply racked-back leading edge contributes to dihedral effect
I have long considered Rivets as a possible answer.
The T-tail effect was also something I wished to learn more about. It seemed ideal
for permitting uninterrupted airflow to the rudder, rather important when that's all
you've got. Flight performance has borne this out as this little one really reacts to
a command.
Not wanting to re-invent the wheel, use was made of many photos and drawings, and
a special kudo is due Joe Foster for his unknowing contribution. The small one was completed
shortly before the '68 Mid-winter Toledo Conference and there re-ceived considerable
interest from spectators and judges alike.
Surrounded by large ambitious projects, the little Rivets seemed lost but before long
it became apparent that it possessed a special appeal. For reasons still not clear, everyone
wanted to touch - pet - bounce and hold it. I had thoughts of renaming it "CUDDLES."
Rivets claimed a victory and came home with an award half as large as itself and all
was well except for a nagging doubt. Would the cute thing fly? Well, it almost didn't.
Early attempts with Dick Adams at the controls were borderline at best and at times
almost disastrous. Behavior was erratic and at least 150 feet were necessary for recovery
from steep spiral dives. One ses-sion was enough and Rivets was retired to a hook on
the wall - head down in disgrace. I salvaged my damaged pride with the philosophical
observation that "you can't win 'em all." It was Rivets' first defeat. For several weeks
other projects took priority and Rivets was allowed to gather dust.

Real Rivets is a consistent winner. It is of all-metal riveted construction.
Heavier than other racers, it is aerodynamically cleaner and faster. "T" tail smaller
with less drag.
All would have ended there had it not been for a visit from Carl Goldberg. After giving
his usual fine talk and demonstra-tions for a record MARCS turnout, we spent a delightful
evening together. At one point attention turned to the "hung up" Rivets and its failure
to perform. Carl looked things over and then chided me for giving up so easily - for
not accepting the challenge of the designers' art. His words really reached me and, feeling
a little ashamed, I went back to problem solving.
Fin area was reduced, stab area enlarged, CG moved forward and VOILA! the aerodynamic
problem was identified and solved. Careful inspection showed it to be a binding linkage
at the actuator! In such ways are we humbled. Embarrassing as the experience was, it
is mentioned only to serve as a reminder that attention to "obvious" details can and
do spell the difference be-tween success and failure.
Now a word here about the guidance system. As space and weight are limited, a small
package is a definite must and the Adams Baby Actuator is coupled with Ace Radio Control's
Commander DE superhet receiver which is designed for actuator use with the "add-on-switcher"
built into the circuit. The small size and weight plus excellent range and sensitivity
make this a winning pulse proportional combo at a bargain price. Two 225 mAh nickel-cadmium
button cells and a small switch complete the works at an all up weight of about 2-½ ounces.
Any rudder only or Galloping Ghost pulse transmitter will handle the remote controlling.
Just be sure to follow actuator instructions with care - no binding link-ages for instance.
Also, no pushrods here - torque rod only and please keep the battery voltage at 2.4V.
for the whole works. The actuator can be mounted on a 1/16" ply slide for quick removal.
Trim and Flying: It is important to remember that all small airplanes
are subject to scale effect. To simplify, this means that wing loadings of 10-15
ounces per square foot on a wee-one are the equivalent of a 20-30 oz. loading on a five
or six foot model. The exact ratio is not important here but the principle is. With limited
area a wing must fly faster to create lift, with the result that there is less speed
spread between power on and power off. Because of this, trim and balance are more critical.
The little ones are less forgiving. Rivets is no exception.
You will find that 1/32" of stabilizer trim has a positive effect on performance and
small changes of the CG or balance point do likewise. Regarding the latter - because
of the wing taper, the CG as shown on the plans must be measured balancing the plane
at the wing roots - not the tips. It's easier to measure with the ship held upside down.
A forward CG will give you a more stable tracking flight with less noticeable stabilizer
trim effect - while a forward CG will produce an opposite effect. The force arrangement
shown on the plans gives a fast grooving flight but not for loops - be sure you have
plenty of altitude before holding the nose down, for recovery takes lots of air space.
A final comment on landings. Set up the approach and leave it alone! Major last minute
corrections will only dump lift and the plane as well. As mentioned, when properly trimmed,
the glide is fast and flat - if you don't disturb it.
While the foregoing comments may seem on the negative side, they are not intended
as such. A scale racer such as Rivets has been designed to do certain things well at
the expense of some limitations which should be respected. This is just common sense.
A trainer it is not. An exciting performer it is. To put it another way - Bill Falck
did not design his racer to replace the J-3 cub.
CONSTRUCTION NOTES
Fuselage: Cut out the sides from rather stiff 1/16" sheet balsa.
Locate and glue F2 and F3 in place on the right side. When dry, glue the left side in
place holding down with weights and/or pins. Use con-tact cement to add the 1/16" sheet
vertical doublers between F2 and F3 and glue the 1/8" square stringers to the bottom
of the sides. Glue and clamp the rudder post in place. Make sure it's vertical.
Install 2-56 blind nuts in F1 to take the .02 engine bolts and epoxy F1 in position
at the indicated side and down thrust angles. Locate and glue F3A and when dry add the
1/16" sheet rear decking. Sand the bottom edge to fit the sides and use a block to sand
the top edges flat.
Add the soft 1/4" sheet top to cap the deck and add the fin, being careful to align
straight. Round off the corners of the deck and use plastic balsa to fillet around the
base of the fin. Add the stabilizer saddle to the top of the fin and brace with a 1/4"
triangular strip. Be sure there is zero degrees incidence. Add the 1/8" square strips
to F1 and F2 and glue cockpit dash panel F2A in place. Add 1/16" cross-grain cockpit
"floor."
Cover the forward fuse top with 2 pieces of soft 1/16" sheet, moistening them on the
outside so they will bend without splitting. Take time to fit carefully before gluing.
Add 1/4" nose doublers and install a ½ oz. tank or make one of thin brass. A cylinder
1-1/4" long by 7/8" diameter will give double the normal Cox tank time. (Note: if the
regular Cox tank is used, the motor bulk-head F1 should be positioned 7/16" further back
than shown on plans.)
Glue the ½" bottom nose block in place and round to shape. Carve the cheek blocks
and oil cooler fairing and glue in position. Leave the bottom face of the cheeks until
they can be fitted to the leading edge of the wing. Around the tank and battery compartment
use foam - use white glue to avoid "melting" the foam.
Install the torque rod and finish sheeting bottom. Don't add the cut down canopy until
ready to paint. Don't add the rudder until all doping is completed and dry. Keep your
finish light: 1 sealer, 2 coats of clear, 2 color and one clear should do it.
Stabilizer: Choose light wood. The 3/16" x 3/32" edging helps considerably
to reduce warping.
Wing: Locate rib notches from the plans. Make sure the landing gear
is firmly anchored. Covering was colored silk and clear dope. Again - keep it light.
Attach the wing to the fuse for the addition of the back section of the oil cooler and
soft block to blend in with the fuse bottom. Anchor the forward wire hold down hooks
with epoxy.
Try different wheels if the CG needs adjusting, Good luck and have a ball!
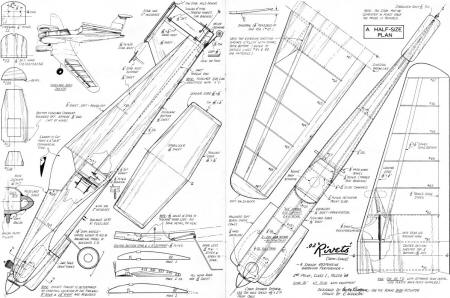
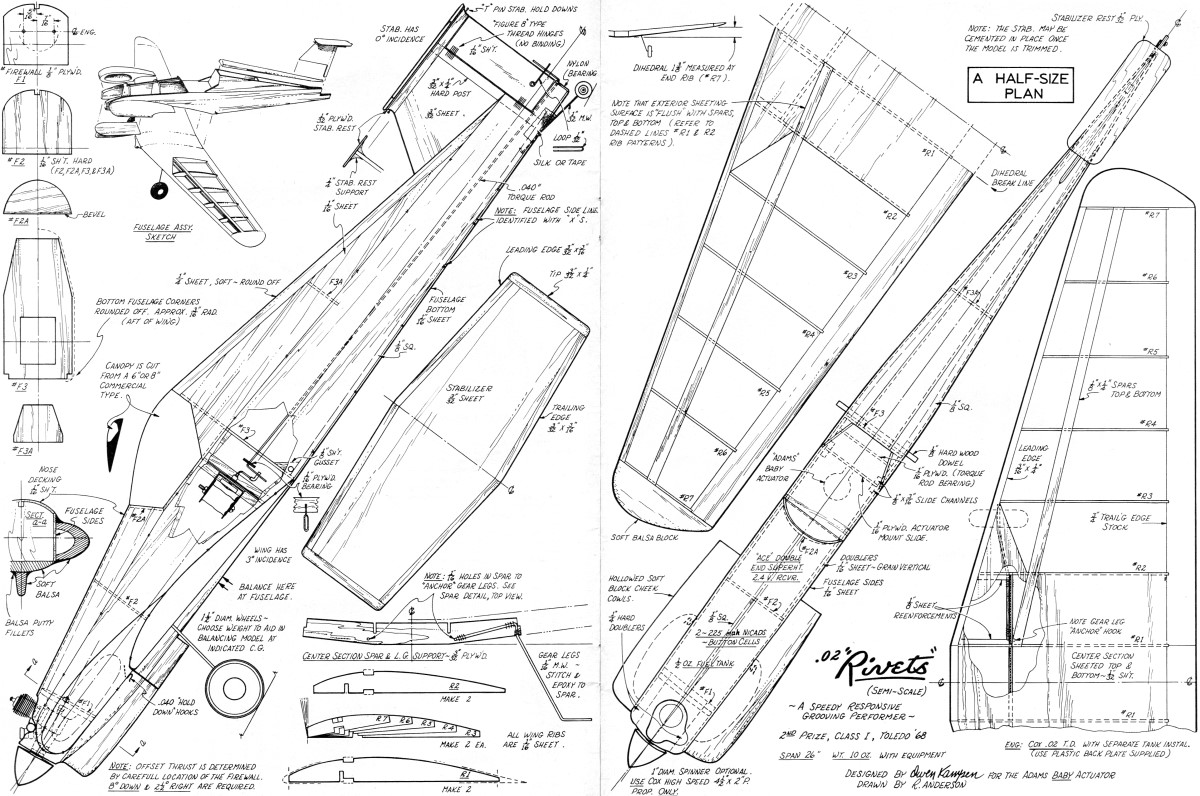
.02 "Rivets" Plans <click for larger
version>
Notice:
The AMA Plans Service offers a
full-size version of many of the plans show here at a very reasonable cost. They
will scale the plans any size for you. It is always best to buy printed plans because
my scanner versions often have distortions that can cause parts to fit poorly. Purchasing
plans also help to support the operation of the
Academy of Model Aeronautics - the #1
advocate for model aviation throughout the world. If the AMA no longer has this
plan on file, I will be glad to send you my higher resolution version.
Try my Scale Calculator for
Model Airplane Plans.
Posted March 14, 2011
|