|
Airplanes and Rockets visitor
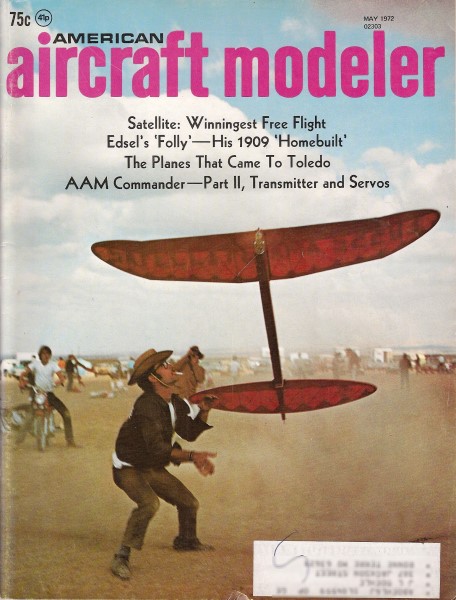
Jochen S., a school teacher from Germany, wrote to request that I scan this Super
Sabre Trainer (SST) article that appeared in the May 1972 edition of American
Aircraft Modeler magazine. The SST reference had marketing gravitas in the
day because of the public fascination with the Supersonic Transport (SST)*. The Super Sabre Trainer is a ½A control-line model
designed by Dean Swift for his 6-year-old son to learn to build and fly C/L airplanes.
It is a simple, profile fuselage with sheet balsa surfaces. Jochen wants to use
the SST in a program to introduce students to aircraft modeling. He says they will
also benefit from trying to read the article in English and to convert inches to
metric units.
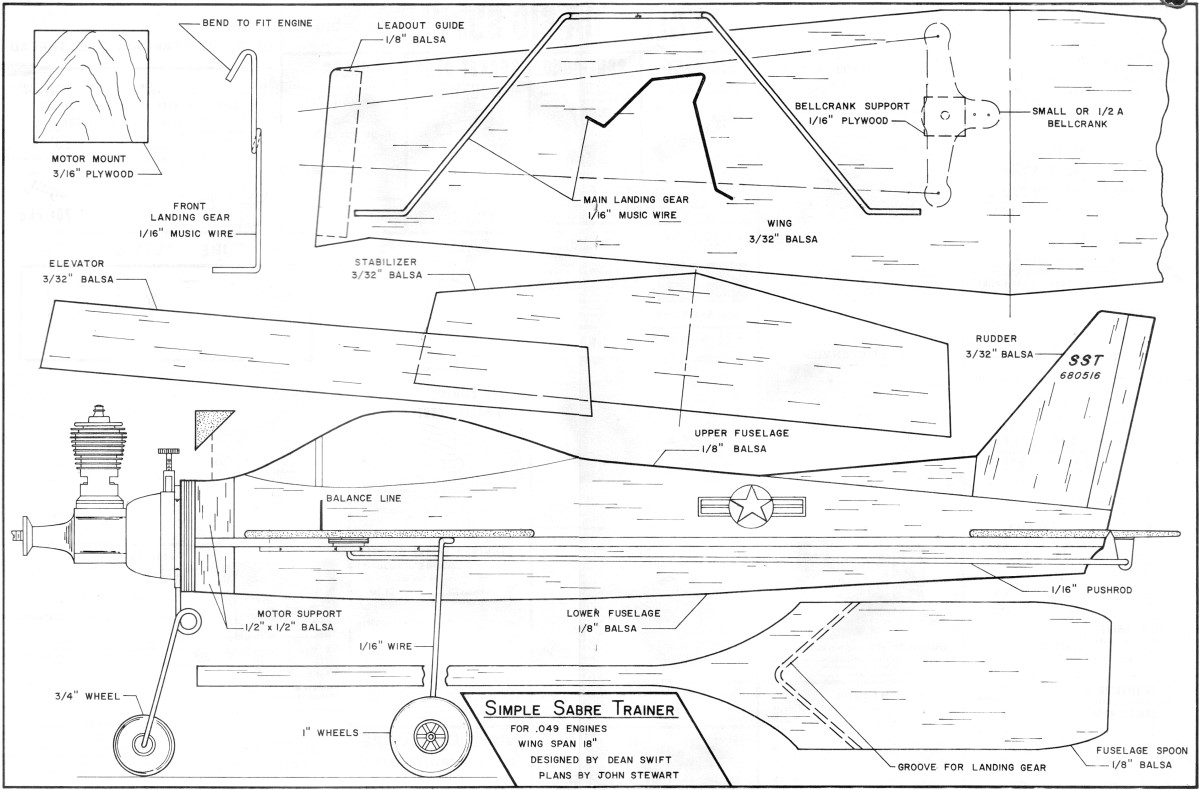
Super Sabre Trainer
 by Dean Swift and John Carr
Designed by a 43½-year-old avid free-flighter for his 6-year-old son to fly.
He did (fly) and so can you. A carefully designer trainer.
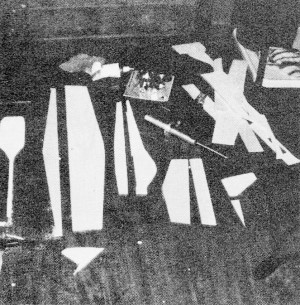
First step is to cut out all the parts.
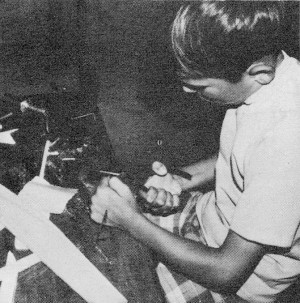
With pliers, bend the gear wires to shape.
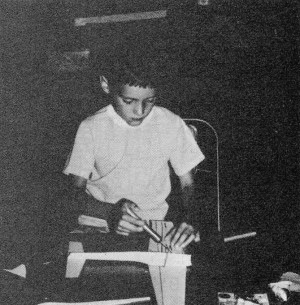
Here he's gluing his fuselage.
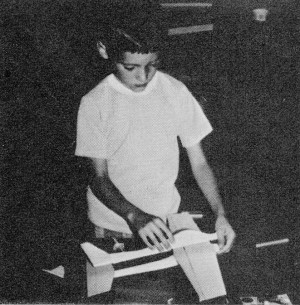
Top of fuselage and rudder are glued over the wings.

Painting is most important to prevent fuel from soaking into
the wood.
Alright, let's face it. ½A U-Control trainers are a dime a dozen. Construction
goes something like this: Peel the bark off the wood and paint until your arm gets
tired. This results in a heavy, sluggish flying plane. Due to the extra weight should
the flier make a miscue, this type of plane has been known to attack the ground
with extra vigor, and the flier goes home carrying more pieces than he started out
with.
 So there you are back in the basement with
a heap of trash. Despair hangs heavy in the air. Is it all worth it? But wait! Isn't
that a cloud of dust on the horizon? It is! It's the SST (Simple Sabre Trainer)
- the solution to all your problems. So there you are back in the basement with
a heap of trash. Despair hangs heavy in the air. Is it all worth it? But wait! Isn't
that a cloud of dust on the horizon? It is! It's the SST (Simple Sabre Trainer)
- the solution to all your problems.
The SST is lightweight (notice the thinner sheets) and flexible, but not weak.
Check that spoon-type fuselage construction - the SST gains its strength through
brains not brawn. Sleek lines don't cost extra either. It has a tricycle landing
gear for real jet-like appearance and smoother takeoffs and landings. And fly? You
haven't seen anything like it west of the Pecos. With a zippy engine and an experienced
wrangler on the handle, the SST will loop, fly inverted, and do a recognizable figure
eight. Yet it is a tame old mare for the Tenderfoot. One more thing before you start
to build. I'll make a deal with you. If you promise to pick out the lighter sheets
of wood at the hobby shop, and go easy on that colored dope, I'll tell you a secret
if you haven't already guessed. The SST was designed by a 43½-year-old avid free-flighter
for his six-year-old son to fly. He did it and so can you.
Construction
The SST goes together quickly. Begin by cutting the wing and stabilizer from
3/32" sheet balsa. The outlines may be transferred by first laying the balsa under
the plans, then, using a com-mon pin, punch through the plan into the wood along
the outline at approximately one-inch intervals. Remove the plans and cut between
pin holes using a razor blade or hobby knife and a straight edge such as a ruler
for a guide.
Cut out the spoon and lower half of the fuselage using the same procedure. Lay
the plans on top of the spoon and mark the "V" groove for the landing gear with
your pin. The "V" groove may be made by scoring the spoon with the end of a screwdriver
or a dull pencil point. Be sure to cut the angle on the front of the spoon for thrust
offset. The main landing gear is next. Cut a piece of 1/16" music wire 10½" long.
Bend at the center into a "V" shape which matches the "V" on the spoon. Mark the
wire where it crosses each edge of the spoon and bend back 90 degrees at these marks.
All you need do now is bend the ends of the wire up for the axles as shown on the
front view of the landing gear. While you have the wire handy, bend the nose gear
as shown. If you don't have a wire bender you may omit the coil.
You now have enough parts to begin assembly. The wing and fuselage assembly is
built upside down. Draw a center-line on the wing and stabilizer as shown on the
plans. Draw a line 14" long on your work board. Pin wing and stabilizer to work
board upside down (with their centerlines up). These centerlines should, be parallel
to and directly above the line drawn on your board. Be sure that the distance between
the trailing edge of the wing and leading edge of the stabilizer is the same as
shown on the plans.
Glue the spoon to the wing and stabilizer with the main gear sandwiched in the
"V" groove between the spoon and the wing. Next glue on the lower half of the fuselage.
Remember that the whole assembly is upside down on your work board at this point.
While this is drying, cut out the upper half of the fuselage (be sure to notch for
the wing); also cut out the rudder, elevator and motor mount. Glue the rudder to
the upper half of the fuselage. "When viewed from the rear, the rudder tab should
be offset 1/8" to the right.
When the fuselage-wing assembly is dry, remove the board and glue on the top
half of the fuselage and motor mount. After it is dry, complete the basic structure
by adding the ½ x ½" triangular motor mount supports and the elevator (cloth hinges
may be used). Now is the time for sandpaper. Sand the entire plane lightly. Next
add the bellcrank mount, the bellcrank, 1/16 pushrod, control horn and lead-out
guide. The lead-out guide is scored to allow passage of the lines.
It's painting time - let's keep it light while trying to make it pretty. One
or two coats of clear dope (mixed about three parts dope and one part thinner) with
a light sanding after each coat is enough. Then one or two coats of color thinned
in the same manner. Use red, blue or any other darker color as they tend to cover
faster with fewer coats. Install motor with four wood screws. Wheels are added next,
and then you're ready to fly.
 Flying Flying
Balance the airplane at the line shown on plans. Add weight to the nose or tail
as required. Use 20 to 25 ft. ½A nylon control lines.
Early test flights should be flown when winds are light and calm. The SST will
RoG (rise off the ground) or may be hand launched. Always release on the downwind
side of the circle with the plane pointed slightly outward from the flier. Control
movements may be limited during the first flights by sticking two straight pins
through the wing to limit the movement of the bellcrank. As your confidence builds,
you may remove the pins and add a 3/8" wide strip of balsa to the trailing edge
of the elevator for more aerobatic flying.
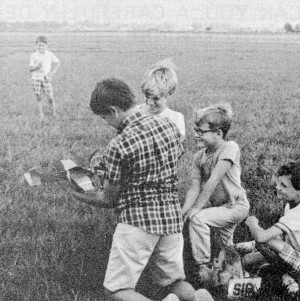
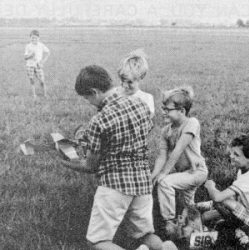
Apparently this group of beginners shares one engine.
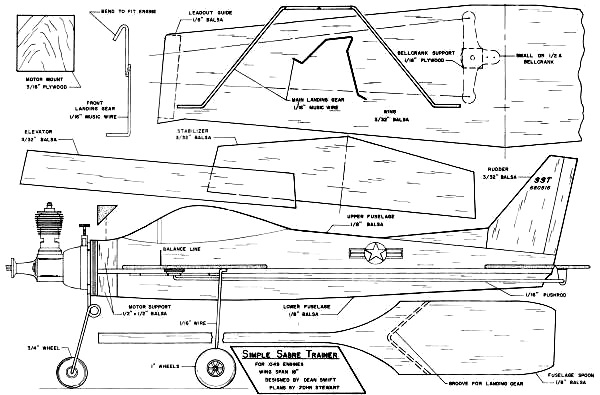
Super Sabre Trainer Plans
<click for larger version>
Notice:
The AMA Plans Service offers a
full-size version of many of the plans show here at a very reasonable cost. They
will scale the plans any size for you. It is always best to buy printed plans because
my scanner versions often have distortions that can cause parts to fit poorly. Purchasing
plans also help to support the operation of the
Academy of Model Aeronautics - the #1
advocate for model aviation throughout the world. If the AMA no longer has this
plan on file, I will be glad to send you my higher resolution version.
Try my Scale Calculator for
Model Airplane Plans.

 |
 |
Supersonic Transport (SST) |
Airplane Models & History
(content generated by ChatGPT)
 The Supersonic Transport (SST) was a type of aircraft that could travel faster
than the speed of sound. The first SST to enter service was the Concorde, which
was jointly developed by France and the United Kingdom and made its maiden flight
in 1969. The Supersonic Transport (SST) was a type of aircraft that could travel faster
than the speed of sound. The first SST to enter service was the Concorde, which
was jointly developed by France and the United Kingdom and made its maiden flight
in 1969.
The idea of developing an SST began in the 1950s, as a result of the growing
demand for faster air travel. The United States and the Soviet Union both began
research into SSTs, but it was the Anglo-French collaboration that resulted in the
Concorde.
The Concorde was a remarkable engineering feat, capable of reaching speeds of
Mach 2.04 (more than twice the speed of sound) and cruising at an altitude of 60,000
feet. Its development was a major undertaking, with extensive testing and modifications
made to its design to ensure it was safe and reliable.
The Concorde entered service in 1976 and operated for 27 years before being retired
in 2003. During its operational lifetime, it carried more than 2.5 million passengers
and completed over 50,000 flights.
Despite the Concorde's success, the SST program was not without its challenges.
The cost of developing and operating the Concorde was high, and the aircraft's noise
levels and fuel consumption were criticized. In addition, the crash of an Air France
Concorde in 2000, which killed 113 people, led to concerns about the safety of the
aircraft.
As a result of these challenges, no new SSTs have been developed since the Concorde.
However, there is ongoing research into new supersonic aircraft designs that aim
to overcome the challenges faced by the Concorde and make supersonic travel more
accessible in the future.
 This
content was generated by primarily the ChatGPT (OpenAI),
and/or Gemini (Google),
and/or Arya (GabAI),
and/or Grok
3 (x.AI)
artificial intelligence (AI) engine. Some review was performed to help detect
and correct any inaccuracies; however, you are encouraged to verify the
information yourself if it will be used for critical applications. In some
cases, multiple solicitations to the AI engine(s) was(were) used to assimilate
final content. Images and external hyperlinks have also been added occasionally.
Courts have ruled that AI-generated content is not subject to copyright
restrictions, but since I modify them, everything here is protected by RF Cafe
copyright. Many of the images are likewise generated and modified. Your
use of this data implies an agreement to hold totally harmless Kirt
Blattenberger, Airplanes and Rockets, and any and all of its assigns. Thank you.
Here are the major categories: This
content was generated by primarily the ChatGPT (OpenAI),
and/or Gemini (Google),
and/or Arya (GabAI),
and/or Grok
3 (x.AI)
artificial intelligence (AI) engine. Some review was performed to help detect
and correct any inaccuracies; however, you are encouraged to verify the
information yourself if it will be used for critical applications. In some
cases, multiple solicitations to the AI engine(s) was(were) used to assimilate
final content. Images and external hyperlinks have also been added occasionally.
Courts have ruled that AI-generated content is not subject to copyright
restrictions, but since I modify them, everything here is protected by RF Cafe
copyright. Many of the images are likewise generated and modified. Your
use of this data implies an agreement to hold totally harmless Kirt
Blattenberger, Airplanes and Rockets, and any and all of its assigns. Thank you.
Here are the major categories:
Airplane Models & History |
Helicopter Models & History |
Rocket Models & History | Aeronautical &
Aerospace History | Aeronautical &
Aerospace Companies | Aeronautical & Aerospace Pioneers |
Aeronautical & Aerospace
Terms & Definitions
|
 |
|


 |
|
Posted April 5, 2023
(updated from original post
on 1/11/2011)
|