|
Website
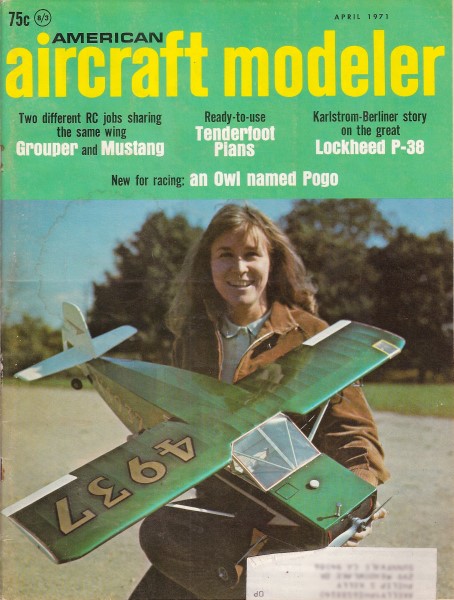
visitor Truman C. wrote to ask me to post the article for the Stringless
Wonder free flight model that appeared in the April 1971 edition
of American Aircraft Modeler. AMA still sells the plans for a mere
$3 through their
AMA Plans Service. Bill Hannan's motivation for designing this
model, AKA "Ben Franklin's Revenge," is quite interesting. Read
the article to find out why.
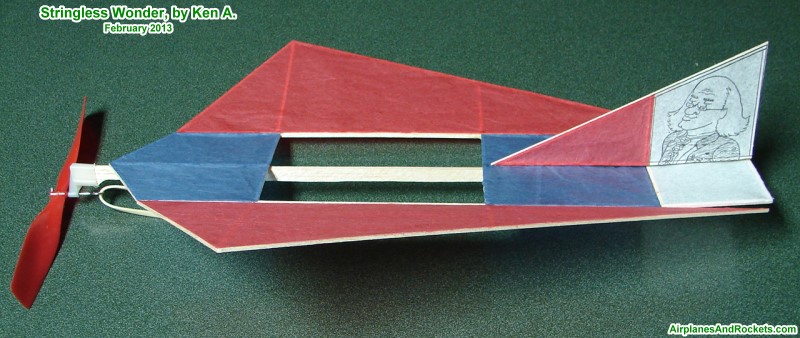
Feb 2013 Update: See
the amazing
Stringless
Wonder
photo submitted by Ken A.
For the Tenderfoot: Stringless Wonder
  Bill
Hannan Bill
HannanA free flight kite, alias Ben Franklin's Revenge,
uses rubber motor for its own wind. HERE'S A
LOW-COST project which can be completed in a few hours and which
is guaranteed to attract attention! Stringless Wonder is the result
of a desire to enter something out-of-the-ordinary in a local kite
contest. I've always enjoyed flying kites but, like Charlie Brown
of "Peanuts" fame, I generally ended up with tangled strings. Solution?
Eliminate the string! The prototype of Stringless
Wonder was accepted as a legitimate entry at the kite contest by
the judges, who finally decided that my entry simply "made its own
wind!" To see just how far rules could be pushed, I also entered
my scale towline glider, and it was also welcomed, which goes to
show that there are still unexplored ways to have fun with this
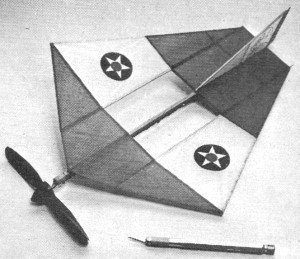
hobby. Kites have traditionally been colorful, and
Stringless Wonder is no exception. The original is red, white, and
blue, but why not let your imagination be wild and really be creative?

Mr. Ken A. submitted this excellent example of a Stringless
Wonder that he built after reading the article here. Thanks,
Ken!
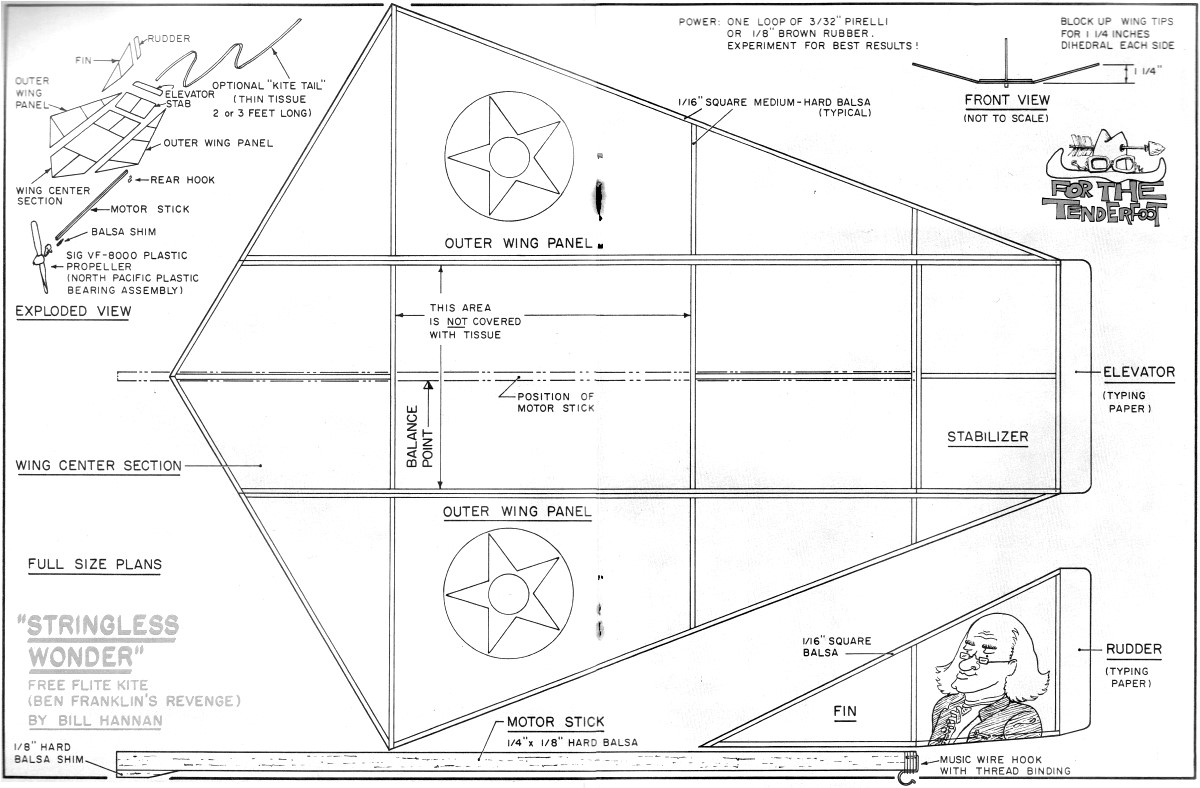
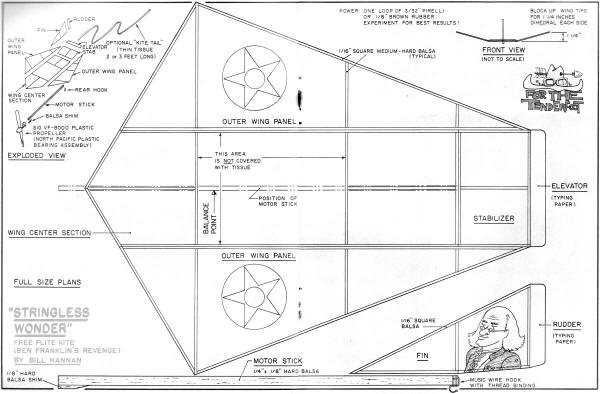
Not-so-obvious detail is absence of covering material at center.
See plan.
Construction The plan is full-size and should be covered
with plastic wrap or waxed paper. Select several straight medium-hard
1/16" square balsa strips, and cut them to the length shown. Cutting
the long pieces first will minimize waste. Take time to achieve
good fits for maximum strength as well as neat appearance. The outer
wing panels and stabilizer are not glued to the wing center section
until after they are covered. After the frames have
dried thoroughly, cover them on the top side only (the fin is covered
on just one side) with lightweight tissue. It may be applied with
clear dope or thinned-out white glue. To prevent warping, pin or
weigh the parts to the building board for an hour or two, while
the tissue adhesive dries. Do not water shrink or dope the covering,
as it would surely distort. Motor Stick: Select a
straight, very hard 1/4 x 1/8" balsa strip and cut it to the length
shown. A scrap of 1/8" balsa is glued to the underside of the motor
stick to shim it to the size required for a North Pacific propeller
bearing as-sembly. This is the type of plastic thrust bearing which
is furnished with Delta Dart kits (AMA Cub), North Pacific Skeeters,
and Sleek Streek ready-to-fly models. The rear rubber motor hook
is bent to shape from a thin-wire paper clip and bound to the rear
of the motor stick with thread and glue. Don't get carried away
with the amount of thread, or the resulting lump will prevent the
wing from seating properly. Only a few turns of thread are needed.
Assembly: The perspective drawing shows the relationship
of the various parts. First, place the wing center section flat
on the building board and weight or pin it in place. Next, glue
on the outer wing panels, adding suitable blocks under each tip
for 1-1/4" dihedral per side. Allow plenty of time for drying. Turn
the assembly over and add a little extra glue in the V slots at
the dihedral joints. Use discretion, as an excess of glue may soften
the joints, and the dihedral will be lost. Next, glue
on the motor stick in its correct location. Add the vertical fin,
centering it carefully. Then the stabilizer may be installed. It
is glued to the underside of the fin, creating an incidence angle.
The small paper rudder and elevator (typing paper) are glued in
place next. The optional kite tail is made from tissue
about 1/4 in. wide, and two or three ft. long. This is strictly
for effect, and helps create the illusion of a kite while flying.
An overly long tail will add excess drag and reduce performance.
Propeller:
The prototype model performed best with a 5-1/2" dia. plastic VF-8000
propeller, which may be obtained from Sig Mfg. Co. This propeller
features a neat spinner and also an effective free-wheeling device.
The model also has been flown with other plastic props, including
the Kaysun 4" dia., Kaysun 5" dia., North Pacific Skeeter (4-1/8"
dia.), and the North Pacific Sleek Streek (5-1/2" dia.).
Since the model was designed for the VF-8000, which weighs more
than any of the others because of its spinner, the substitution
of other propellers will require adding nose weight, such as modeling
clay. Regardless of the type of propeller, spend a few extra minutes
checking its balance. A little sanding of the heavy blade will reduce
vibration and improve performance. Also, several tiny brass thrust
washers and a drop of oil will do wonders. Without them, the plastic
prop will gradually wear down against the plastic bearing assembly
and won't turn as freely. Flying br>& Make
up a single loop of 1/8" brown rubber, allowing a little slack between
the hooks. With the motor in place, the aircraft should
balance at about the point indicated on the plan. If not, add small
amount of modeling clay to the nose or tail, as required. Next try
a gentle glide (do not throw). The model should float to the ground
with perhaps a slight mushing effect. If it dives, add a little
up elevator or subtract some nose weight. If it stalls (nose up
suddenly, then dives) add clay to the nose. Wind in 75-100
turns and launch the model gently, parallel with the ground. It
should exhibit a natural tendency to climb in a shallow turn. If
it turns too tightly, compensate with a slight bending of the rudder
in the direction opposite the turn. If the model falls off on a
wing repeatedly, add a small lump of clay to the opposite wing tip.
Gradually increase the number of turns and readjust, as required.
If very high power is used, it may be necessary to increase
the down thrust of the propeller. A fair amount is built into the
North Pacific thrust bearing assembly. It is also easy to add right
or left thrust adjustments by bending bearing assembly slightly.
In spite of its kite motif, this model should be flown
in calm weather, at least until familiar with its performance and
adjustments. When all is satisfactory, lube the motor and pack in
the turns with a geared winder for best performance, This craft is also known as Ben Franklin's Revenge. Because of an
archaic law, of obscure political origin, kite flying is illegal
in Washington, D.C. Since model airplanes are (apparently) allowed,
it would seem that string is the real offender. We wonder if America's
most celebrated kite flyer, Ben Franklin, might consider Stringless
Wonder a possible "key" to this problem! Editor's
Note: Happily, the law against kites has been revoked, thanks to
appropriate lobbying of Congress. So, come to Washington and join
us, flying kites on the Mall!
<click image for larger version>
Notice:
The AMA Plans Service offers a
full-size version of many of the plans show here at a very reasonable cost. They
will scale the plans any size for you. It is always best to buy printed plans because
my scanner versions often have distortions that can cause parts to fit poorly. Purchasing
plans also help to support the operation of the
Academy of Model Aeronautics - the #1
advocate for model aviation throughout the world. If the AMA no longer has this
plan on file, I will be glad to send you my higher resolution version.
Try my Scale Calculator for
Model Airplane Plans.
Posted December 31,2011
|