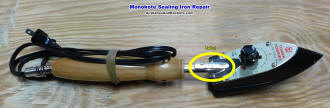
Repaired Monokote sealing iron handle with splint installed.
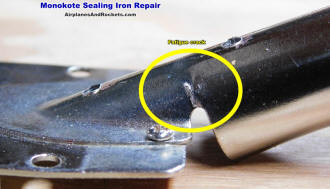
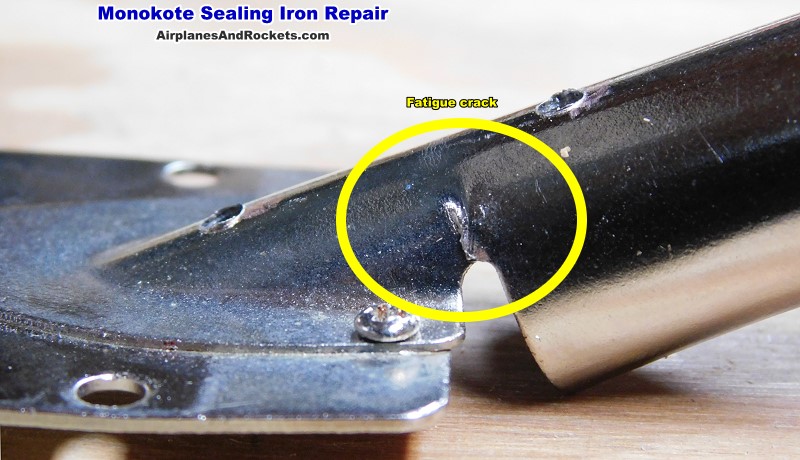
Fatigue crack in the handle.
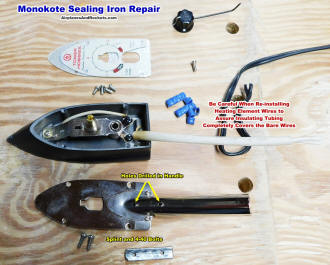
Disassembled Monokote sealing iron components, with splint.
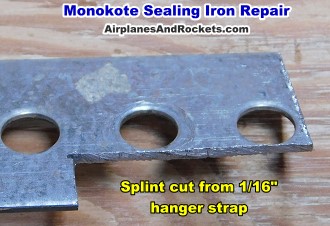
Handle splint cut from 1/16" metal hanger strap.

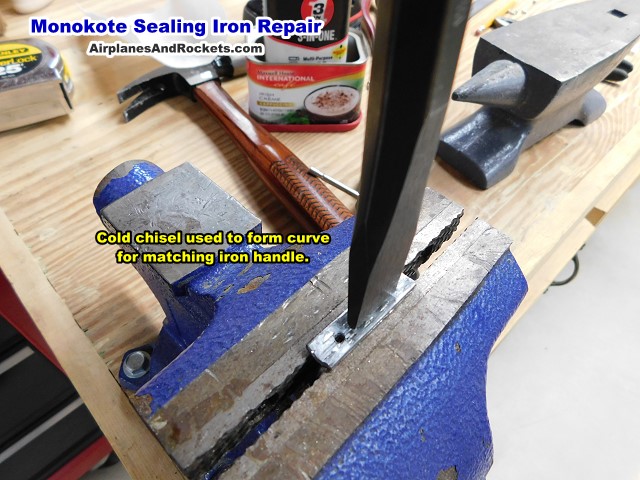
Cold chisel used to create curve in splint to conform to Monokote
sealing iron handle.
My original Top Flite Monokote Sealing Iron, purchased in the mid-1970s, lasted
until the late 1990s, when the heating element burned out. A quarter century of
use was not too bad. To replace it, I bought a Tower Hobbies iron, and the first
time I used it the handle started to bend where it transitions from a hollow round
shape to a flat shape. The metal was noticeably softer than the Top Flite handle,
which never even hinted at bending. For two decades I have had to be very careful
not to press too hard on the iron lest it bend. After many times of bending and
straightening the handle, a major stress crack had formed, and it was pretty evident
that the handle would not last much longer. I would either need to buy a new Monokote
sealing iron, which in all likelihood would be equally cheaply built since Top Flite
does not make them anymore, or come up with some kind or repair for this one.
Living by the World War II era philosophy of "Use it up. wear it out. Make
it do, or do without," attempting a repair seemed like the right choice.
The first order of business was to disassemble the Monokote sealing iron. A hex
wrench is used to loosen the heat adjustment knob set screw and remove the knob.
Remove the single retaining screw in the wooden handle and slide it off, then remove
the four bolts from the top of the flattened portion of the handle assembly to release
the shoe.
Carefully pull the heat shoe away from the metal plate while feeding the A/C
power cord into the handle, in order to keep tension from building on the heater
element wires.
Cut the two crimp connectors from the power cord and heater element as close
to the connectors as possible. The crimp connectors should not be re-used. Replacements
are cheap (Walmart and auto supply stores have them). You might be able to getaway
with not cutting off the crimp connectors, but drilling and tapping the handle would
be more difficult and you risk damaging or breaking the heater element wires.
For the metal splint, I used a hacksaw to cut a 3/8" wide by 1-1/2" long piece
from a section of surplus 5/64" thick perforated metal hanger strap (bought at
Lowes). The edges were filed smooth, then a cold chisel and hammer were used
to create a lengthwise curve to closely match the curvature of the sealing iron
handle. It doesn't need to be perfect.
Two clearance holes for 4-40 bolts (machine screws) were drilled in the handle,
and then the metal splint was laid in place on the outside top and the hole locations
were marked on the splint from underneath. Location is not critical. Tap-sized holes
were drilled in the metal splint and then a 4-40 tap was used to cut threads. Note:
The photo showing a cold chisel to form the curve was made after this step because
I forgot to take it before drilling and tapping the holes. Forming the curve afterward
would distort the threaded holes too much to be useful.
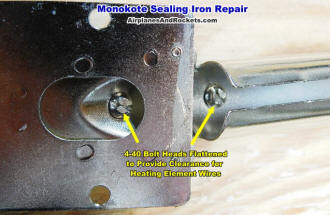
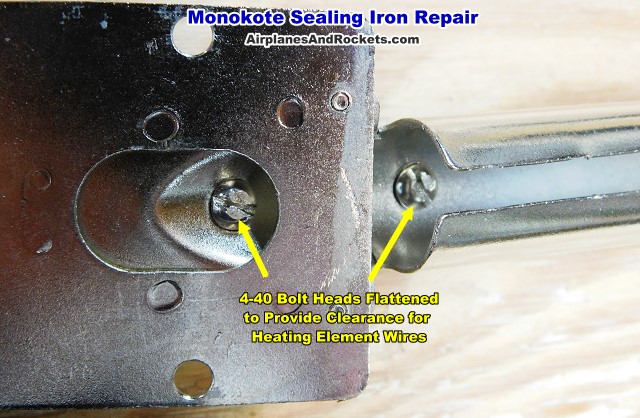
Monokote sealing iron handle with metal splint installed. Screw
heads flattened to provide clearance for heater element wires.
The heads of the 4-40 bolts were flattened a bit with a file and were used to
secure the metal splint to the outside of the Monokote sealing iron handle. Then
the bolt was pounded with a hammer along its axis to compress the threads to prevent
loosening. Continued heating and cooling cycles might otherwise allow the bolts
to loosen. Flattening the bolt heads provides extra clearance for the heating element
wires and insulating tubing - it's a pretty tight fit even without the bolt heads
inside the handle.
Push the A/C power cord back through the wooden handle and through the rounded
metal handle. Use the two new crimp connectors to re-attach the power cord to the
heater element wire. Being A/C there is no polarity to be concerned about.
Next, carefully feed the heater element wires all the way back into the handle
while making certain that the insulating tubing completely covers both wires all
the way back to where they connect inside the heating element foot. The wires are
bare and could easily short out otherwise. You will need pull the A/C cord while
pushing the foot into place to keep it from bunching up inside the handle. Install
the four bolts back into the top of the heating element foot, and reinstall the
thermostat adjuster knob.
Plug the Monokote sealing iron in and verify that everything is working properly.
If all went well, then from now on you will be able to apply covering without needing
to worry about bending the handle!
Posted March 28, 2020
|