|
Peter Bowers was a well-known
designer and builder of both full-size and model airplanes. As an aeronautical engineer
working for Boeing in Seattle, he was well qualified for his hobby pursuits of homebuilt
airplanes and competition-class free flight airplanes. He was also an aviation photographer
and historian with many books and magazine articles to his credit. Bowers' most
famous creation is undoubtedly the
Bowers Fly Baby monoplane,
which won the Experimental Aircraft Association
(EAA) contest in 1962 for the best low-cost, folding-wing plane that can be towed
or trailered from home to and from the airport - the goal being to avoid expensive
hanger or tie-down fees. The Fly Baby was much in the fashion of a large model as
it was constructed almost entirely of wood - spruce and plywood. Metal was used
for fittings, guy wires, engine mount, hinges, etc., but even the landing gear structure
was fabricated from laminated wood. Critics said lack of spring loading would cause
the gear to fail, but hundreds of Fly Babys were built and flown without reported
landing gear failures. As designed, the wooden undercarriage and Cub-type were able
to a absorb landing forces. Being an open-frame aircraft, it was of course covered
with the traditional silk and dope. Between the full-scale airplanes that Peter
Bowers covered and finished and the model airplanes he built, he became a real authority
on covering technique. Some of that expertise is shared in this 1941 Flying Aces
magazine article.
Covering Up

Number One: Dope along the upper main spar to fill the silk so
that the tightening coat will not stick the silk covering to the spar.

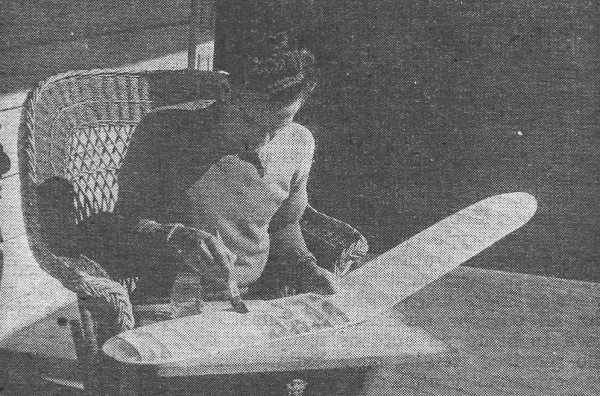
Number Two: Hold the material tightly at the center section as
shown. Pull the silk outward to the extreme tip, "tacking " it as you go along.

Number Three: Remove the wrinkles from the silk by pulling across
the chord, at the same time working outward from the center section to tip.

Number Four: The completely covered wing is doped chordwise.
Clear dope is applied with an inch-wide brush from center section outward.
by Peter Bowers
A poor covering job on a model plane is as unnecessary as giving a permanent
hair wave to a poodle dog. Here, an expert gives you the dope on best ways and means
with which to smooth out and even end that troublesome model finishing problem.
How many times have you modelers built a beautiful ship only to ruin it by putting
on a messy covering job? No doubt, this has happened to most of you at onetime or
another during your model building career. The purpose of this article, therefore,
is to pass on helpful suggestions and best method of covering your model planes
so that in the future your efforts will attain a higher standard of workmanship.
After all, many things in life are still judged by their surface. So let's get right
down to the bottom of this important phase of aeromodeling and cover this subject
thoroughly.
Gas jobs are usually faced with one of two materials - silk or bamboo paper.
Small rubber powered models, and more recently class "A" gassies, are covered with
tissue paper. The method of application in each case, however, is the same. The
covering is held to the framework of the craft with dope as an adhesive.
Applying Material
Let's assume that the first ship we are to cover is a small gas job using paper.
We will start with the wing, as it is the easiest part of the model with which to
begin.
First, lay a sheet of paper, larger than a single wing section, on the workbench,
and then the wing panel is placed on top of it. Then trim around the paper with
a pair of scissors or a razor blade, leaving a margin about half an inch wide all
around the panel. Next, apply a thick coat of dope to the leading edge of the panel
with a brush, and then lay the leading edge along one edge of the paper pattern.
Pick up the wing and smooth the paper along the leading edge with your fingers.
When the dope has set enough so that the paper can hang without pulling loose, dope
each rib about one half the chord of the wing back from the leading edge. The paper
is then rolled back over the ribs, smoothing it again. When the paper adheres sufficiently,
repeat the process for the rear half of the wing. Work out all the wrinkles while
the dope is still wet. After the dope has dried thoroughly, the whole wing should
be sprayed lightly with water which will shrink the paper and remove small wrinkles.
While the water is drying, proceed with the fuselage and tail of the ship. The
tail surfaces are covered in the same manner as the wing. On a flat-surfaced stabilizer
and rudder, it is best to give one side of it a thorough doping so that the panel
can be pressed down upon the piece of paper, thereby eliminating the necessity of
having to cover in stages because of the quick drying dope.
The fuselage requires a bit more care in covering than does the wing and tail,
especially if it has a round or oval section. When the surface has changes of curvature,
it will be necessary to cover it in many small sections, rather than one whole side
at a time. Use sections as large as possible to simplify your work. Sometimes compound
curves can be covered with paper quite successfully - if the tissue is moistened
first.
Posted January 25, 2020
|