|
Even with the many decades of attempts
to get girls and women interested in flying model airplanes, the sport still has
a very small percentage of them involved. The same is true of model cars, boats,
trains, helicopters, and even the newfangled drones. It certainly cannot be
blamed on a lack of trying to encourage participation since anytime a girl or
lady shows up at the flying field or has a modeling story to tell, the media are
all over it. The same phenomenon is true of amateur (Ham) radio, and probably
for many other historically male-dominated activities. Could it be that girls /
women in general just are not as interested in such things? To even suggest such
a possibility in today's hostile social environment could lead to threats of
physical harm, doxing, Twitter and Facebook flaming, and other forms of extreme harassment.
Surely, documented history is wrong and must be altered to achieve the desired
outcome. I personally welcome all comers, but refuse to be blamed for those who
choose not to engage.
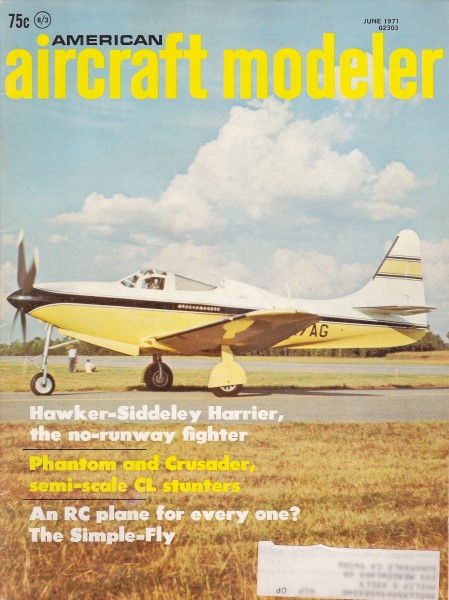
If You Can't Beat 'Em, Join 'Em
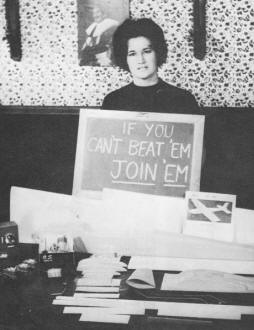 By Pauline Zober By Pauline Zober
Photos by Wally Zober
This story begins last spring when I first saw the Dee Bee Alpha fly in an impressive
performance at the Suffolk Falcons' Winter Fun Contest. As a free-lance model designer
and writer, I was interested in doing an article on this ship. Don Brown gave his
okay and two months later the Alpha kit arrived.
It was quite a package and as I was going through all the goodies my wife, Pauline,
arrived on the scene.
"What have you got there?" she asked. "Don Brown's new ARF kit," I answered in
an offhand manner.
"It's a what kit?" "An ARF kit."
At this point, Pauline exclaimed indignantly, "Are you clearing your throat or
are you barking at me?"
A word of explanation definitely was in order, "No, dear, the word ARF is an
abbreviation meaning almost ready to fly. Got it?"
We both began to layout the parts from the kit on the dining room table. For
the first time in our married life, Pauline was showing a real interest in a plane,
so I told her I planned to build the model and do an article on it.
Then she floored me. Right out of the blue, Pauline exclaimed, "I'll bet I could
build that!"
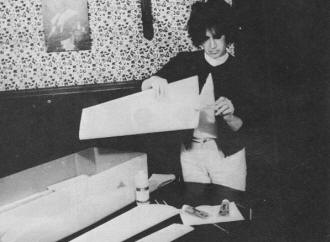
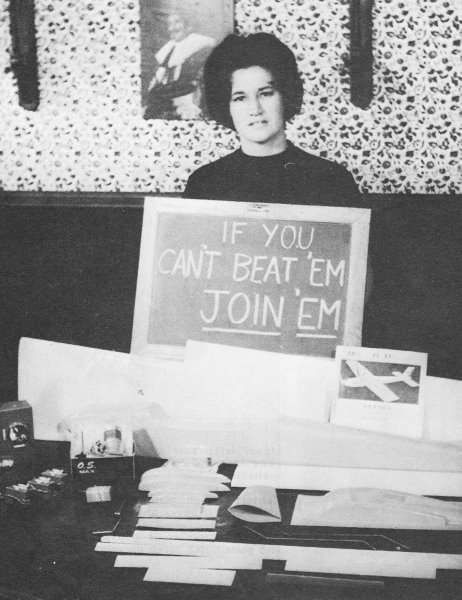
Assembly of the Alpha began with mixing the HobbyPoxy glue and
applying it to the dihedral joint. A messy job at best, but here it is done quite
delicately.
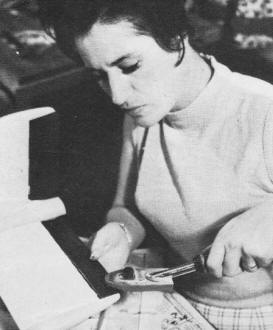
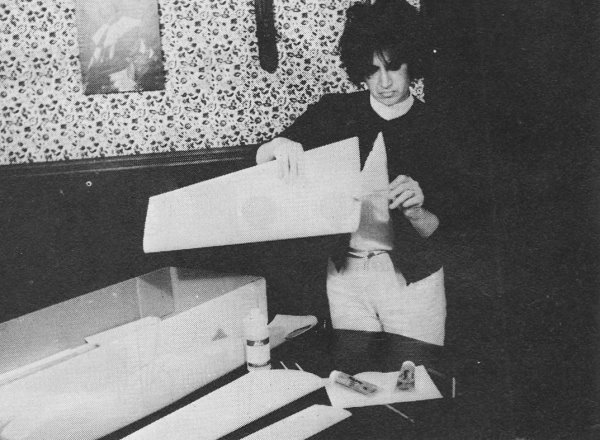
A sealing iron is used to MonoKote the control surfaces. (You
didn't think she'd use a clothes iron - did you? It's too heavy.)

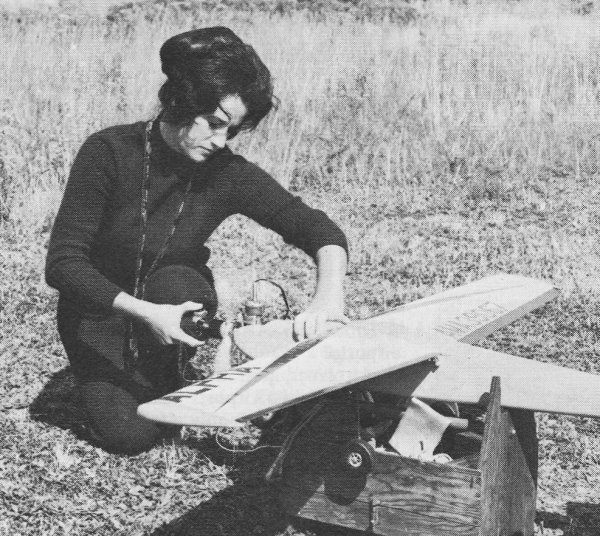
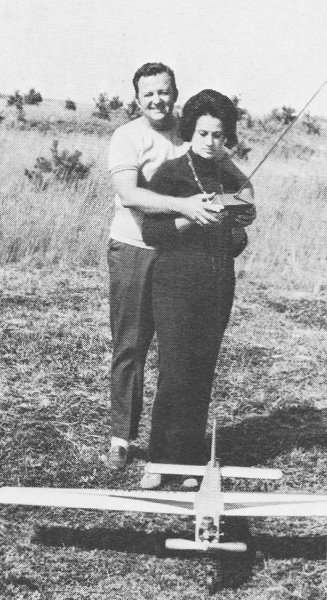
If you build it, you start it! Electric starter was appreciated.
Wally adjusted needle valve, Pauline got to hold the plane.
When asked if she really meant what she'd just said, she replied, "For 16 years,
I've been fighting this hobby of yours and I know it's a losing battle, so it's
time I joined you."
And that is why this article is titled, "If You Can't Beat 'Em, Join 'Em." What
follows is my wife's commentary as a first-time model builder and flier.
Hi, fellows! I hope you won't mind a gal getting into your act. But after being
married to a model builder all these years, my resistance has been worn down. When
I saw that eye-catching kit, the bug really got to me.
The ARF Alpha was quite a kit. It came in a sturdy package, with the parts securely
nested in place. Wally checked them all and found them to be excellent quality.
The wing cores or wing halves were in the styrofoam blocks from which they were
cut. All those little fittings were in a plastic bag and the trimming on the formed
plastic parts was neatly done. The wings and stab were covered with a smooth semigloss
white plastic sheet (the rudder-fin was part of the fuselage).
After familiarizing myself with all the parts and learning their proper names
such as fuselage, wings, rudder, ailerons, landing gear, etc., I laid out the kit
on my kitchen table - that's my work bench. Wally told me this was my project and
that everything needed to build the kit was there. "What about the tools?" I asked.
He grudgingly replied, "I'll let you use mine, but when you're through, be sure
to put them back into my tool box, not in your kitchen drawer!" (l wonder why he
said that?)
Now I was all set to start - after asking my husband to leave. The first thing
I did was read the instructions carefully. I won't go into step-by-step construction
details since the Dee Bee booklet is complete and helpful. The fuselage came as
two vacuum-formed halves, trimmed by the manufacturer. I joined them by applying
welding fluid (MEK) sparingly with an artist's camel's-hair brush. An excess of
the welding fluid would have dissolved the plastic.
The motor mounts, bulkheads and firewall are already installed. I had to seal
them to the fuselage sides to prevent fuel from creeping into the radio compartment.
Wally recommended G.E. Silicon seal because it is fuelproof and sticks to the plastic.
It was a little messy to work with but it did the job.
The most critical part was joining the wing halves. If they came apart in the
air, I'd be in deep trouble! I used Hobbypoxy Formula" and plenty of it. The dihedral
brace slots were well-coated with epoxy, as were the foam core ends. I coated the
plywood brace and inserted it in one wing half. The other wing half slid over the
brace and made a firm contact of foam core butt surfaces. Masking tape around the
dihedral joint prevented the epoxy from running out while it set. The dihedral angle
is slight, so I had to double-check its alignment. Who wants an airplane with drooping
wings?
One change on the rudder-fin was made at my husband's suggestion. I placed a
1/4" sq. post in the rudder-fin and epoxied it in place. This stiffened the rudder-fin
and allowed the use of plastic hinges. The only trimming that had to be done on
the Alpha was the cutout for the engine installation and for the radio compartment.
I used a sharp razor and cut slowly because this plastic material is really tough.
But with care, I had no problems.
I started this kit on a Sunday afternoon and, working on it in my spare time,
had it finished the following Wednesday. An experienced modeler probably could build
it in a day. The only thing I did not do was install the electronic equipment. Wally
did that - something to do with CG location.
Then the big day finally arrived! I was going out to fly! Wally loaded the station
wagon with the Alpha, field box, transmitter, fuel can, starting battery, electric
starter, and me. Off to the field we went.
I was hoping and praying that none of my husband's club members would be there.
I was nervous and I knew an audience wouldn't help any. Luckily, the field was deserted,
so I felt a little more at ease. The pre-flight check of the Alpha and the equipment
began.
We range-checked the radio, since it was a new rig. I filled the tank with fuel,
attached the starting battery connector to the glow plug, and put the electric starter
to work. The Enya 60 came to life with a roar. Wally throttled the engine back,
made a few final adjustments with the needle valve, and said we were ready to go.
He taxied the Alpha out to the middle of the runway, gave everything one more
check with the engine running wide open and with me holding the tail (I get all
the good jobs - like getting covered with fuel exhaust) and then he gave me the
go-ahead. I let the Alpha go and in a matter of seconds it was airborne.

Then the big day finally arrives!
Wally took the Alpha up to what he thought was a safe altitude, made a few trim
adjustments, and then I heard him say, "Okay, honey, it's your turn." For a moment,
I froze, then I heard him call again, "Come on, it's flying beautifully." With that
he handed me the transmitter.
"Make a turn to the left," he said. I pushed the aileron controls to the left
and the Alpha did a roll. "You're over-controlling! Relax and try it again." This
time the Alpha turned beautifully, but I lost a little altitude. I advanced the
throttle and the Alpha began to climb. I regained the altitude I lost and throttled
back to cruising speed.
I asked my husband if I could try a loop.
He said, "Why not!" So I advanced the throttle, pulled back on the stick, and
the Alpha looped with ease. I was having a ball. I made one more figure eight, then
the engine quit because it was out of fuel. Wally took the transmitter and made
a dead-stick landing. That was the maiden flight of the Alpha.
Before I sign off, I'd like to say that you fellows have a good thing going in
this hobby of yours and I can see why you enjoy it so much. The building is relaxing
and the flying certainly is exciting. So, to you wives and girlfriends of modelers,
my advice is "Don't fight 'em, join 'em."
Note from the modeler's husband: My wife did a professional job in building this
aircraft. As a matter of fact, my flying buddies suggested that she build all my
models!
Posted January 26, 2019
|