|
Control line speed models do not appear very often in modeling magazines,
and as far as I know you cannot buy a manufactured kit for one,
so when I run across an article it gets posted. C/L speed is an
event where, assuming you can proficiently fly an airplane in level
flight, your success is most dependent on your skill as an airframe
builder and an engine mechanic. I have never witnessed a control
line speed model flying in real life, but there are a few on YouTube
that show the rigorous couple minutes a speed flyer spends in the
center of the flying circle. One of the coolest parts is then the
pilot whips the plane to get the engine to break from 4-cycle into
2-cycle operation and it just starts screaming. That really gets
the adrenalin flowing!
This video of Paul Eisner setting an
F2A world speed record is a must-see video.
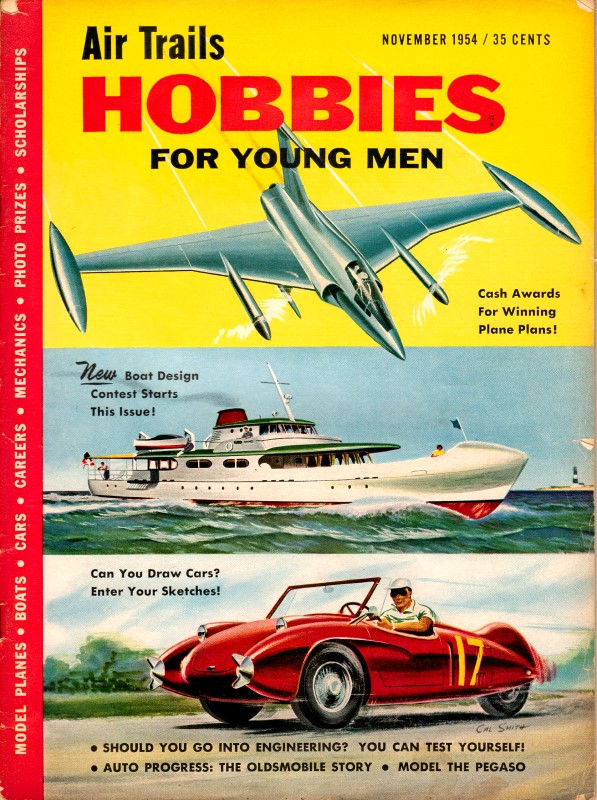
"Squeaker" Speed Plane
"Mr. MPH" himself, America's most consistent control line speed
model winner and record holder, unveils his prize job this C/L Class
A won everything!
By Tommy Baker
|
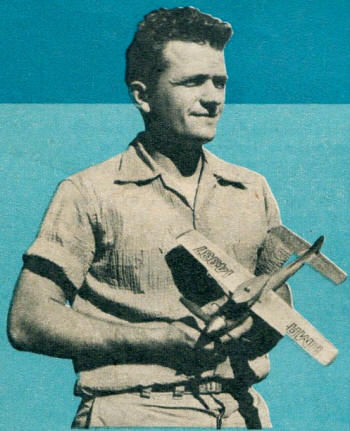
Quiet, unassuming, capable Tommy Baker from Kings Mountain,
NC, went into Air Force as dental technician, served overseas,
now runs AF recreation program at West Palm Beach, FL. Married,
he and his wife Beth have one youngster. At most recent
National Model Plane Championships Tom, as "open" contestant,
took 1st in Control Line Class A Speed (130.19), 2nd in
B (136.86), 3rd in 1/2A (78.03).
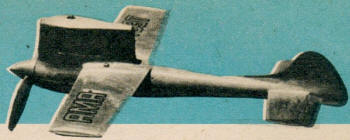
Triple Winner! Squeaker was first at the Nationals! First
at the Internationals!
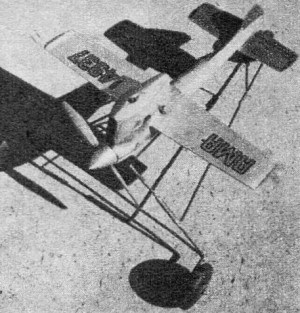
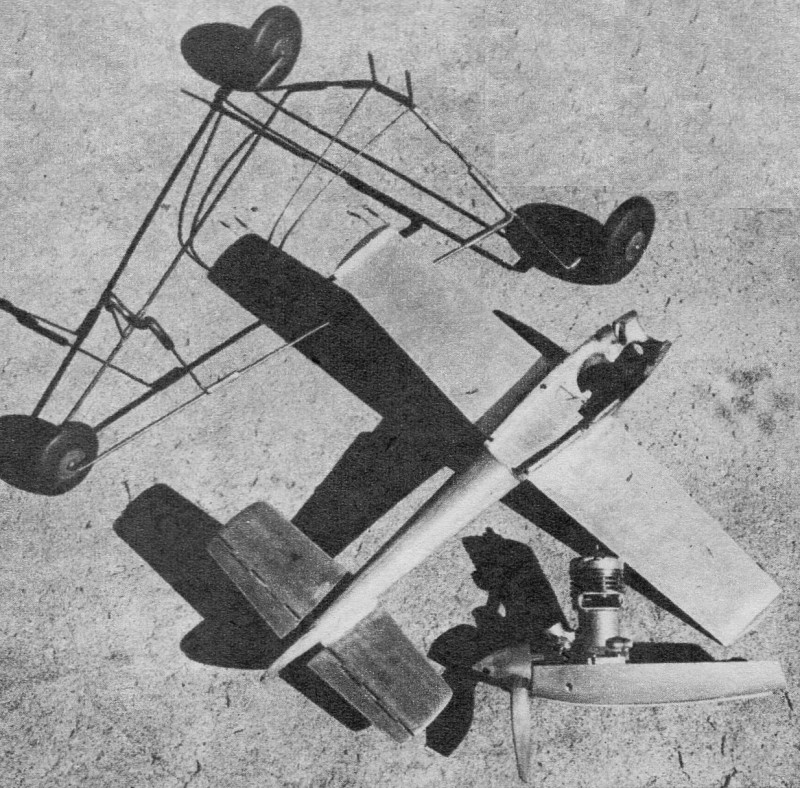
Squeaker can take off from a dolly or be hand-launched.

Air Force man Baker prefers the 2-pin, 1-wheeled dolly
shown, but says any good dolly serves if you can count on
a perfect take-off every time.
|
The Squeaker is my latest effort to produce a stable, consistent
contest winner. In a single contest season it racked up an impressive
list of wins, taking first at the Air Force World Wide Championships
with 130.37 mph, first at the Nationals with 130.43 mph, first at
the Internationals, 133.28 mph. The flight at the Internationals
established a new A.M.A. record. Squeaker also took second place
at the 1952 Nationals, turning a speed of a little over 130 mph.
This was its maiden flight. In every contest where it has been flown
it has consistently turned in times of 130 mph or better. The most
important thing in a fast speed ship is stability, in my opinion.
This seems to be the theme of the Squeaker.
Hobby People is Your Trusted Source for Radio Control Planes, R/C
Helicopters, R/C Cars, R/C Trucks, R/C Boats and More!
The ship is designed around a K&B Torpedo .19 which I believe
is the hottest Class A engine to hit the market. Alterations of
the Torp .19 are as follows: Turn the cylinder head and fins down
to 1 1/8" diameter. This allows you to use a smaller, more streamlined
cowling. Remove the needle valve and venturi restrictor and tap
the needle valve body in the venturi with a 10-32 tap. Install a
Dooling needle valve and body. The Dooling needle valve has a fine
taper and the body is of the lock-nut type which allows a fine positive
setting which is very important. Install a McCoy right-angle seat.
This allows an easy fuel line hook-up in close quarters.
Next, go through the Torp and remove all burrs and sharp edges
that the fuel passes over on its way through the engine. Then comes
the most important thing. Make certain the engine is entirely free
of any binding, and is as free as possible. Binding and excessive
drag create friction, and friction robs rpm, which all means lost
speed. Above all do not alter the timing of your Torp in any way.
The factory timing seems to be about perfect. In other words, don't
make the intake port in the shaft any larger, and don't touch the
top side of the intake and exhaust ports in the cylinder.
Another "must" is to keep your engine and fuel as free from dirt
and lint as possible. If the engine gets dirty, tear it down and
clean it up. Several turns of a prop on a dirty engine can ruin
it, so keep 'em clean and make 'em last longer.
Assuming you have your Torp .19 and have turned the fins down,
file off the exhaust stack just enough to allow easy cowling. Mount
the engine in the half-pan. You can purchase a commercial pan and
saw the back off or make a wooden half-pan as described in the plans.
I used a metal half-pan on the original Squeaker. I like the metal
pan best because it permits a rigid, more permanent engine mount,
and also will dissipate heat much faster. The wooden half-pan is
quite suitable, though, and is about as durable as any wooden pan.
The maple crutch is tough and gives a tough surface on which to
mount the engine.
After you have the engine mounted in the half-pan, take a piece
of hard, straight-grained balsa and mark off a center line and hole
the engine will fit through. Glue a piece of 1/32" plywood to the
surface that will lie along the pan and center of the fuselage.
When dry, carve out the hole in top half of fuselage to be a snug
fit around the engine. Now take the piece of wood to be used for
the lower rear part of fuselage and cut to fit snug against the
rear of the half-pan. Glue on 1/32" plywood former that goes next
to the rear of the half-pan and tack-glue rear of fuselage to top
half. Draw outline of cowl platform on top half of fuselage. With
half-pan in place as a guide, carve entire fuselage to approximate
shape and rough sand. Final sanding will come later. Split off back
portion of fuselage that was tack-glued on and hollow entire inside
of fuselage out to about 3/16" wall thickness.
The cowl comes next. Carve out the top outline of cowl top, and
shape up inside of this block. Cut cowl sides from 1/32" plywood.
Cut so that outside grain of plywood runs vertical. This makes it
easier to bend around engine. Put engine and half-pan together in
top half of fuselage. Carve balsa blocks to shape and glue in place.
Now glue top and sides of cowl in place, leaving about 1/32" space
between sides and engine. When dry shape top of cowl and air passages
as indicated on plans. Make wing spar, carve hole for spar in top
half of fuselage and install. Drill holes for hold-down bolts. Make
elevator, elevator horn and bar and assemble. Carve out recess in
fuselage for elevator and install elevator and controls. Make rudder
and install. Glue on lower rear portion of fuselage. Glue on fillets
at base of rudder to cover control horn. Make shim-stock engine
lug covers and glue in place.
Sand entire model with fine sandpaper. Give it two thin coats
of clear dope to seal pores in wood. Sand lightly between coats
to keep surfaces smooth. Cover all outside wooden surfaces with
silk. Silk works best if used wet. Moisten silk with water, then
lay over surface to be covered and smooth out. Brush dope on silk
and rub out smooth. After all surfaces have been covered and have
dried, sand very lightly to remove fuzz. Now give model four coats
of thin, clear dope, sanding lightly between each coat. Make a mixture
of about 50-50 talcum powder and clear dope and thin until mixture
has almost consistency of water. Give all wood surfaces about five
coats of this sealer, sanding lightly between each coat.
This sealer is the only fuel proofer I use on all my speed ships.
This type finish is easy to maintain, too. If fuel, after a time,
appears to start eating into the clear dope underneath the sealer,
all you have to do to restore the finish is to sand lightly and
give several more coats of the sealer. A fuel-proof color finish
can be used if you desire it.
Wings and lead-out wires go on next. Scribe outline of wing panels
on a sheet of .012" half-hard aluminum and cut out. To bend leading
edge of wing panels, either clamp aluminum between two steel rulers
and bend or go to a sheet metal brake and bend panels to about a
45 deg. inside angle. Form panels from here to the desired airfoil
by hand. Clamp trailing edge between two rulers and mark rivet holes.
Drill holes for 1/16" diameter soft countersunk rivets. Cut rivets
off so they stick through trailing edge about 1/32". Now find some
smooth, hard surface and pound rivets over until flush with trailing
edge.
Next, out of hard balsa, make the wing lug blocks so that they
fit flush against fuselage and are a snug fit inside wing panels.
Glue wing lugs onto fuselage so that they will hold the wing incidence
parallel to the center line of fuselage. Wing, stabilizer, and rudder
are all set at zero degree incidence with the engine and line of
thrust ... All building details available on full-size plans.
Full-size plans for Squeaker are part of Group Plan # 1154, Hobby
Helpers, 770 Hunts Pt. Ave., New York City 59 (50¢).
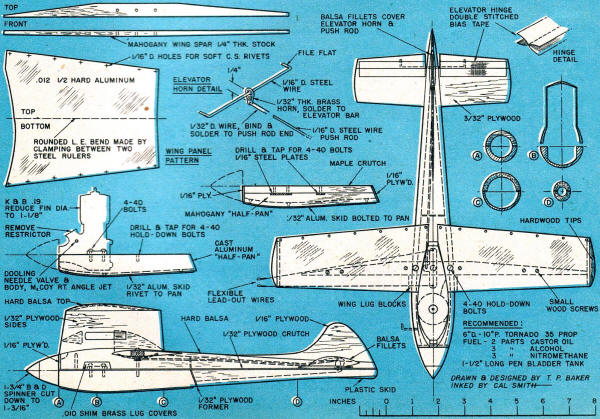
Squeaker Control Line Class
A Speed Plans
Notice:
The AMA Plans Service offers a
full-size version of many of the plans show here at a very reasonable cost. They
will scale the plans any size for you. It is always best to buy printed plans because
my scanner versions often have distortions that can cause parts to fit poorly. Purchasing
plans also help to support the operation of the
Academy of Model Aeronautics - the #1
advocate for model aviation throughout the world. If the AMA no longer has this
plan on file, I will be glad to send you my higher resolution version.
Try my Scale Calculator for
Model Airplane Plans.
Posted October 25, 2014
|