|
Rick Rabe's rubber-powered free
flight "Pogo," not to be confused with Bob Morse's glow fuel-powered R/C 1/4 Midget
racer "Pogo" that appeared five months later in American Aircraft Modeler,
is a quick-building stick and tissue job for modelers of all ages and interests.
Rabe adds a little pizzazz to the craft with a "V" shaped vertical fin. The flat,
stick-framed wing and stabilizer are built directly on the Jap tissue, which speed
the already minimal construction time.
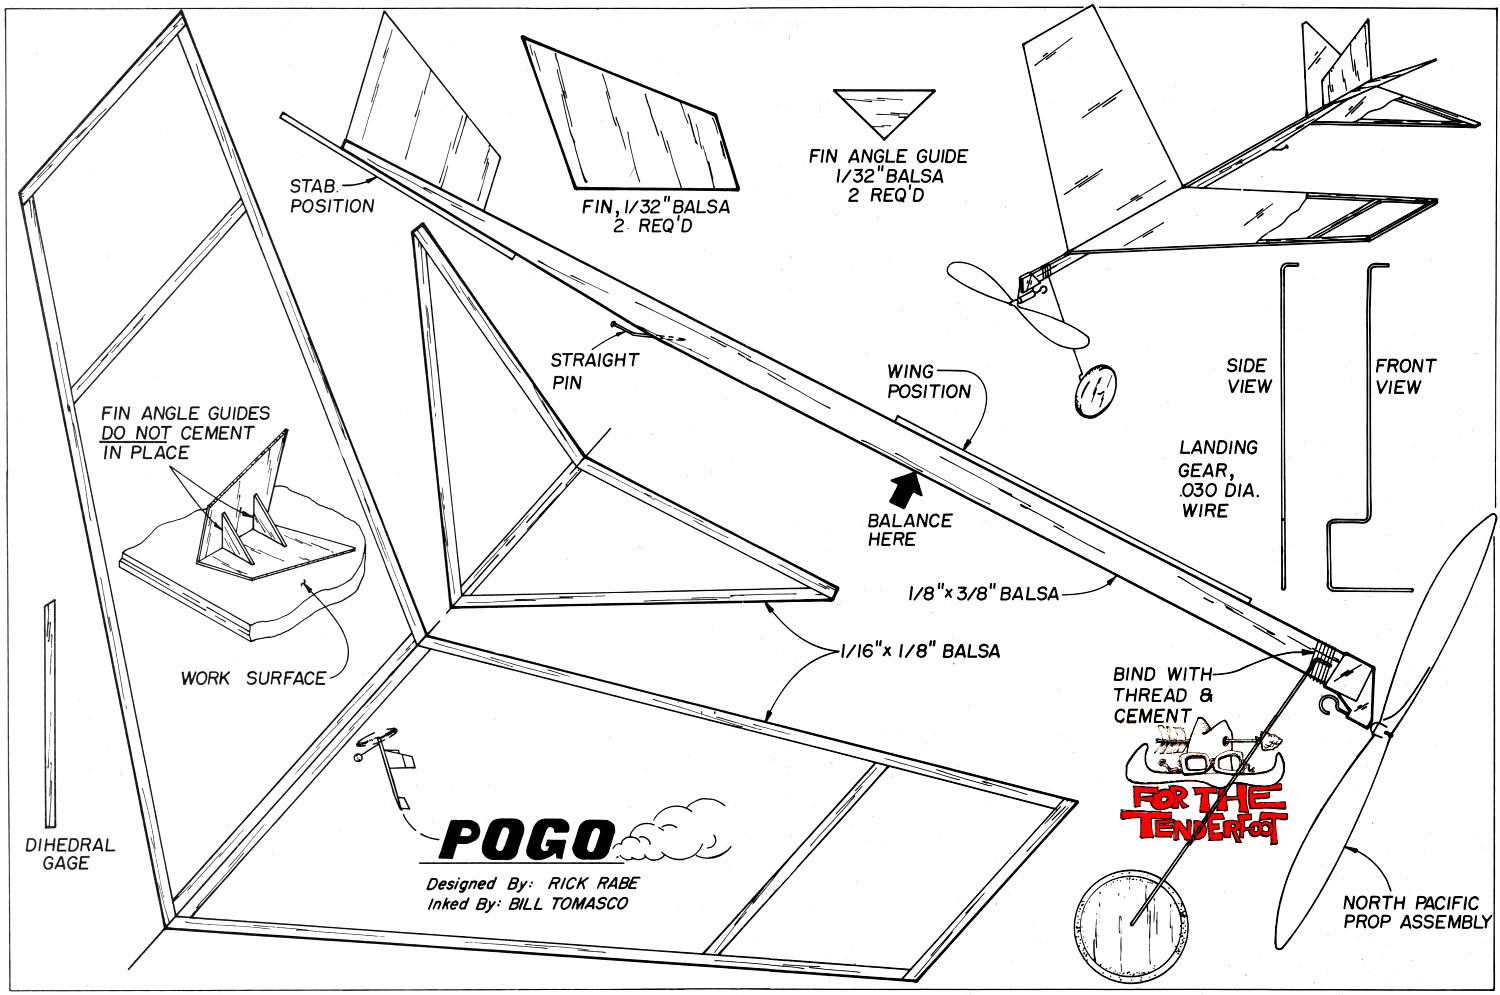
Pogo
 For the Tenderfoot For the Tenderfoot
Designed By: Rick Rabe
Inked By: Bill Tomasco
 Just because a beginner's model should be simple,
build fast, and fly easily, does not mean it can't be stylish. Pogo is fun for all
modelers. Just because a beginner's model should be simple,
build fast, and fly easily, does not mean it can't be stylish. Pogo is fun for all
modelers.
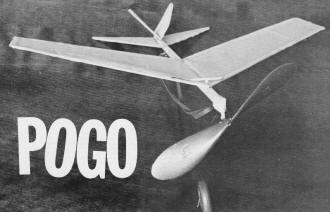
Aptly-named model climbs straight up, then flops into gentle glide when rubber
unwinds.
Ready-to-use plans on back of centerfold.
As the propeller picks up speed, the plane begins to move. In less than a foot,
it is airborne and climbs almost vertically until the propeller stops turning. Instantly,
the plane noses over and goes into a long gentle glide, finally touching down to
a perfect landing.
Does that sound like the flight of some hard-to-build, expensive contest-type
model? It isn't. It's just a normal flight of the Pogo .
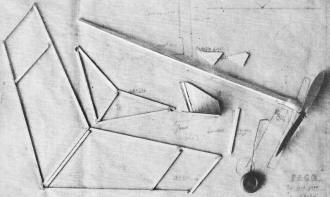
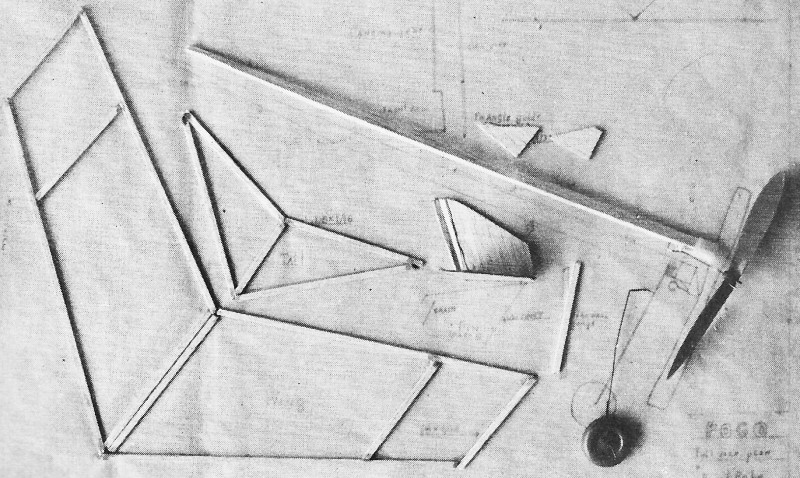
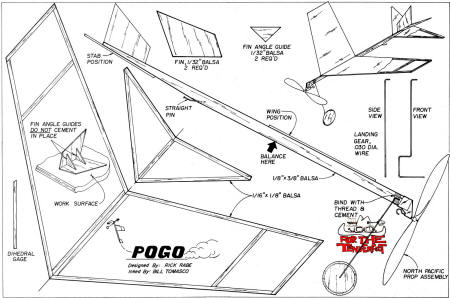
Note wing made on its covering material. Later the extra tissue
is cut away, the wing turned over, and dihedral added. V-shaped rudders have built-on
trim tabs.
The Pogo is not hard to build, nor is it expensive, or hard to fly. It requires
a minimum of construction skills. An ideal beginners' project, the Pogo can be built
in less than two hours and easily can be flown in the usual back yard. Wherever
it is flown, its one-wheel landing gear, swept wing, and unusual tail arrangement
will make it stand out from the ordinary beginner's plane.
Construction
The tools for building this plane are those usually found around the house. When
buying the required balsa, select only the straightest strips, Check by looking
down the edge to see whether there are any bends in the strips. For help in selection,
ask the hobby shop sales clerk. For the propeller assembly and wheels, purchase
a North Pacific plane kit such as the Skeeter which sells for about 15 cents.
Lay the plans on a building board and tape the corners down. Place the covering
tissue over the plans, making sure it is wrinkle-free, and also tape its corners
down. The plans can be seen through the tissue.
Cut out all balsa parts as shown on the plans, but not directly over them, else
the covering tissue may be slit accidentally. Use several light strokes instead
of one heavy one for cutting. Check each piece to be sure it is the proper size.
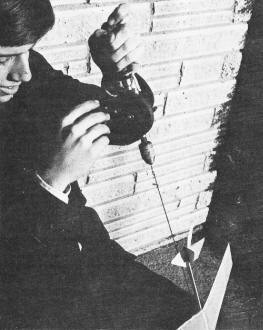
Wind up the rubber band with a crank; hand drill is fine. Stretch
rubber and pack in the turns to a full row of knots.
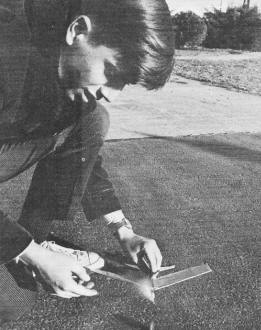
Flight from a takeoff is most fun. Release prop first, then model,
and be sure to aim it into the wind. Pogo hops into the air.
Lay the parts for the wing and the tail in their places. Fasten the parts to
the tissue and to each other with a thin layer of glue. Do not use too much glue
because it will make the plane too heavy. The tissue, in a later step, will be used
as a covering material.
When inserting the tail fins, have the photograph handy for checking their angle.
Place one of the fins on the building board, but not on the tissue. Apply a line
of glue along the base edge of the fin. Lay the other fin on top of the one on the
board so that the bases are lined up. Slide the fin angle guides between the two
fins (one in the front and one in the back) so that the bases are still together.
Looking at the fins from the front, they should now look like a slanted V. Allow
all parts to dry completely.
If using the North Pacific landing gear, bend it to the shape shown on the plans.
If building the gear from basic parts, cut a piece of wire and bend it as shown
on the plans. To build the wheel, cut out six 1 1/4 x 1 1/4" balsa pieces from 1/32"
sheet. Glue these pieces together, placing each one so that the grain runs opposite
on each successive piece. When dry, sand to roundness and punch out the center with
the landing gear wire. Attach the wheel and bend up the wire to keep the wheel on
the wire. The parts are now ready to be assembled.
Assembly
Cut the tissue from around the wing and tail, trimming off any excess. Cut out
the fuselage and glue the tail in place. Allow to dry, then glue the fin assembly
in place. Lay the wing, with the tissue face up, on the building board. Gently break
the wing in the center and bend up so that the dihedral guide will support the wing
tip. Glue the center section so that the wing will keep the angle.
When the wing is dry, remove the guide and glue the wing onto the fuselage at
the location shown. When the entire assembly has dried, insert the pin to hold the
rubber, using glue to hold the pin firmly. Wrap the landing gear with thread for
extra strength and glue in place. Slide the propeller assembly onto the front of
the plane and attach the rubber loop.
Flying
Be sure the model balances as shown on the plan. Gently push the model forward
at about shoulder height and release. It should glide straight forward and touch
down about 12 to 15 ft. in front of you. Wind the propeller about 50 turns and launch
the plane as in the test glide, releasing first the prop then the plane. The model
should turn in flight and touch down about 20 ft. in front of you.
If the plane does not turn under power, bend the front part of the prop assembly.
Try it again, this time winding it about 100 turns. The plane should climb gently
to the right. If it stalls, bend the prop assembly a little more to the right. If
it does not climb, straighten out the prop assembly a little by bending it gently
to the left. For long flights use a drill with a wire hook in the end of it to wind
the rubber. For ROG (rise off ground) flights, wind the motor about 400 turns and
release the plane on the ground. This type of flight will demonstrate the reason
for this plane being called Pogo.
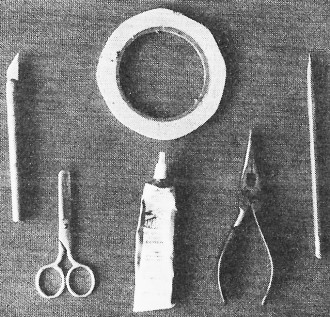
Basic tools for model airplane construction. Knife must be sharp
and thin for balsa.
Materials
3 strips of 1/8 x 1/16 x 36" balsa
1 strip of 1/8 x 3/8 x 36" sheet balsa
1 sheet of 1/32 x 2 x 36" sheet balsa
1 sheet of lightweight covering paper (Jap tissue works best)
1 piece of .030 wire at least 8 in. long (omit if using the North Pacific wheel)
1 North Pacific prop assembly
16" of 1/8" flat rubber
Straight pin
1' button thread
Tools
Single-edge razor blade or balsa knife
Needle-nose pliers
Ruler
Glue
Drill (with a wire bent to form a hook) or an escapement winder
Masking Tape
Pogo Plans
Notice:
The AMA Plans Service offers a
full-size version of many of the plans show here at a very reasonable cost. They
will scale the plans any size for you. It is always best to buy printed plans because
my scanner versions often have distortions that can cause parts to fit poorly. Purchasing
plans also help to support the operation of the
Academy of Model Aeronautics - the #1
advocate for model aviation throughout the world. If the AMA no longer has this
plan on file, I will be glad to send you my higher resolution version.
Try my Scale Calculator for
Model Airplane Plans.
Posted September 30, 2017
|