|
In
2013, flying a radio-controlled airplane model with a 22" wingspan
is no major accomplishment. In 1963 it was a phenomenon. Today's
micro-size servos and receivers and powerful brushless motors and
Li-Ion batteries. Yesterday's models used relays, electronic components
with wires sticking out of them, interconnecting wires, metal frames,
heavy alkaline batteries, and in the case of single-channel models
like the Lil' Roughneck, a rubber band to power the escapement.
Oh, and you had to build the model yourself. It was all very crude
by today's standards. Pioneers like author Aubrey Kochman helped
pave the way for what we enjoy now with ready-to-fly convenience
and at a much cheaper price in inflated dollars (or rupees).
Lil' Roughneck
By Aubrey Kochman
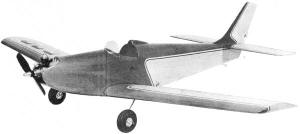
Lil' Roughneck -- A "ballpark-size" radio control low-winger
with a lot of forgiving features, this diminutive darling
will surprise you with its steady flight and sturdy construction
which resists rough landings.
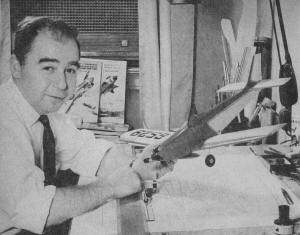
Designer-author-draftsman Aubrey Kochman with his latest
R/C success; being a New Yorker "Koch" is accustomed to
flying in small areas, hence crash-insurance construction.
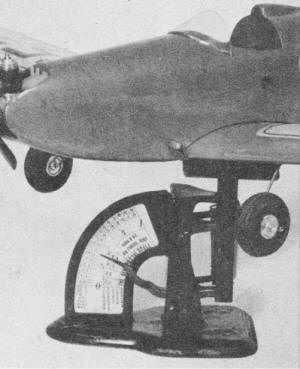
Completed model ready to fly weighs just a wee bit over
6 ounces as shown.

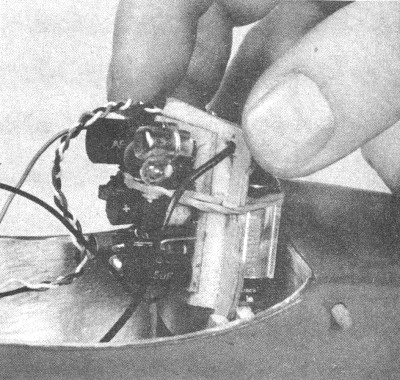
Receiver is cushioned to tray as above. Full size drawings
are on Hobby Helpers' Group Plan #1263. |
Once .01 powered R/C models proved to be an ideal fun ship, their
popularity spread like crabgrass. As is the case with any comparatively
new class the best all-around size and configuration isn't quickly
settled upon. We have witnessed flights of these mini-ships
with as little as 12" and as much as 36" spans. In our opinion the
12" jobs were too hot to handle while the 36" models were definitely
underpowered. Unless you are interested in flying either the largest
or the smallest .01 R/C in the world we see little attraction in
either extreme. From past experience, we have learned that
.01 models have extremely poor ground handling characteristics.
R.O.G. (rise-off-ground) take-offs are usually a matter of luck.
Unless very smooth runways are provided, landings - right side up,
that is - are also uncertain. Ground loops or cart wheeling can
be the rule rather than the exception. Even a perfect approach and
touchdown can't guarantee a smooth landing. A wire skid would probably
be the best answer, but our aesthetic values ruled against it. As
you can guess we feel a trike gear is of little value in so small
a model. Therefore we use a two-wheel wide-track gear. And the extra
weight of a nose gear can be put to better use by beefing up the
fuselage front with additional lumber. Silk covering was
ruled out as too heavy while tissue has always seemed to us to have
an affinity for tough weeds that can make Swiss cheese out of most
and any airframe. Although weed-proof, the single-surface sheet
balsa wing at best is pretty flimsy so it, too, was ruled out. Not
much left to choose from, so we settled on a double-surface sheet
balsa wing (which is our favorite anyway). So look out weeds-here
we come! In our design approach to Lil' Roughneck we have
attempted to lessen the jump these small models make when entering
and recovering from a turn. To accomplish this we lengthened the
tail moment to gain longitudinal stability and reduced wing dihedral
to an angle which proved a good compromise as far as lateral stability
goes. Construction-wise, this model is rugged enough to take it
when we miss the weed patch and has been found to be practically
warp-proof. Once flight trimmed, Lil' Roughneck will prove a consistent
flyer which is as it should be for a model designed primarily for
fun flying. Our completed model, painted and ready to fly,
weighed in at just over 6 ounces. To match this weight it is very
important that you spend a little extra time at the balsa rack and
choose your stock wisely. The wing, which is built in halves
and joined together glider fashion, is more easily formed if 6"
wide stock is used. Choose straight grained medium soft balsa sheets.
We used Sig contest balsa. Cut bottom sheets to outline shape. Cut
all ribs from 3/32" soft sheet and cement them in place. Add 1/8"
dowel leading edge. This dowel greatly strengthens the wing and
guards against leading edge knicks and cracks. Its weight is practically
negligible so don't leave it out. Taper trailing edge of the bottom
sheet to conform with rib airfoil. Add landing gear legs. Cut top
sheet oversize to allow for the bend and cement it to the dowel,
ribs and trailing edge. This is the most critical stage of construction
as any built-in warps cannot be corrected once the cement has thoroughly
dried. Rough carve tips from 1/2" x 1/2" soft balsa and cement in
place. Sand to final shape when both wing panels have been completed.
Join the panels, carefully checking for proper dihedral angle. When
this joint is thoroughly dry and with the wing still blocked up,
add 1/16" sheet center section doubler. Stabilizers of 1/16"
sheet have always given us trouble since they seem to warp so easily
and upset trim adjustments. To overcome this, we resorted to a double-surfaced
stab which like the wing is practically warp-proof. Choose very
light 1/32" sheet, preferably with some quarter grain mottling.
Cut both top and bottom sheets exactly alike except for the fin
notches which are in only the top sheet. The single 1/16
x 3/32" deep medium hard spar may be cut or sanded so that it tapers
symmetrically from the center to a feather edge at its tips. Cement
spar to either of the stab sheets. Run a bead of cement all around
this sheet and, along top edge of spar. Position second sheet accurately
and hold them together with clamp clothes pins or masking tape (pin
holes would mar the final appearance). Again check carefully for
warps and remove them before the cement has thoroughly dried.
The fuselage should offer no problems. Side doublers, longerons
and vertical braces are cemented in place before you add the sides.
Nose tripler is added after formers A, Band D are installed. We
recommend a white glue when installing former A. Note that the top
longeron extends 1/32" above side sheet to give 1/32" top sheet
good gluing surface. Install escapement and torque rod before
adding top sheeting. The only tricky operation for some
could be fitting the curved top sheets. Bond paper fitted and then
used as a pattern for the balsa saves both time and wood. After
cutting front 1/16" sheet and the rear 1/32" sheet according to
the paper pattern proceed as follows. Rub a thin coat of cement
onto the underneath side of the balsa and moisten the outside with
warm water. As the cement dries, the sheet will begin to curl. With
a little added assistance, the sheet assumes the proper curvature
and very few pins will be needed to hold it in place. Do not cut
out the cockpit until after the front sheet has been cemented in
place. The bottom 1/32" sheet, rearward of the wing, is
applied so its joints meet on the 1/16" sq. cross braces.
Cut
the fin from medium 1/16" sheet. the rudder from soft 1/16" sheet.
The two fin tabs which fit through the stabilizer slots insure a
strong joint and perfect alignment - provided, of course, that the
slots have been cut accurately. Finish is a matter of choice
and will depend upon the undoped weight of the finished model and
how balances with all components installed including receiver, batteries,
escapement rubber. We used three coats of clear dope over
the entire model, sanding well between each coat and lightly sanding
after the last coat. Colored dope was kept to a minimum aft of the
CG so as not to upset the correct balance we had achieved through
careful construction. Pin striping was done with 1/32" Chart-Pak
tape, available at most art supply stores. Clear dope applied over
the tape will keep it from peeling. Glide test the model
before attempting powered flights to familiarize yourself with its
flying speed. Slight alterations in trim is provided by the stabilizer
trim tab. Make your first powered flight with engine at moderate
speed or with the prop on backward in case thrust adjustments require
some change. When trimmed properly for a shallow climb and a slight
turning tendency, (to whichever side the model trims easiest) Lil'
Roughneck, through its warp-proof construction, will remain a consistent
performer, requiring only slight stabilizer trim tab adjustments
to compensate for various wind conditions. Bill of Materials:
Two sheets 1/16 x 6 x 36" medium soft straight grain; 1 sheet 3/32
x 3 x 36" soft; 1 sheet 1/32 x 3 x 36" soft quarter grain; 1 sheet
1/ 16 x 3 x 36" medium; 1 sheet 1/32 x 3 x 36" soft straight grain;
1 pc. 1/2 x 1/2 x 36" very soft; 3 pcs. 1/8 dia. x 12" birch dowels;
1 pc. 1/16 x 1/16 x 36" med. hard; 1 pc. 1/16 x 3/32 x 36" med.
hard; 1 pc .045 music wire; 1 pc. 1/16" music wire; 1 pc. 1/32"
music wire; 1 pr. 1-1/4" wheels; 1/8" plywood; 1/16" plywood; 1/32"
plywood; 1 pkg. 2-56 blind nuts and bolts; 1 Acme #913 battery holder.

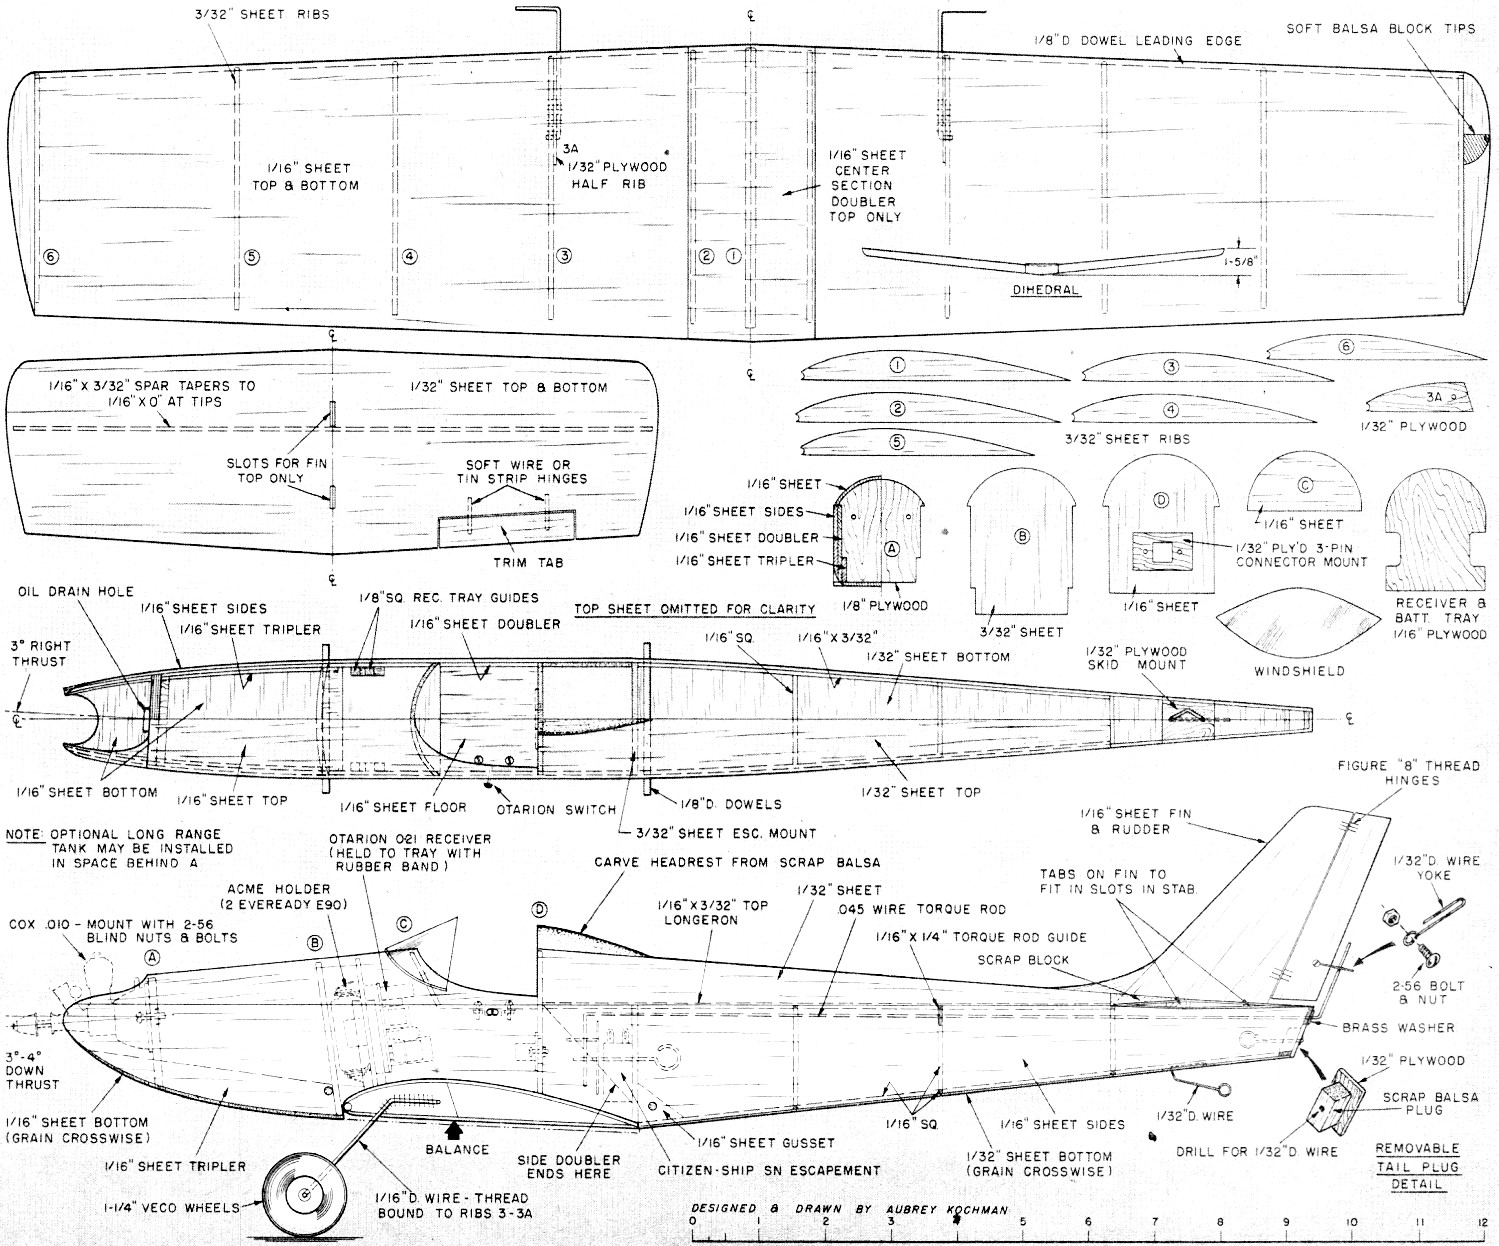
Lil' Roughneck Plans
<click for larger
version>
Notice:
The AMA Plans Service offers a
full-size version of many of the plans show here at a very reasonable cost. They
will scale the plans any size for you. It is always best to buy printed plans because
my scanner versions often have distortions that can cause parts to fit poorly. Purchasing
plans also help to support the operation of the
Academy of Model Aeronautics - the #1
advocate for model aviation throughout the world. If the AMA no longer has this
plan on file, I will be glad to send you my higher resolution version.
Try my Scale Calculator for
Model Airplane Plans.
Posted June 15, 2013
|