|
Website visitor Kenneth E. wrote
to say that he is working to build a complete collection of the "For the Tenderfoot"
models that were published in American Aircraft Modeler magazine. The Tenderfoot
series was an attempt to provide motivation to young newcomers to the hobby. They
were a mix of free flight rubber, gliders, and 1/4A & 1/2A control line designs
that built simply and cheaply.
Kenneth requested reprints of the following three models:
Saucerer, Ray Malmström:
C/L 1/2A, January 1970
Bonanza and Mustang,
David Thornburg: FF HLG, January 1971
Clodhopper, Paul Denson:
FF Rubber February 1973
Clodhopper
 An Old Timer sized and simplified for novice
balsa choppers. An Old Timer sized and simplified for novice
balsa choppers.
By Paul Denson
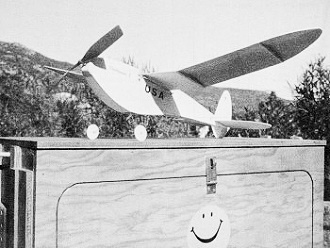
Clodhopper in all its glory.
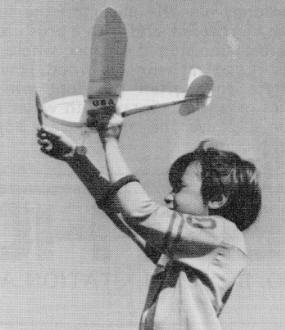
Proper launch technique demonstrated by Tenderfoot. Never throw
the model at a sharp upward angle.
Ever since I can remember, when the talk got around to rubber-powered models
someone would say, "There never was nor will there ever be a plane that can fly
like the Clodhopper," or, "With that underslung fuse, you can recognize the Clodhopper
as far as you can see it." Someone else would take off with a bunch of technical
jargon about how the low center of gravity coupled with the shoulder wing was the
thing that really made the Clodhopper fly. I personally feel there is something
aesthetically beautiful about the curves along the bottom of the fuselage that first
attracted my attention.
Wanting to build something unusual in these times, I ordered the plans for Jim
Cahill's International Champion to build and enter in one of our local Old-Timer
contests. But, like quite a number of good intentions that everyone has, other things
became more pressing and this idea got pushed back on the shelf. So, rather than
building the full-scale model, I settled for this little, small-field 1/2 scale
model of the Clodhopper.
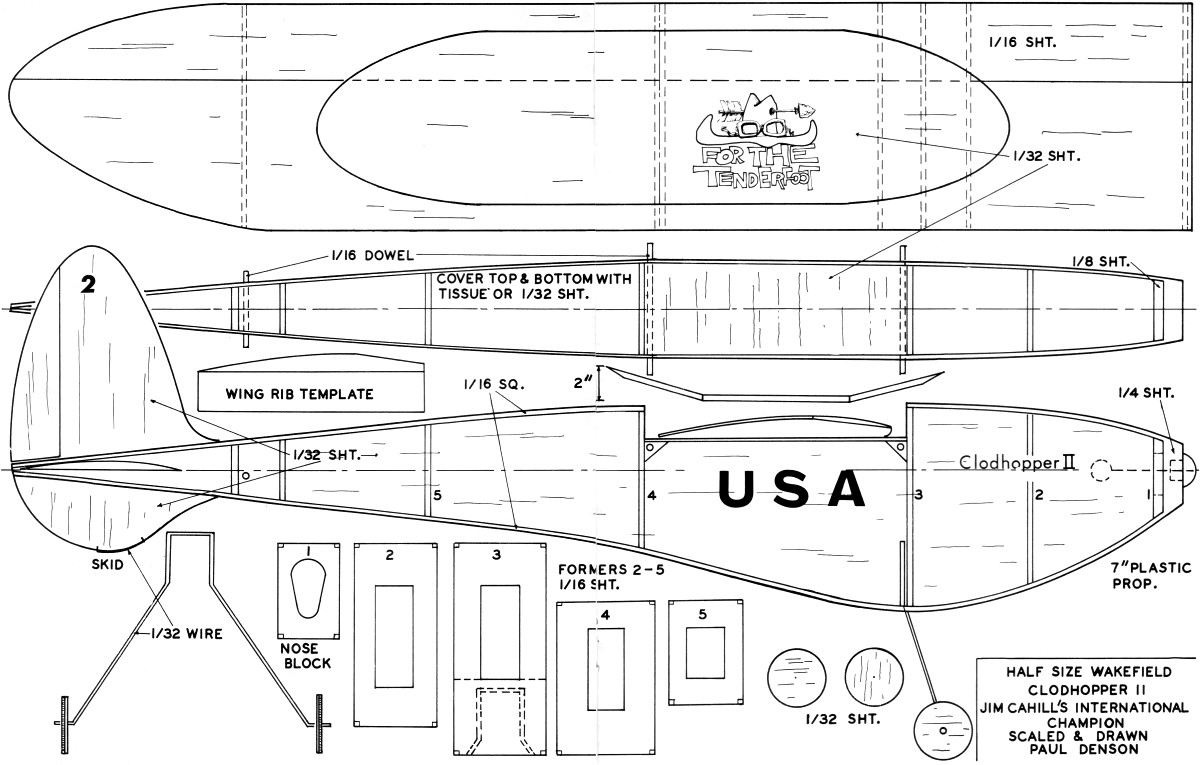
Construction
Start construction by cutting two fuselage sides from medium weight 1/32 balsa.
Cut the rudder from pieces left over. The back section of the wing and the stab
are cut from lightweight 1/32 sheet. The leading edge section of the wing is cut
from medium weight 1/16 sheet. Cut the formers from sheet balsa as indicated on
the plans, making sure the grain is vertical. After cutting the opening in the center
of each former, glue a scrap of 1/16 sq. strip crossways near the top and bottom
of each for-mer. This adds very little weight, but strengthens the formers when
side pressure is placed upon them. Don't forget the wheels-these are made by laminating,
cross grain, two pieces of 1/32 sheet. Do not throwaway the cutout of former No.
1, it will act as a key so the nose will go back on the same way each time it is
removed for winding the rubber motor.
I usually extend the former lines 1/2 in. on each side of the fuselage on the
plans before I start construction, then, when the fuselage half is pinned to the
plans, you can see the exact position of the formers. The first step of construction
is to pin the left half of the fuselage to the building board and completely outline
the half with 1/16 square strips. (Soak the bottom stringer in hot water for a few
minutes before bending it around the extreme bottom curve.) When you have the outlining
completed, put in the two vertical strips just forward of the tail surfaces. Allow
this to dry while you are making the opposite side. By very careful to insure that
you are making two sides, one left and one right. The way I do it is to pin them
flat to the working surface top edge to top edge. Then, when I outline the halves,
I have one left and one right side.
Pin the left side to the plans directly over the outline and glue former No.4
in place, making sure it is at right angles to the building surface. Repeat with
former No.2. Allow these two formers to dry thoroughly. Place the right side of
the fuselage on top of formers 2 and 4, check for fit and if everything seems to
mate well, remove, apply glue and replace. Allow this to dry for at least two hours.
While waiting, bend the landing gear from a piece of 1/32 wire and sew it to the
bottom of former No.3. Remove the fuselage from the plans, check to see that former
3 fits, then coat your sewing with glue, put some on the edges of former No.3 and
glue in place. Add former No.5 in the same manner. After placing some glue on the
insides of the tail end of the fuselage halves, hold them together with a clothespin
or small scrap of masking tape.
The placement of former No. 1 is simple if you plan ahead. Place two six-in.
strips of masking tape on one side of the fuselage-one at the top, the other at
the bottom. Put glue on the edges of former No. I, hold in place then squeeze the
two sides of the fuselage side, pull tight and press down. While this is drying,
cut the slot for the stab in the tail end of the fuselage.
The wing also is not difficult to build. From 1/16 balsa, cut nine ribs. To make
the wing rib template, cut the shape shown on the plans from stiff cardboard or
aluminum metal from a soft drink can, glue a strip of 1/16 balsa to the back side
of the template, the wood parallel to the line on the template. This acts as a stop
which butts against the edge of the material used for the ribs. Butt the template
against the edge of a piece of 1/16 balsa and cut around the edge of the metal or
cardboard.
Place the plans on your building board and pin nine ribs on the dotted lines.
Put a pin through the leading edge end and trailing edge end. Put a small amount
of glue on the leading or sloped edge of each rib. Temporarily remove each
leading edge pin. Very carefully place the 1/16 leading edge sheet on the top of
the lined-up ribs. Then replace the pins through the sheeting - it is good to
pin the back edge of this sheet down, too. Remove the trailing edge pins. Place
the 1/32 sheet against the rear edge of the 1/16 sheet and check from wing tip
to wing tip for fit. Sand where necessary. Put a bead of glue on the front edge
of the 1/32 sheet where it will butt against the 1/16 sheet. Put in place,
making sure the two sheets fit together from end to end and are flat. Pin the
glue joint down firmly and replace the trailing edge pins. When the wing is dry,
cut it into three pieces at the dihedral joint. Cut between the two ribs. Sand a
slight bevel on the ends of each part, block up the tip of the wings two in. and
glue the ribs together. This completes construction
unless you wish to cover the top and bottom with 1/32 sheet. If you do, be sure
and run the grain crosswise - this adds strength.
Temporarily glue the nose block in place to former No. 1 making sure the key
is in place. Sand the whole fuselage and round the corners slightly. Glue the stab
in place, add the rudder, put in scrap balsa doublers in the corners of the fuselage
where the wing hold-down dowels go through and double up the fuselage where the
rear motor dowel is located. It is now ready for papering top and bottom.
Give the fuselage, wings and stab one coat of diluted white dope. When dry, sand
and apply one coat of diluted clear dope to all surfaces. Cut white tissue to fit
the top and bottom with 3/4-in. margin around. Lay the paper on the surface to be
covered, and with a brush full of thinner moisten the paper where it comes in contact
with the wood. It will penetrate and soften the dope which will act as a glue. Spray
with water to tighten and give one coat of clear dope for protection.
There are two adjustments you can make when you are test flying your Clodhopper-they
concern the wing and nose block. If the plane stalls during the test glide, place
a sliver of 1/32 balsa under the trailing edge of the wing. Try again. If she dives
during the test glide, then a sliver of 1/32 balsa under the leading edge will help.
The thickness of wood may be increased until a smooth, flat glide is obtained.
I started with one 14" loop of 1/8 flat rubber. (You may go to two loops if the
plane is too heavy to fly on one.) Wind in a few turns and launch the plane with
a smooth horizontal thrust. If she moves right out and up into a right-hand turn
and when the prop stops she transitions into a left gliding turn, it is all set.
If not, a sliver of 1/32 balsa between the nose block and former No. 1 will cause
Clodhopper to turn one way or the other while the motor is unwinding. If your plane
glides perfectly, but attempts to climb too steeply, the sliver of 1/32 may be placed
between the top of the nose block and the top of former 1. These adjustments are
critical so be careful-not too much at one time. Experiment adjust and fly her again.
The Clodhopper is a tough little plane and will bounce off most objects she runs
into. To get a long life from your plane, find an open field to fly her in, away
from houses and trees.
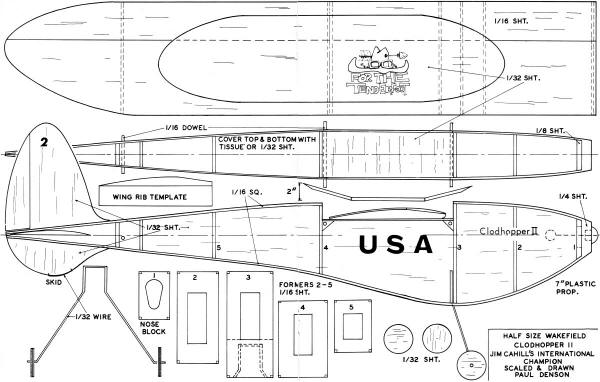
Clodhopper Plans <click for larger version>
Notice:
The AMA Plans Service offers a
full-size version of many of the plans show here at a very reasonable cost. They
will scale the plans any size for you. It is always best to buy printed plans because
my scanner versions often have distortions that can cause parts to fit poorly. Purchasing
plans also help to support the operation of the
Academy of Model Aeronautics - the #1
advocate for model aviation throughout the world. If the AMA no longer has this
plan on file, I will be glad to send you my higher resolution version.
Try my Scale Calculator for
Model Airplane Plans.
Posted September 15, 2023
(updated from original
post on 6/26/2011)
|